
April 11, 2024 09:39Updated by Brittany Garcia to Rip DVD
Do you want to import the DVD to your Final Cut Pro? If that is the case, you are on the right post. While reading, you will know the most efficient and effective procedure to get your desired outcome. Aside from that, you will discover the best ripper to help you with all the processes you need. So, without anything else, we suggest reading the post and getting an insight into how to import a DVD into Final Cut Pro.
Part 1. Does Final Cut Pro Support DVD
Unfortunately, the Final Cut Pro software doesn't support DVDs. It means extracting video from DVD directly is impossible when using the program. As we all know, the software only supports almost all popular digital formats. So, if you want to import DVDs, the best way is to rip the DVD to other file formats that the software supports. But before that, let us give you a simple introduction to Final Cut Pro. The program is an advanced non-linear video editing software created by Apple. Its core features are editing, importing, processing films, adding effects, and more. It is also perfect for non-linear editing, advanced audio editing, workflow organization, and high-performance processing. With this, all professionals can use the program. Returning to our topic, we have told you that Final Cut Pro only supports digital formats. It includes MP4, MXF, AVI, MTS, M2TS, 3GP, and more. So, if you want to import a DVD to Final Cut Pro, the best solution is to rip it to other formats, like MP4. Thankfully, you can learn the ripping procedure by proceeding to the next section.
Part 2. How to Rip DVD for Final Cut Pro
Since the Final Cut Pro cannot extract the video from the disc, the best way is to rip the DVD first to other supported formats. In this section, we will teach you how to rip the DVD to MP4 file format using AnyMP4 DVD Ripper, chosen by Blu-ray Master. This is one of the best versatile offline programs to help you effortlessly rip the DVD to MP4 and other digital formats. Its ripping process only takes a few clicks until you get the overall process with its simple interfaceMoreover, its ripping speed can reach up to 50× faster than other DVD rippers. With that, you can rely on this software to rip DVDs quickly. Another good thing here is that when ripping, the AnyMP4 DVD Ripper won’t reduce the video and audio quality from the disc, making it a more powerful ripper for you.
Furthermore, besides DVD ripping, you can also do a simple editing process when using the program. It lets you add and remove a watermark, crop, rotate, add effects, adjust video color, and more. So, if you plan to edit the video before proceeding to the final ripping process, you can do so. Moreover, AnyMP4 DVD Ripper is available on Windows and Mac operating systems, making it more accessible to all users. Without further ado, if you want to instantly learn how to rip DVD to MP4 and other digital formats, you can check the simple process we provided below.
Step 1.For the first step, hit the Free Download buttons below to access the AnyMP4 DVD Ripper. Then, install the software and run it on your Windows or Mac to proceed to its main user interface.
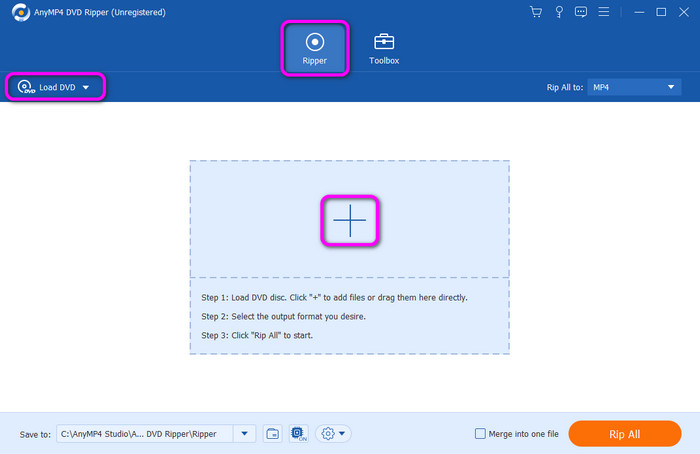
Step 2.When the interface already appears, navigate to the Ripper section. Then, hit the Load Disc or the Plus button to add the DVD. You can also use the drag-and-drop process to insert the file.
Note:
Ensure the DVD has been inserted into your computer before following the method.
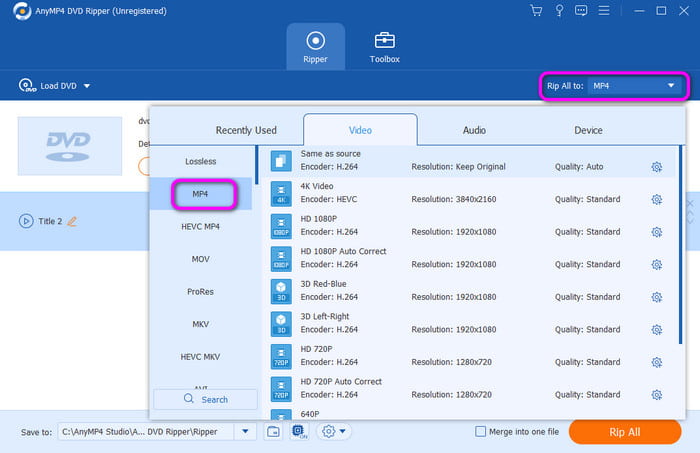
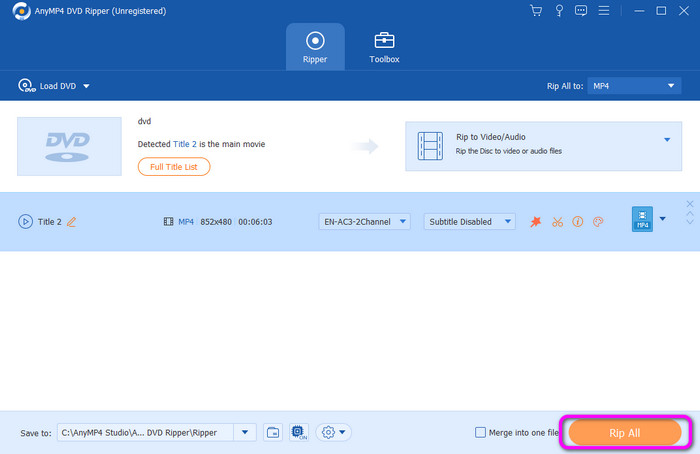
Step 3.After adding the DVD file, go to the right interface and select the Rip All to option. Then, select the MP4 format from the format options. You can also choose other formats the Final Cut Pro supports, such as MOV, AVI, MXF, and more.
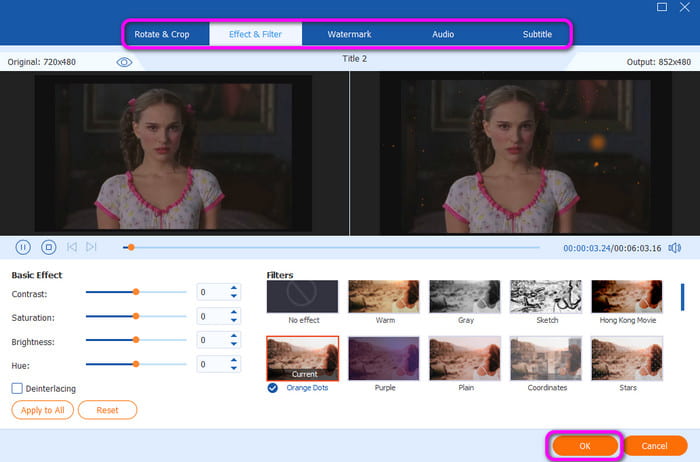
Step 4.Since the program has basic editing tools, you can use it by clicking the Edit function. After that, you can edit, crop, rotate, adjust video speed, and more. Once done, click the OK button.
Step 5.To begin the final ripping process, hit the Rip All button from the lower interface. You can already use the ripped DVD and import it on Final Cut Pro when you are done.
Part 3. How to Import Ripped DVD to Final Cut Pro
After ripping the DVD to a digital format, you can begin importing it on the Final Cut Pro program. Well, importing a ripped DVD is like importing a normal video file. So, to learn how to import a DVD into Final Cut Pro after ripping, see the methods below.
Step 1.First, launch the Final Cut Pro to view its main user interface. You can access the program from the App Store if you don’t have the program yet.
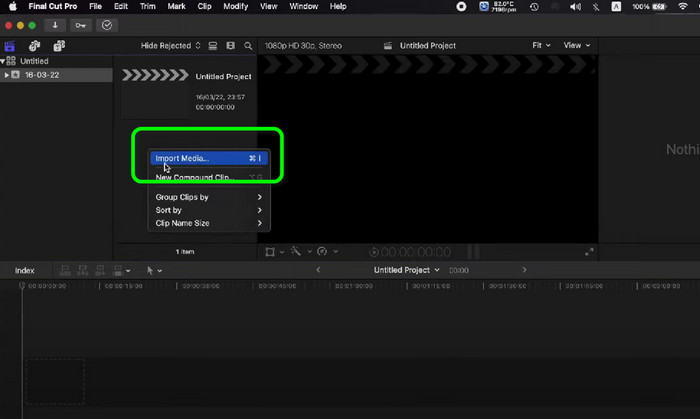
Step 2.When the main interface shows up, put your cursor on the blank left interface and right-click. Then, click the Import Media to see various options. Select the ripped DVD and hit the Import Selected option. After that, you will already see the video from the interface.
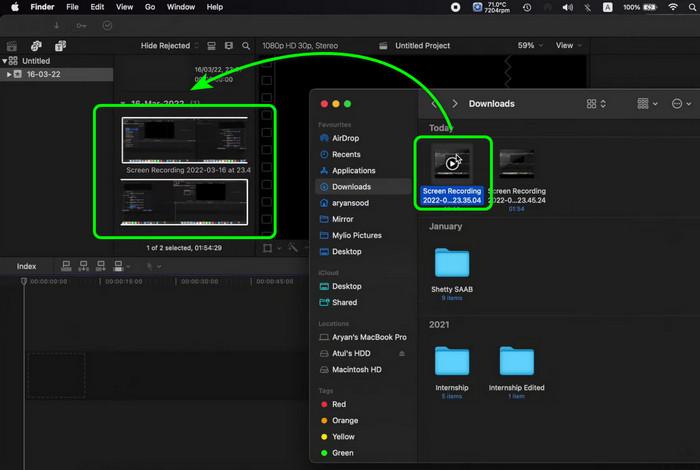
Step 3.Another way to import the ripped DVD is the drag-and-drop process. To do that, you can open a folder where you saved the converted DVD, then click and drag it to the program’s interface. Once done, you can already see the file on Final Cut Pro.
Part 4. FAQs about Importing DVDs to Final Cut Pro
-
How do you share the DVD in Final Cut Pro?
You only need to launch the Final Cut Pro on your Mac to share. After that, hit the Choose File > Share option. Once done, select the DVD. Then, the final process is to click the Share button from the Toolbar and hit DVD. With that, you can achieve your goal.
-
Can we buy Final Cut Pro for a lifetime?
Definitely, yes. You can purchase the Final Cut Pro and use it for a lifetime. The program costs $299.99. With this, you can enjoy and access all of its functionalities.
-
Is there a cheaper alternative to Final Cut Pro?
Yes, there are more programs to use which are more affordable compared with Final Cut Pro. It includes Shotcut, HitFil Express, OpenShot, and more. With these, you can still edit and import videos without spending much money.
-
How do you convert DVDs to Final Cut Pro?
It's sad to say, but you cannot convert DVDs to Final Cut Pro. So, to convert DVDs, you can use AnyMP4 DVD Ripper. With this, you can turn your DVD to various digital formats, such as MP4, MOV, MXF, AVI, and more.
Wrapping up
The post taught you how to import DVDs into Final Cut Pro. But, to import a DVD into Final Cut Pro, you must first rip it to a supported file format. Thankfully, the post introduced the AnyMP4 DVD Ripper software for an effective DVD-ripping procedure. So, you can use this program to easily and quickly rip the DVD. After that, you can effectively import the ripped DVD Final Cut Pro.
More from Blu-ray Master
- How to Flip Video in Final Cut Pro with The Detailed Guide
- Final Cut Pro: Change the Aspect Ratio [With Pictures]
- Guide on How to Make Splendid Slideshows in Final Cut Pro
- How to Convert DVD to H.264 Quickly (Protected & Unprotected)
- Tutorial to Import DVD to iTunes for Playback on Windows and Mac
- How to Rip and Import DVD into iMovie for Editing on Mac