November 14, 2020 09:12Updated by Selena Thomas to Record Video
VLC Media Player is the magic tool.
When you search for a media player, it does.
When you want a video converter, it works
When you need a screen recorder, it has straight-up YES.
VLC is a powerful program that works with a full of features, and today, we will talk about how to use VLC to record screen and video, including audio.
Now, let’s move on.
Part 1. How to Record Screen and Video with Audio in VLC
To record screen and video in VLC, no special tech knowledge is required. The process starts with downloading VLC on Windows, Mac, or Linux.
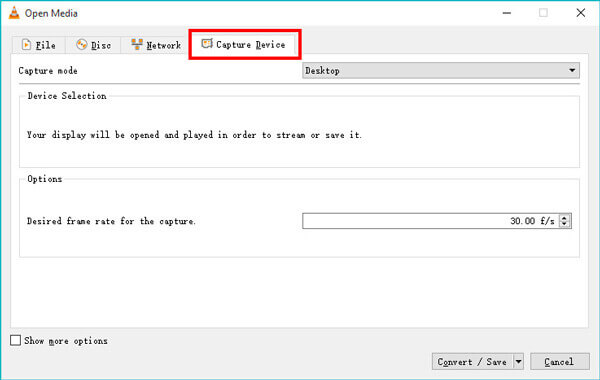
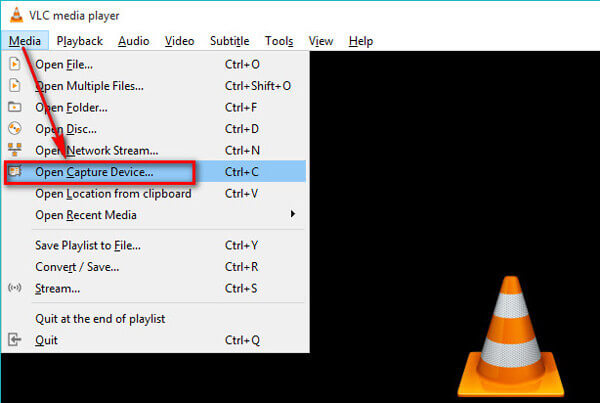
Step 1.Run VLC, click Media from Menu, and select Convert/Save to open the Open Media dialog box. Click the Capture Device tab.
Alternatively, click View from Menu and select Advanced Controls. Then you can find Open Capture Device option from the dropdown options of Media on the menu.
Step 2.Under Capture mode, there are 3 modes, DirectShow, TV – Digital, and Desktop.
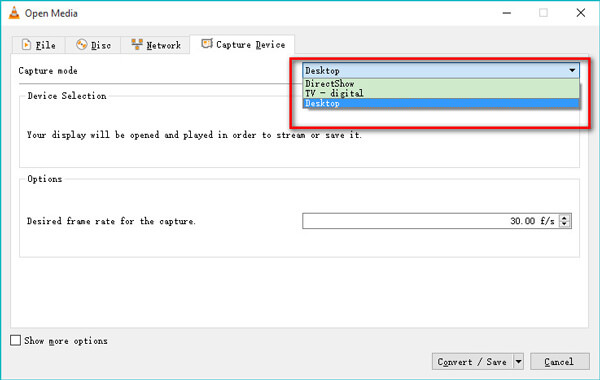
Select the Desktop option to record all the activities on your computer’s desktop. Select the TV – Digital option to capture input from a TV tuner card.
Select the DirectShow feature to allow you to select a video and audio device to record the webcam video.
Select the one you want, and here we will take a recording desktop screen in VLC as an example.
Step 3.Select the desired frame rate up to 100 fps for the capture. Commonly, the frame rate of 10 is just fine for screenshots.
To create a high-quality screen recording, you can select high fps.
Click Convert/Save button to continue.

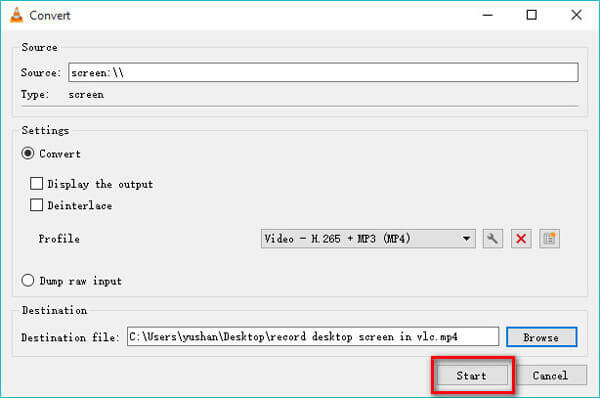
Step 4.Select the output file for the screen video recording from the dropdown option of Profile.
Then set the destination file location and name the output recording file by opening the Browse dialog.
After that, click Start button at the bottom, and VLC will start recording anything on your computer desktop.
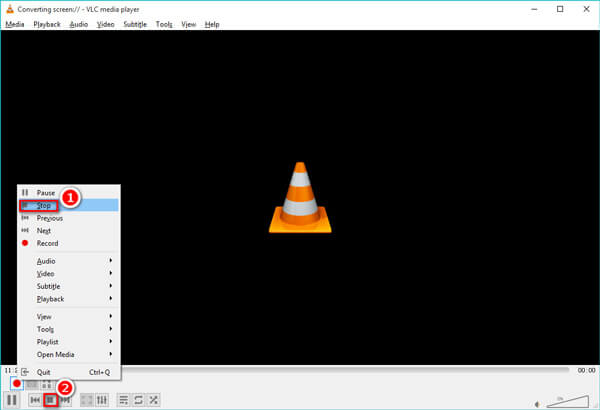
Step 5.To stop VLC screen recording, there are 2 ways.
Open VLC again, and right-click the red record button to select Stop.
Alternatively, just click the Stop Playback button (A grey square) in the toolbar in VLC
After that, you can find the saved recording video file on the destination.
Part 2. FAQs of VLC Screen Capture
-
Question 1. Does VLC screen capture record audio?
VLC only allows us to capture the screen and it does not record the audio or voice automatically during this desktop screen capture activity. However, it can record audio once you select DirectShow recording mode.
-
Question 2. Where is VLC recording folder?
The screen recording folder is customized by yourself in step 4 of part 1. You can save the recording video file anywhere as you wish on this computer.
-
Question 3. Does VLC record my screen with a mouse pointer?
No. VLC will not show the mouse pointer while recording the screen and video. To record your screen with a visible mouse, there are 2 solutions. One is to download the mouse pointer. The other solution is to get a VLC alternative.
-
Question 4. The Record button is not working to generate a file in VLC, how to fix?
1. Make sure you are looking in the right folder for the recording file.
2. Upgrade VLC to the latest version.
3. LC can’t create the file until you tell it what folder to dump it into.
4. There is a delay to create the recording file.
More solutions to VLC recording not working are here.
-
Question 5. VLC screen recording not saving video, but only audio, how to fix?
The reason for VLC only recording and transcoding audio, instead of audio sometimes is the system bug. You can fix the problem via the following solutions:
fix the problem via the following solutions:1. Uninstall VLC and install VLC again.
2. Update VLC to version 3.0 and later.
3. Get a VLC alternative.
-
Question 6. Does VLC have a screen recorder on Android?
No. VLC screen capture is enabled on the VLC desktop versions on Windows, Mac, and Linux. As for Android or iPhone users, VLC can only play media files. Learn here to record screen on Android.
Part 3. VLC Alternative – Record Screen and Video with Audio Easier
VLC is the multifunctional media software, but you have to admit that it is not a dedicated recorder to offer some advanced features, like select region recording, recording desktop with audio, etc.
If you’re looking for even more options, to get a VLC alternative is a certainty.
p>Screen Recorder is a professional screen and video recorder for Windows and Mac computers. It can capture anything that is happening on your computer desktop, programs, browser, and webcam. Besides, it offers a wide range of recording modes to select or exclude windows and regions for recording.Whether you want to record home movies or local actions on desktop, its user-friendly interface will direct you effortlessly.
Wrapping up
This post has mainly talked about how to join TS files together. You can get 3 video joiner tools to combine two or more TS clips into a single file. If you need to merge videos in other formats, you can also rely on them.
- Record screen, video, webcam, and audio together or separately.
- Customize any recording window or region and audio source freely.
- Support real-time editing while recording like add texts, draw a shape, take screenshots, etc.
- Record screen without mouse via hotkeys, show mouse pointer, highlight or hide mouse clicks, and more.
- Select from multi-monitors and set a timer recording to capture the screen automatically.
Free Download
For Windows
Secure Download
Free Download
for macOS
Secure Download
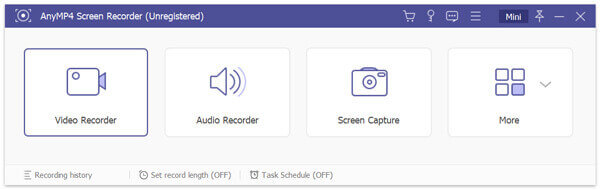
Step 1.Select Video Recorder
Free download the VLC substitute by clicking the download link above. Launch this program and select Video Recorder.
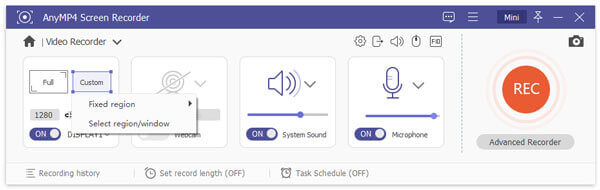
Step 2.Choose recording area and audio source
Here, you should make the simple settings for the screen capture.
Click Full or Custom to select the screen recording region as you wish.
Toggle on/off System Sound or Microphone to record screen and video with or without audio.
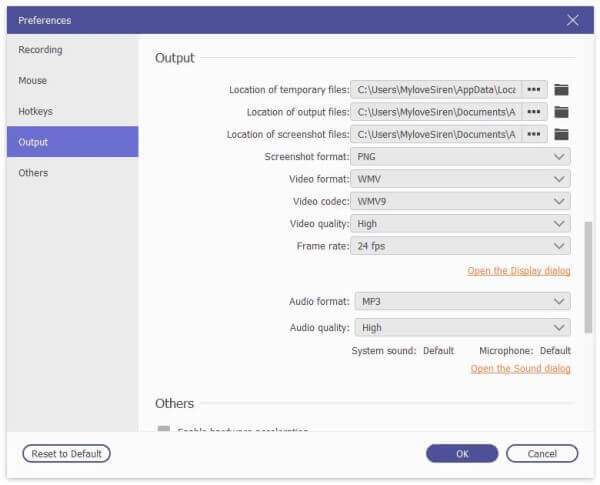
If you want to show the mouse pointer while recording, just click Preferences from the menu (three-dot) option in the toolbar to show or hide mouse clicks, colors, and more. The recording output format can be customized here.
Step 3.Record a video
While everything is made well, just click the REC button to start recording your computer screen. The floating bar allows you to edit the recording file while capturing the screen.

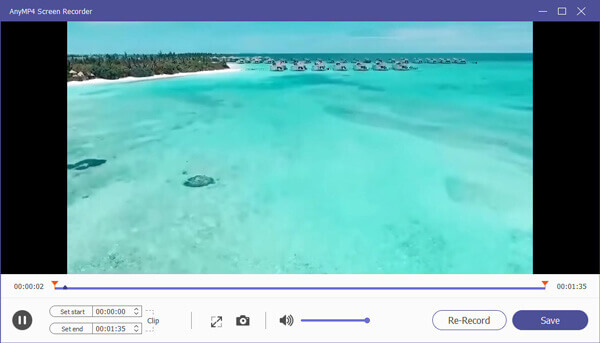
Step 4.Preview and save the video recording
To stop the recording, just click the stop button in the floating bar, and you are directed into the preview window. The preview feature allows you to see what your recording file will look like without encoding all of it.
Besides, the clip feature here can cut down unwanted parts from the video file.
Click Save to export the recording file on your computer.
That’s all it takes to make a quick recording of your screen with the VLC alternative.
Wrapping up
VLC, as the free media software, plays an important role, when it comes to playing Blu-ray, DVD, media files, and convert videos. Moreover, you can record screen and video with VLC. Lack of some advanced functions, VLC maybe not the best option for you to record screen and video. Here, Screen Recorder is the best VLC replacement recommended in this post to complete the task.