November 08, 2023 15:00Updated by Brittany Garcia to Edit Video
The proportion between a video’s width and height is known as an aspect ratio. A video assumes a rectangle form if its width is nearly twice as large as its height. A video is considered square if its width and height are the same. To indicate that the width and height are the same, a square video has an aspect ratio of 1:1. The 16:9 aspect ratio is the most common. Your video’s aspect ratio is 16:9 if it is 1280 pixels wide and 720 pixels in height.
In connection with that, many users are asking, how can the aspect ratio of a video be altered. That query will be addressed in this post. We’ll demonstrate how to use different editing or video resizers to modify a video’s aspect ratio for different devices quickly. With the help of these methods, you can easily resize or change the aspect ratio of your video without complications. Let us see the helpful methods you can use.
Part 1. How to Change Video Aspect Ratio in Video Converter Ultimate
We should start by presenting the best tool to modify the aspect ratio of your video. Blu-ray Master chooses Video Converter Ultimate because it possesses great features and high-quality performance that can help us get a smooth and effective video editing process.
It offers various aspect ratio options like 16:9, 4:3, 21:9. 5:4, 1:1, 9:16, and more from the given values. Besides, you can move and crop your video freely to get any ratio as you like.
Besides, it is mainly for converting media files to another format, yet it also offers a great toolbox and extra features like watermark removal, movie splitting, video trimming and merging, and more. Its AI enhanced feature can upscale video quality in 4 ways.
Let us see how we can use it in this situation. As we make it, we need to use the Crop feature. Carefully see the steps below.
Free Download
For Windows
Secure Download
Free Download
for macOS
Secure Download
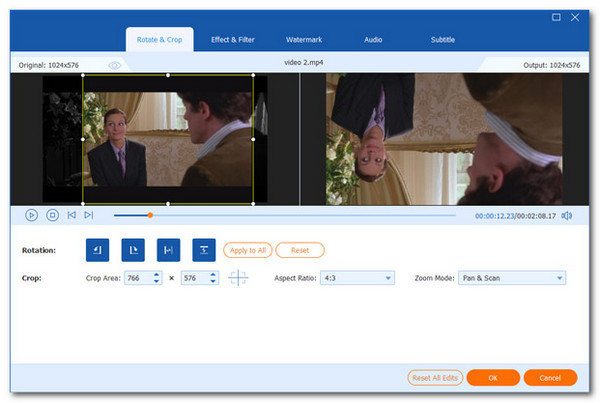
Step 1.We must install the Blu-ray Master Video Converter Ultimate and run it on your computer. From there, add the video you need to modify by clicking the Add icon.
Step 2.You can now see the video on the interface of the tool. That means we must proceed to the second step, clicking the Edit icon from the parameter setting.
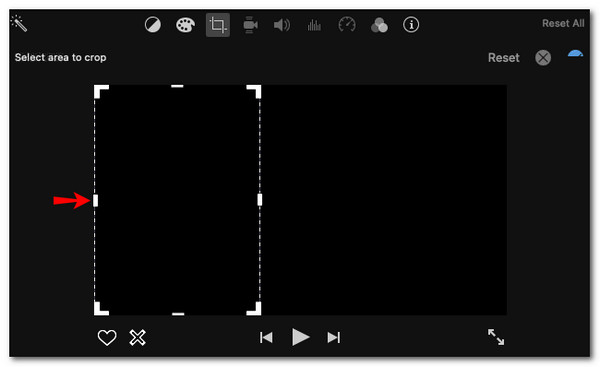
Step 3.Here, you can rotate a video by 90 degrees, 180 degrees, or 270 degrees and flip it vertically and horizontally. After that, you can view the preview to see the outcome. You can also Crop the Movie by modifying its aspect ratio, zoom mode, and crop region. This feature will be the one you need to make the process possible.
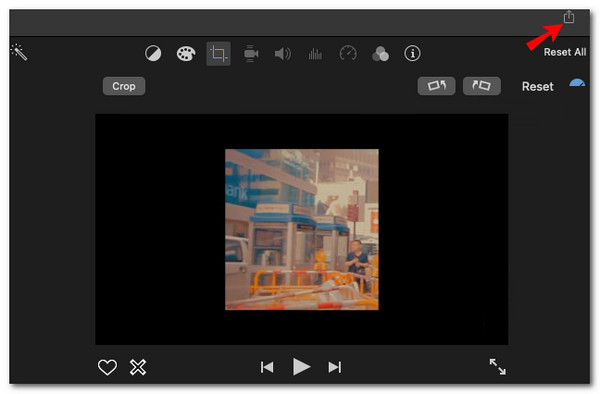
Step 4.To save the changes, click the OK button. Then, we shall now Export and Save it on your files.
Part 2. How to Change Aspect Ratio in iMovie
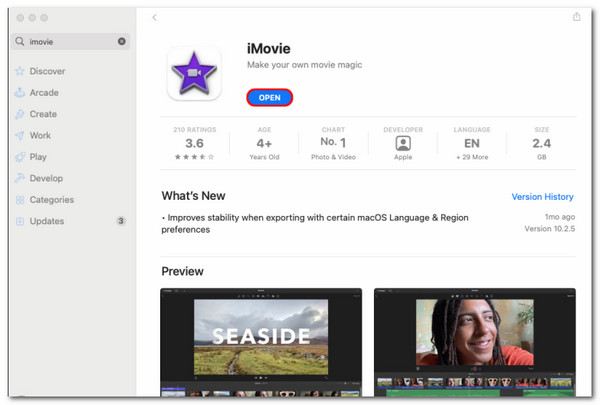
iMovie, a video editing application for macOS and iOS devices, is one of the best tools for altering a video file’s aspect ratio. You can post a video you’ve altered in iMovie’s aspect ratio to various social media sites. It’s important to do this because if you don’t, the platform where you post the video can automatically crop or stretch it incorrectly. Here are the steps to use it for that: our iPhone, iPad, and Mac.
For iPhone and iPad Devices
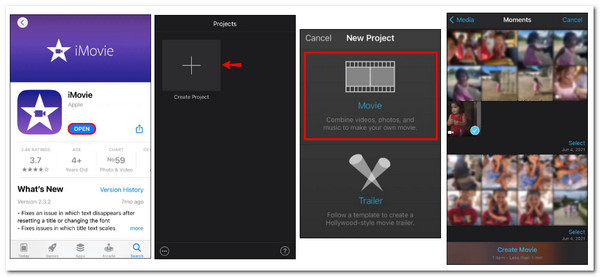
Step 1.On your iPhone or iPad, launch iMovie. From your home page, select the Create Project option. Then after that, from the New Project window, choose Movie. From your device, import a video file you want to modify.
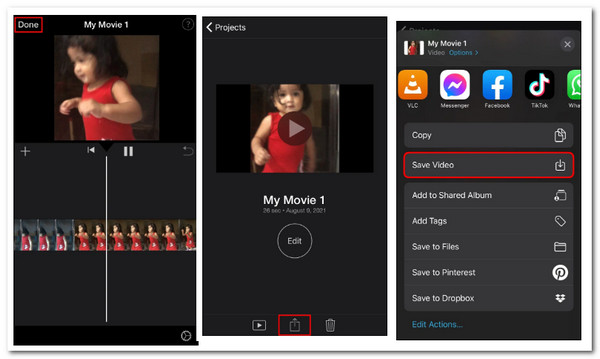
Step 2.On the timeline, click your video. Find the magnifying glass in the top-right corner of your screen by navigating there. You can pinch the timeline to enlarge your video. Pinch toward the center of the screen to reduce the size of the video. Drag your fingers to the video’s outer edges to make it larger. In the above corner of your screen, click Done when you’re done.
Step 3.As we finish the process, go to the Share button now. Decide to Save the Video.
For Mac Devices
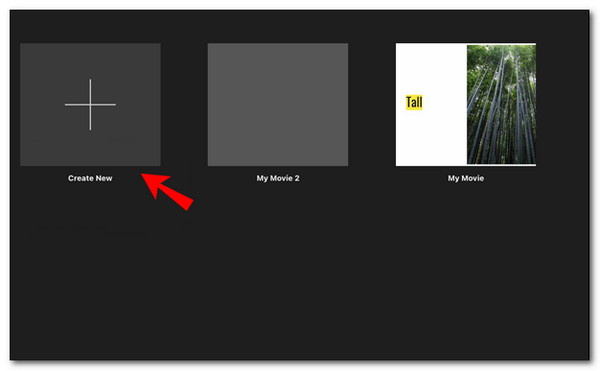
Step 1.On your Mac, launch the iMovie software.
Step 2.In the top-left corner of your screen, select the Create New button.
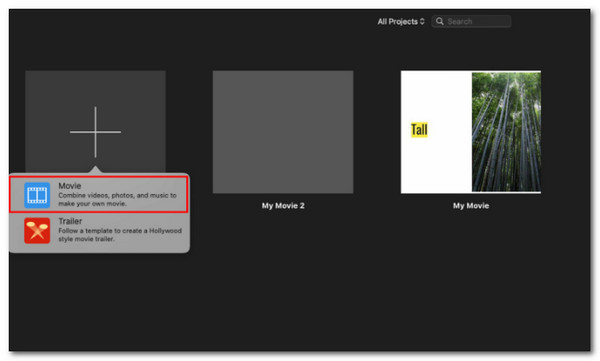
Step 3.From the drop-down option, choose Movie.
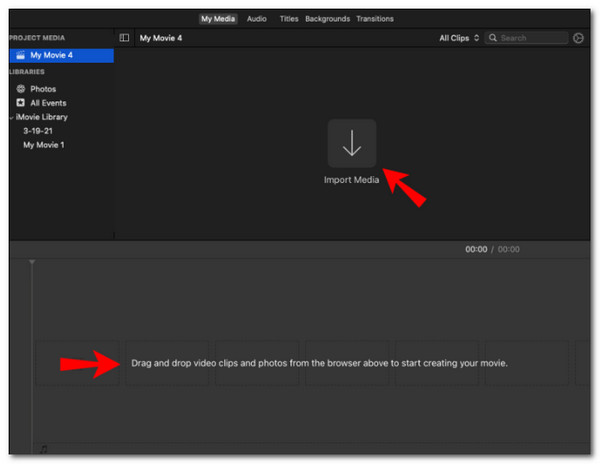
Step 4.To upload a video from your Mac, select Import Media from the menu. Remember that the web video clips can also be dropped straight onto the timeline in iMovie.
Step 5.On the top toolbar, select the Crop symbol. Drag the cropped window’s edges over your video.
Step 6.Once finished, select the blue checkmark icon in the top-right corner of your video. In the top right corner, click the Share icon.
Step 7.Save the video to your device.
Check the detailed guide here to crop a video in iMovie.
iMovie is free to use to crop the video, however, it leaves less options for video editing. For some beginners, it is not easy to start.
Part 3. How to Change Video Aspect Ratio in Premiere
How to configure and modify aspect ratios in Premiere Pro is shown here. To alter the aspect ratio in Premiere Pro.
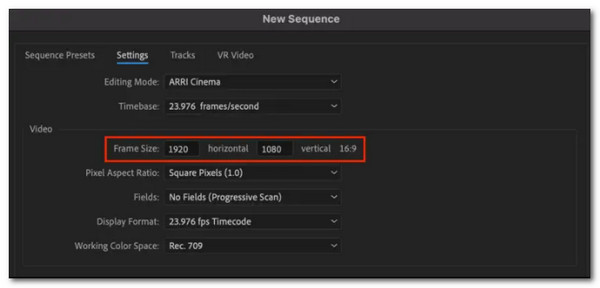
Step 1.Click on the Settings tab by selecting File as you see the New, then, Sequence.
Step 2.Now, here are the details you need to remember. The Vertical value must then be updated in the Video section. Divide the horizontal value by your aspect ratio for this. The aspect Ratio divided by the horizontal value equals the vertical value. Only by changing your film’s vertical or horizontal values can the aspect ratio be adjusted. You cannot set it up depending on your preferred aspect ratio for your video.
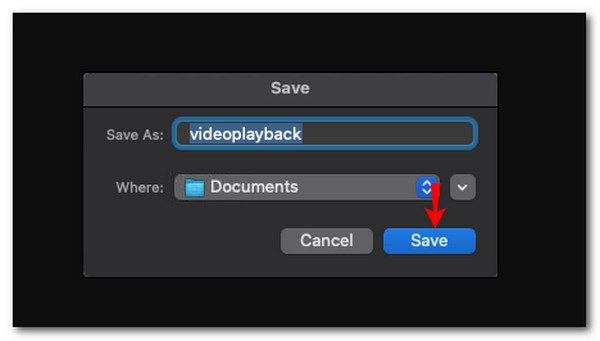
Step 3.Please proceed with the File again, see the Export Video, and save it on your computer.
Part 4. How to Change Video Aspect Ratio in DaVinci Resolve
Free and cross-platform video editor Davinci Resolve provides many tools and a simple user interface. We advise you to try it if you’re new to video editing but still want to learn more about it. There I give my preferred method of changing the video’s aspect ratio.
Step 1.Drag the video straight from the disk into DaVinci Resolve’s timeline. To access the Timeline Settings tab, head to the media pool and right-click the loaded Movie. Then, select Use Customized Settings by clicking here.
Step 2.You can modify the resolution information to alter the clip’s aspect ratio there. For example, if we need a 1:1 output, we shall modify the 1920 x 1080p (16:9) original video resolution to 1080 x 1080.
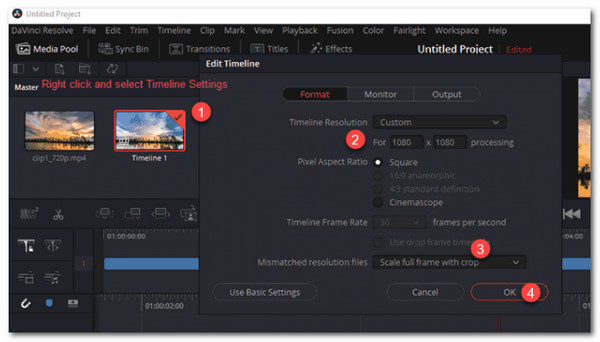
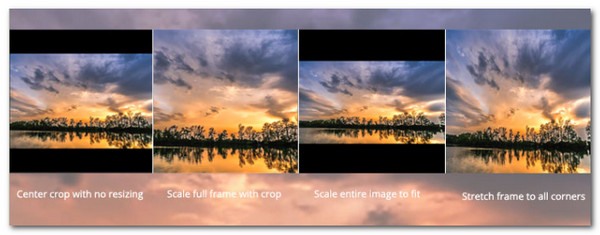
Step 3.Choose the necessary Mismatched resolution filters from the options Scale complete frame with the crop, Stretch frame to all corners, Scale entire image to fit, and Center crop with no scaling. Now, to access the delivery panel, click Deliver. Click Add to Render Queue once the format and codec details have been established. To start changing the aspect ratio of your video, navigate to the Start Render option and click it.
The above are the steps of cropping a video in Davinci Resolve. Davinci Resolve, similar to Adobe Premiere, offers the all-in-one video editing features, including aspect ratio change, but its complexity may block many of you.
Part 5. FAQs about How to Change the Video Aspect Ratio
-
Can I change the aspect ratio in Powerpoint?
Yes. Here are the simple steps we can take to do it. We should start with the sizing and portion. The Size and Position can be chosen by right-clicking on an image. Click the Height box in the Scale portion of this window. Click once each on up and down now. You can modify the scale by one step while keeping the Lock Aspect Ratio option selected, and switching it back will correct your image. That is how simple it is to be done.
-
How to change the aspect ratio in Final Cut Pro?
Final Cut Pro is one of the great tools we can easily use for editing videos. For that, here is how we can use it to arrange the aspect ratio of our video with ease. Choose the Undertaking as we click the Modify tab in the property window’s upper right corner. You can adjust the aspect ratio, alter the video format, and change the resolution numbers according to your needs in a pop-up window that appears. Then, Save your work by clicking the Export tab.
-
What are the different video ratios?
Widescreen video has a 16:9 aspect ratio, which we see on YouTube, television broadcasts, and streaming platforms. For Vertical, we have 9:16, 1:1 for Square, 4:3 for Fullscreen, and finally, 21:9 for Cinematic Widescreen.
Wrapping up
We can now edit and upload our video aspect ratio to the proper social media outlet. Ensure to know what suitable size you have so that we can prevent any issues. In connection with that, Blu-ray Master Video Converter Ultimate is a great tool without complication for this process. A combination of high-speed performance and high-quality output. Try it and see what it has to offer.
More from Blu-ray Master