Jun 19, 2025Posted by Kevin Miller to Create DVD
If you're looking to create a longer music compilation, you may wonder if it's possible to convert audio CDs to DVDs. The short answer is yes, you can put audio onto a DVD. However, it's important to understand that this isn't a direct conversion in the traditional sense. Audio CDs are designed for stereo playback using uncompressed PCM (pulse-code modulation) audio. Meanwhile, DVDs are designed for both video playback and data storage, supporting various file types. When you move audio from a CD to a DVD, you're burning audio files onto the DVD. This post will explain the difference between Audio CDs and DVDs. Also, we'll provide step-by-step instructions for both data DVD creation and DVD video with audio tracks.

- Part 1. What is CD and DVD
- Part 2. Why Do You Want to Put Audio on a DVD
- Part 3. How to Put Audio on a DVD (Different Approaches)
- Part 4. Tips for Success
Part 1. What is CD and DVD
Audio CD
A CD is an optical disc format for storing audio in the form of pulse-code modulation (PCM). It is based on the Red Book standard, which defines the specifications for Audio CDs. It was developed as a replacement for analog formats, such as vinyl records and cassette tapes. It is designed for high-quality stereo playback and holds around 74 to 80 minutes of audio.
DVD
A DVD is another optical disc format made for video playback and/or data storage. Unlike CDs, DVDs can store various audio formats such as Dolby Digital, DTS, and PCM. It offers more storage capacity for storing full-length movies, large applications, and data collections. It can store up to 4.7 GB for single-layer discs and up to 8.5 GB for dual-layer discs.
Curious about the difference between DVD-R and DVD-RW? Learn more about it here!
Part 2. Why Do You Want to Put Audio on a DVD
Audio CD
Can I copy an Audio CD to a DVD? Yes.
Consolidating audio with home videos and photo slideshows allows you to create unified media presentations. Instead of managing multiple files, you can store everything into a single disc for easy access. It simplifies playback and avoids the hassle of switching between media sources.
Specific Playback Devices
Some older playback devices offer better DVD compatibility than USB drives and streaming apps. Suppose you're going on a long road trip with a DVD-based in-car entertainment system. Burning audio into a DVD ensures uninterrupted playback without depending on the internet.
Creating Custom Media
DVDs offer a versatile platform for creating custom multimedia projects that seamlessly integrate audio and visuals. You can create a karaoke DVD that features music tracks with synchronized lyrics or video backgrounds. Additionally, you can create narrated photo albums where images transition on screen, accompanied by background music..
Long Playback Without Disc Swapping
It is a good idea to burn CDs to DVD-R format since DVDs have a larger capacity. You can store long audio content, such as extended background music or audiobooks, with ease. A single DVD can hold several hours of high-quality audio, meaning you don't have to swap discs during a session.
Part 3. How to Put Audio on a DVD (Different Approaches)
Creating Audio DVDs (Data DVDs)
Can I burn audio CDs on DVD on my computer without any software? Yes, provided that the content from the Audio CD is already extracted. The Windows 10 and Windows 11's File Explorer lets you burn a CD to DVD. This method treats your DVD like a storage disc for your audio files. It's a basic but effective solution for those who don't need flashy features.
Step 1.On your Windows, insert a blank DVD into the disc drive and allow the system to detect it. Open File Explorer and navigate to the folder containing the audio files. Select all the audio files, right-click the selection, click Send To, and choose DVD Drive.

Step 2.In the Burn a Disc window, enter a title for your DVD. Then, choose an option on how you want the system to use this disc. For audio DVDs intended for compatibility, select With a CD/DVD player. Windows will then open a new window labeled Files Ready to Be Written to the Disc.

Step 3.Click the Drive Tools tab in the File Explorer window, and then select Finish Burning. Next, select a recording speed. A higher speed results in faster burning but may lead to data loss and lower quality. Click the Next button to start burning audio to DVD.

Windows File Explorer provides a simple way to store or transfer audio files to DVD. It works best for backing up, archiving, and playing audio on devices that support DVDs. However, it doesn't offer DVD authoring tools that a DVD menu creator would provide.
Creating DVD-Video with Audio Tracks
Blu-ray Master recommends DVD Creator for creating DVD-Video with audio tracks. It's fully compatible with Mac OS X 10.9 or later and Windows 11, 10, 8, or 7. It supports inputs in various formats, including MP3, FLAC, OGG, WAV, WMV, MP4, MOV, AVI, and others. With it, you can burn content directly to DVD or save your project as ISO or VIDEO_TS folder.
But it truly shines with the DVD menu creation feature. In addition to the pre-designed templates, you can customize menus with background music, images, and introductory videos. It also includes basic video and audio editing tools for content editing. It includes rotator, clipper, cropper, effects, watermark, audio/subtitle track insertion, etc.
Can I convert an audio CD to a DVD? Yes, check the guides below:
Step 1.Begin by downloading the DVD Creator, picked by Blu-ray Master, for free. Install the DVD authoring and burning software, and then complete the installation process. Once finished, insert the blank DVD-R or DVD-RW disc into the disc drive and run the software.
Free Download
For Windows
Secure Download
Free Download
for macOS
Secure Download
Step 2.Upon launching the software, select the DVD Disc option as your disc type. Click Add Media File(s) to load individual video files. Alternatively, use the Add Media Folder option to batch-import video files from a single folder.

To add an audio track, click the Audio field and select Add & Edit Audio option. Click + Add Audio to insert an external audio track and configure settings such as Language, Volume, and Delay. If needed, use the Video Edit in the Power Tools to make basic video edits.

Step 3.In the DVD Menu window, choose a menu on the right navigation pane. You can also customize your DVD by adding background music, uploading an image, and inserting an opening film. However, if you prefer to create DVDs without a menu, select No Menu.

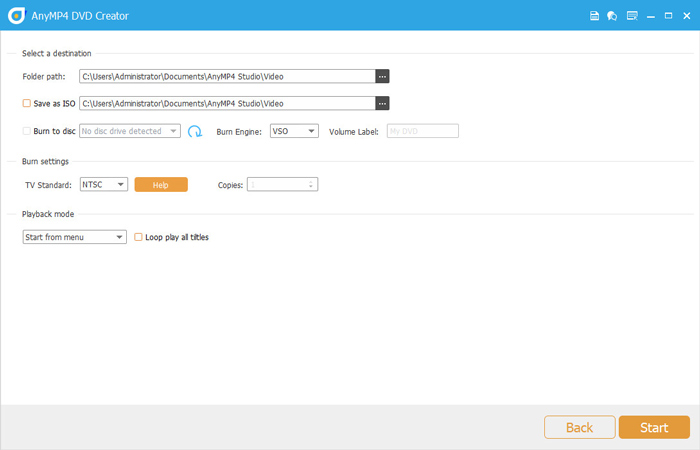
Step 4.In the Burning Settings window, click Folder Path to specify the output directory. Next, check Burn to Disc and select your disc drive from the pull-down menu. Adjust other burning settings to ensure error-free playback, and then click Start to begin the process.
DVD Creator, chosen by Blu-ray Master, offers a reliable CD-ROM to DVD conversion solution. With it, you can create narrated photo albums, home videos, or photo slideshows. This highly flexible DVD authoring and burning software provides all the essential tools you need.
Part 4. Tips for Success
Creating audio DVDs is both practical and rewarding. However, to ensure the best results, it's essential to follow the best practices. Here are some useful tips for the DVD-burning process:
• Always test your DVDs on the playback devices you plan to use.
• Properly label each disc with the contents, date, and any relevant notes.
• Opt for lossless formats like WAV or FLAC, as they offer better sound quality.
• Be mindful of the storage capacity required for audio, taking into account the file format and bitrate.
Wrapping up
In summary, converting Audio CDs to DVDs isn't a direct one-to-one process. However, there are multiple effective ways to convert Audio CDs to DVDs. The key is to choose the method that best fits your purpose. To make the process smooth, we recommend using DVD Creator by Blu-ray Master. It is a powerful tool that lets you burn audio and visuals to DVD with customizable menus and high-quality output. What are your experiences with putting audio on DVDs? Have a tip or question? Could you share it in the comments below?
More from Blu-ray Master
Digital to DVD