Jun 06, 2025Posted by Kevin Miller to Create DVD
MOV, also known as QuickTime Movie, is a multimedia format developed by Apple. It is associated with QuickTime Player and supports high-definition content and multiple tracks. However, these files are not compatible for playback with standard DVD players. So, many are asking, can MOV files be burned to DVD? The answer is yes. You need specialized DVD authoring software to burn MOV to DVD. This post will show four ways to convert MOV to DVD on Windows and Mac systems. This way, you can improve playback compatibility and create a long-term backup option for your videos.
- Section 1. Burn MOV to DVD on Windows
- Section 2. Burn MOV to DVD on Mac
- Section 3. FAQs Burning MOV to DVD
Section 1. Burn MOV to DVD on Windows
1.1 Blu-ray Master DVD Creator
DVD Creator , preferred by Blu-ray Master, is a professional DVD-burning and authoring software. It is compatible with Mac OS X 10.9 and later versions and Windows 8-11. You can add multiple MOV files to it and burn them into a DVD. It also lets you add and customize external audio tracks and subtitles. What’s more, you can use the built-in editor with essential tools like Video and Audio Edit. In addition to the video editor, it provides various pre-designed menu templates and menu customization.
Here’s how to burn MOV file to DVD:
Step 1.Download the DVD Creator, picked by Blu-ray Master, on your computer for free. Install the MOV-to-DVD creator software and let the installation process finish. Once completed, place the blank disc on your computer’s DVD drive and run the software.
Free Download
For Windows
Secure Download
Free Download
for macOS
Secure Download
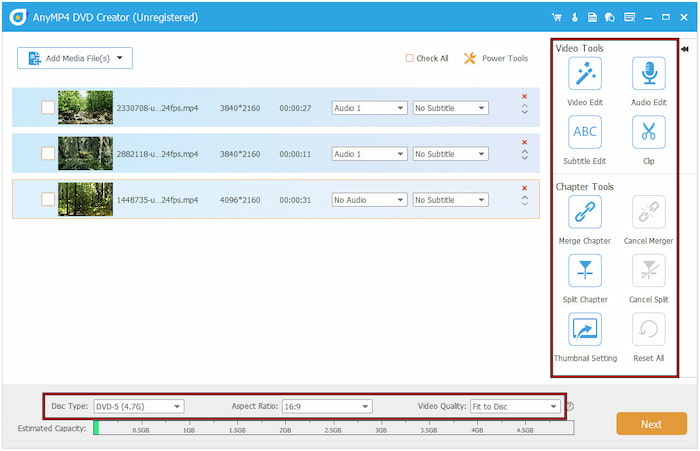
Step 2.As soon as the software launches, select the DVD Disc option as your disc type. Click the pulldown menu and select Add Media File(s) to import individual MOV files. Alternatively, use Add Media Folder to batch import MOVs from a single directory.
Important Note: Don’t forget to configure the disc type, aspect ratio, and video quality. It is to ensure the final DVD is compatible with playback on any standard DVD player. Optionally, use the Power Tools for video, audio, subtitle, and chapter edits. Then, click Next to proceed.
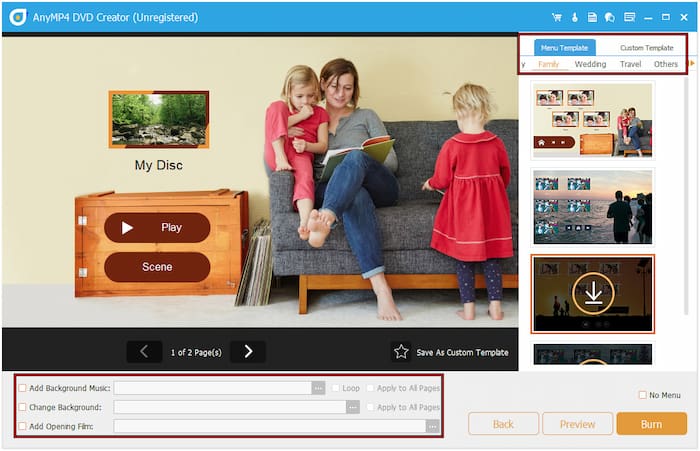
Step 3.In the Menu window, choose a menu template from the right navigation pane. Browse through available pre-designed templates, such as Holiday, Family, Wedding, Travel, and Others. To create a custom menu, add background music, upload an image, and insert an opening film. But if you prefer to burn DVDs with no menu, click the No Menu option.
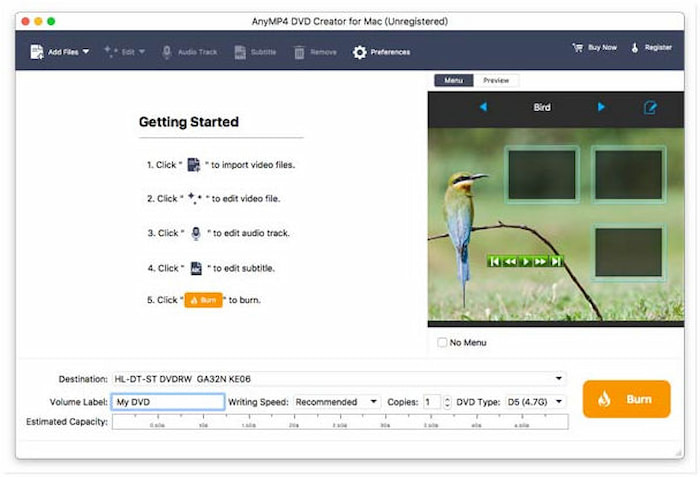
Step 4.Set an output directory and check Save as ISO to create a backup. Check the Burn to Disc and select your DVD drive from the pulldown menu. Now, select the correct TV Standard, NTSC, or PAL, depending on your region. Finally, click Start to convert the MOV file to DVD.

DVD Creator, chosen by Blu-ray Master, provides a complete solution for burning MOV to DVD. Aside from MOV to DVD conversion, this software also works as an MP4 to DVD creator . What’s best about it is that it supports NTSC and PAL standards to ensure playback compatibility.
1.2 WinX DVD Author
WinX DVD Author r is a DVD-authoring software built to burn MOV to DVD. Beyond MOV files, it also supports other inputs like MP4, MKV, M4V, and YouTube videos. It operates efficiently on Windows systems and delivers a fast burning speed.
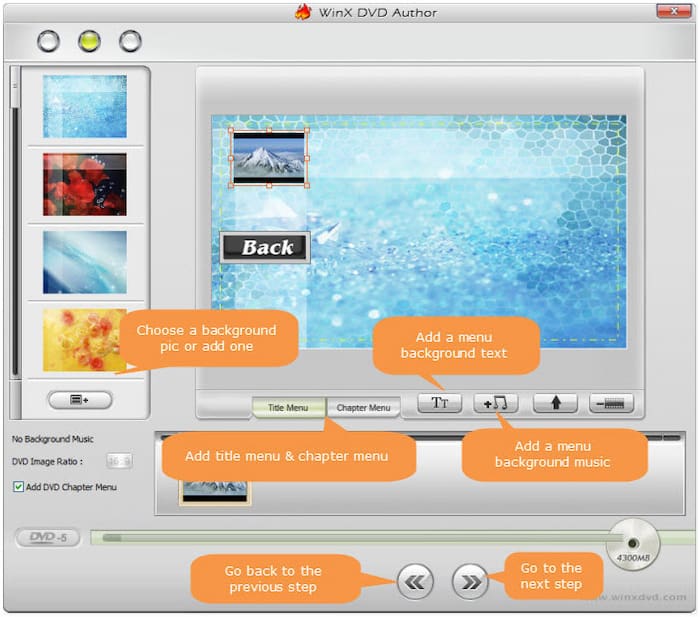
Step 1. Grab your blank DVD, insert it on your disc drive, and launch WinX DVD Author. Select the Video DVD Author option and click + to load the MOV file. You can also use the buttons to move up/down the MOV segments. Click the Forward button to proceed.

Step 2.Choose a built-in background picture or click Folder to add a custom image. Click the Title Menu or Chapter menu buttons to create and edit these menus. You can also add Title Menu or Chapter menu buttons to create and edit these menus. You can also add background music to the DVD menu by clicking the Music Note button.
Step 3.Click Forward to proceed to the next step. Set the output directory and choose a format based on your region. Then, click Start to burn the uploaded MOV files to DVD. Depending on your content, the burning process may take time.
WinX DVD Author offers a hassle-free solution to burn MOV to DVD on Windows 10. It supports nearly all disc types, including DVD+R/-R/+RW/-RW, etc. However, one drawback of this software is that it keeps crashing while you’re using it.
Section 2. Burn MOV to DVD on Mac
2.1 iMovie
iMovie is Apple’s built-in software for creating video projects from MOV files. Although it doesn’t burn DVDs directly, it is integrated with iDVD to complete the DVD creation. It means you can still burn MOV to DVD on Mac using the iMovie-to-iDVD workflow.
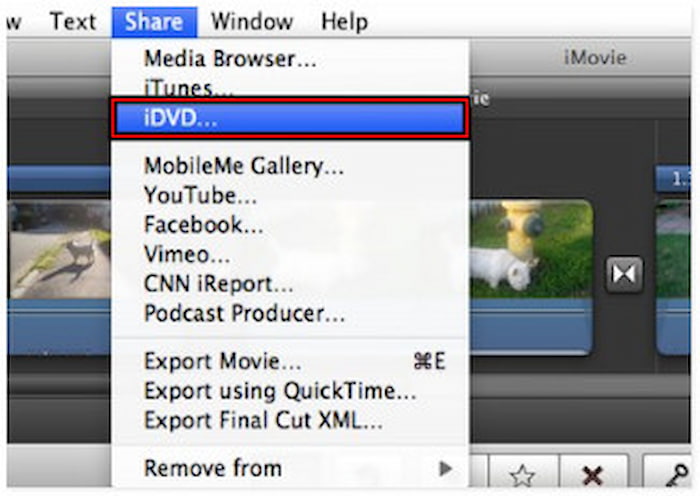
Step 1.On iMovie, click File and select Import to load the MOV files individually. Use the available features to edit or add elements to your video files. Proceed to the top menu bar, click Share, and select iDVD from the pulldown menu.
Step 2.After you’ve exported your videos to iDVD, name the project for your DVD. Select a DVD theme from the right navigation pane or click Media for a custom template. If needed, insert a custom picture, music, or video clip.
Step 3.At this stage, insert the blank disc on your Mac’s external DVD drive. Navigate to the top menu, click File, and select Burn DVD from the pulldown menu. iDVD will begin converting the MOV project to DVD on your Mac right away.
The iMovie-to-iDVD technique lets you edit and convert iMovie MOV to DVD for free. Although it has limited OS compatibility, it’s still a good option for older Mac systems. Please be informed that iDVD was phased out in 2011 and is no longer available in macOS Catalina and later.
2.2 iSkysoft DVD Creator
iSkysoft DVD Creator is dedicated DVD-burning software designed to convert MOV files to DVDs. It includes over 40+ free DVD menu themes perfect for your DVD movies. In addition to MOV files, it supports other formats like MKV, MPEG, MP4, AVI, and WMV. It also supports burning slideshows to DVDs on Mac.
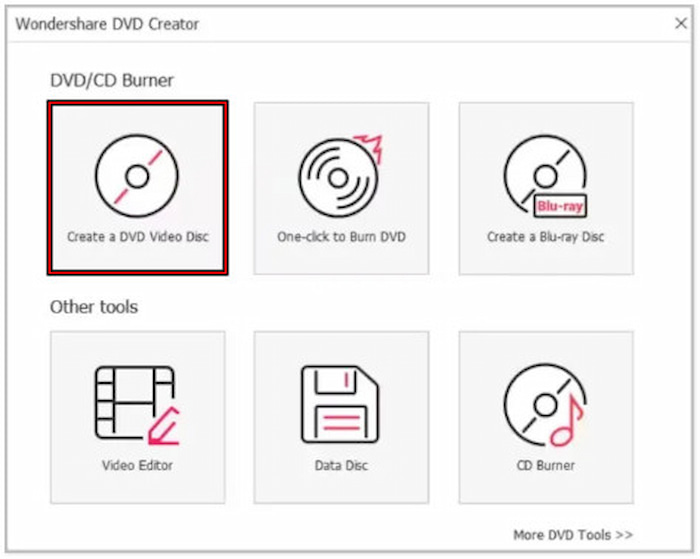
Step 1.Place the blank DVD on your Mac’s disc drive and run iSkysoft DVD Creator. Select the Create a DVD Video Disc option and click + to import the MOV files. Afterward, move to the Menu section and choose a template from the styles available.
Step 2.Click Preview to see the final DVD layout and menu. In the Burn section, select the Burn to Disc option and configure other DVD burning settings. After all the settings are set, click the red Burn button below to initiate the burning process.

That’s how to convert MOV to DVD with iSkysoft DVD Creator! In addition to video files, you can also burn photos into DVD, ISO file, or VIDEO_TS folder. However, it often fails to create DVDs from multiple video and photo inputs.
Section 3. FAQs about burning MOV to DVD
-
Will converting .mov files to DVD affect the video quality?
Yes, converting MOV to DVD can affect the final video quality. DVD uses MPEG-2 compression, which has a lower resolution and bit rate compared to MOV files.
-
What type of DVDs should I use to burn MOV?
You should use DVD-R or +R discs for burning MOV files. These disc types are compatible with most standalone DVD players. But if you need to reuse the disc, DVD-RW or +RW is the option.
-
Why is my burned DVD skipping or freezing during playback?
A burned DVD skips or freezes due to low-quality discs and poor video encoding. Cheap DVDs are prone to playback errors, so use a high-quality blank disc and encode MOV files properly.
Wrapping up
This post showed four effective ways to burn MOV to DVD on Windows and Mac. Among the tools presented, DVD Creator, picked by Blu-ray Master, stood out for its powerful features and broad compatibility with MOV and DVD. If you want a complete tool to customize menus and enhanced video quality, DVD Creator offers an all-in-one solution.
More from Blu-ray Master
Digital to DVD