
November 06, 2023 17:06Updated by Brittany Garcia to Screenshot
Dell keyboards provide the same key combination to screenshot on a Dell laptop or desktop as the other Windows PC. When you want to share the information with others on your computer, taking screenshot should be a nice option you can take into consideration. The article shares 5 best methods to screenshot on Dell. Learn more about the process and choose the desired one according to your requirements.
Part 1. How to Screenshot on Dell with the Screenshot Shortcuts
Similar to the other Windows PC, you can use the default key combination to capture a screenshot. Here is the detailed information you should know to screenshot on Dell.
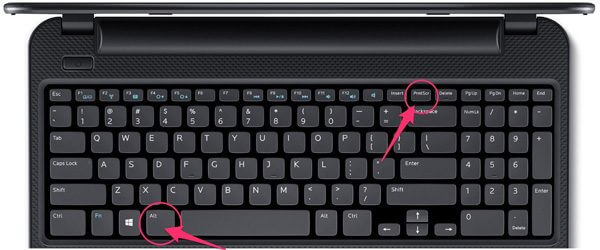
Step 1. To capture a full screen on Dell, you can press the PrtScn key to save the screenshot to the clipboard. For some notebook of Dell, you should hold both Fn and PrtScn keys to screenshot on Dell.
Step 2. To capture an active window on Dell, you can hold down Alt and press PrtScn to copy the screenshot to clipboard.
Step 3. To take a screenshot of a specific area of Dell, you can hold down Windows logo and Shift, then press the S button, which you can use the mouse to draw a rectangle in order to specific what to capture.
Step 4. To capture and save the screenshot, you can press the Windows logo and the PrtScn keys, which will save the image to C:/Users <user name>, then select the Screenshots under the Pictures folder on your PC.
Part 2. The Ultimate Free Snipping Tool to Screenshot on Dell
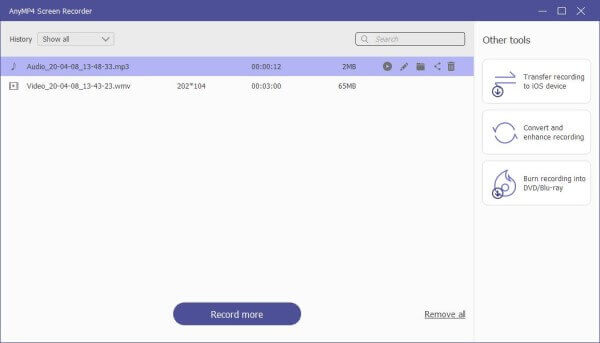
How to screenshot on Dell with a professional snipping tool for free? Blu-ray Master Screen Recorder is a desired screen recorder you can take into consideration. It not only enables you to take snapshots for free, but also tweak the photo formats, set up a schedule, annotation/edit the screenshot and even manage the photos within the program.

- Capture all onscreen activities on Dell, like video, audio and snapshot.
- Tweak the photo format; customize the recording area or active window.
- Add annotation, shapes, lines, text and more with a desired color or size.
- Manage the screenshots, such as edit, rename, share, add to folder, etc.
Free Download
For Windows
Secure Download
Free Download
for macOS
Secure Download
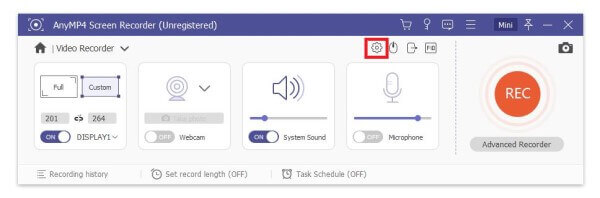
Step 1. Download and install the free snipping tool, launch the program on your computer. When you want to tweak the photo format, you can click the Gear icon to choose the Output option from the left menu. Then select the desired photo format accordingly.
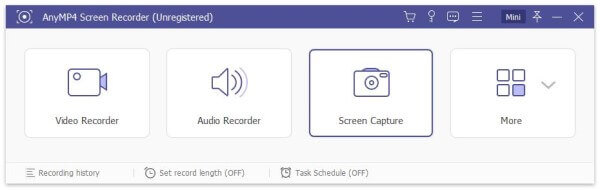
Step 2. Back to the home interface of the screen recorder, you can choose the Screen Capture button to select the area with a shape of a cross. When you need to capture an active window, you only need to move the mouse cursor to the desired window.
Step 3. Once you have captured the screenshot, you can find a little bar to draw on the screenshot, such as the border, line, arrows and any shape. Moreover, you can also select the size and color of elements to a satisfied result with ease.

Step 4. After that, you can save the screenshot on Dell directly. If you need to manage the photos, you can simply click the Recording history icon on the bottom left corner. It enables you to view, rename, add to folder, share to social media and delete the file.
Part 3. 3 More Online Methods to Take Snapshots on Dell
1. How to Screenshot on Dell with Browser Add-on Nimbus Capture
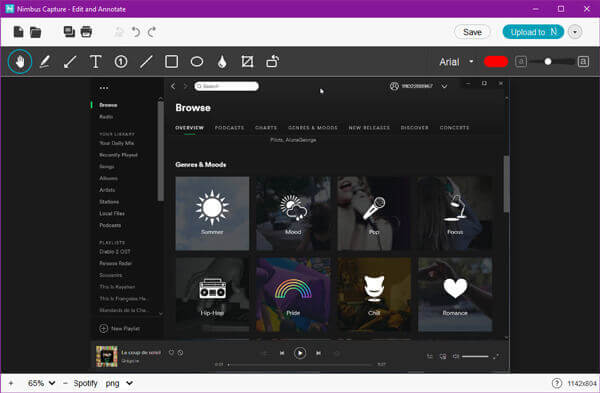
Nimbus Capture is a versatile snipping tool to capture screenshot on Dell with ease. The free version only provides 100MB upload traffic, 10MB single attachment size and 50MB maximum note size. When you need to take some simple screenshot, it is an excellent solution.
Step 1. Go to nimbusweb.me to download the related browser version, such as Chrome, Firefox, Opera and even Microsoft Edge. Once you have installed the add-on, there is an icon for nimbus capture in the upper left corner.
Step 2. Click the nimbus capture icon, which will provide you a list of screen capture tools, such as the visible part of page, capture fragment, select area, selected & scroll and more. Choose one and select the area.
Step 3. Once you have captured the screenshot on Dell, you can further edit the photo with annotation, add shapes/callouts/texts, or even share to social media website. But you should pay attention to the size limitation for the snipping tool when using the free version.
2. How to Screenshot on Dell via Online Snipping Tool Screenshot
Screenshot.net is another popular snipping tool to screenshot on Dell and other computers. It enables you to take a screenshot, edit the image, upload the file to social media sites, as well as more other features to touch up the photos with ease.
Step 1. When you want to screenshot on Dell online, you have to install a pkg file to your computer beforehand. After that, you can launch the installer to capture a snapshot.
Step 2. Once you opened the capture window, hit the icon of this extension on the toolbar, and choose the Visible screenshot option to capture the screen on your Dell accordingly.
Step 3. There will be some editing options to further edit the capture image. You can crop it to get the specific part you want or add texts, lines and arrows to the graph before clicking the Save button. (Crop a screenshot on Mac)

3. How to Screenshot Webpage on Dell via Online Screenshot
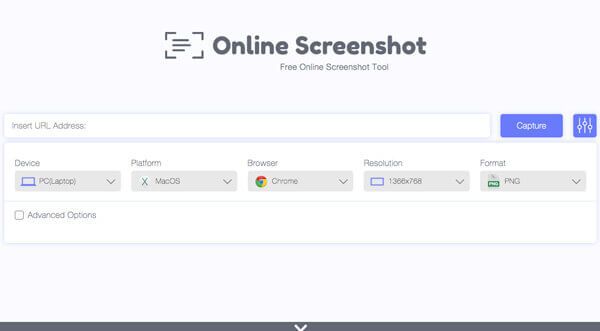
If you do not install any program to take a snapshot, Online Screenshot provides a free snipping tool to capture the webpage with high quality, as well as some advanced options to get a satisfied screenshot format with the URL of the webpage only.
Step 1. Go to the free online screenshot and enter a valid URL with HTTP or HTTPS protocol followed by domain name and extension to capture webpage screenshot accordingly.
Step 2. After that, you can also choose the Device as Dell laptop, Platform, Browser, Resolution as well as the Format. Moreover, you can also check the Advanced Options to set up the proxy server.
Step 3. Click the Capture button to have a screenshot on Dell for webpages. Now, you can choose the output format as PNG, JPEG or even PDF format to your hard drive of your Dell.
Part 4. FAQs about How to Screenshot on Dell
-
1. What is a Screenshot on Dell?
Screenshot is also known as screen capture, which is a digital image of what should be visible on a computer monitor, smartphone or tablet. Just take the screenshot on Dell for example. You can always use the default methods to get the information and share with others.
-
2. How to Find the Key Combination?
Where is the PrtScn key to screenshot on Dell? When you are not using a different keyboard, you might find the key in a different name, such as Print Screen, which is at the upper right of your keyboard, which is next to the ScrLk key with the keyboard.
-
3. Will You Choose an Online Snipping Tool?
If you just take a simple screenshot on Dell, the online snipping tool is a nice option. But when you need to tweak the photo format, add annotations or even manage the photos, you should use the professional snipping tool, such as Blu-ray Master Screen Recorder instead.
More from Blu-ray Master