November 20, 2023 11:34Updated by Brittany Garcia to Edit Video
TS is a video transport stream file that mainly used to store MPEG-2 compressed video data on DVDs. You may easily get a sequence of multiple TS files from DVDs. Are you looking for a simple way, especially a free way to join several TS files together?

This post shares 3 effective methods to combine and merge TS files into a single video. 3 great TS joiner tools are recommended for you to merge two or multiple video clips.
Part 1. How to Crop Videos Using Adobe Premiere
Adobe Premiere Pro is an ultimate video editing program that can assist you in cropping any unwanted borders off of a clip. It is considered one of the comprehensive software that professional video editors utilize. It would help if you used the software when conducting video production, mainly a skilled video editor. Several solutions are available to you as a beginner, but Adobe Premiere Pro is well worth the money you’ll spend to get it. This video editing made a complex interface but packed with many excellent features. The following are the steps in Premiere Pro to crop video.
Step 1.Download the Adobe Premiere Pro
To get started, download the Adobe Premiere Pro first by going to the tool’s official website.
Step 2.Import the clip you wish to crop
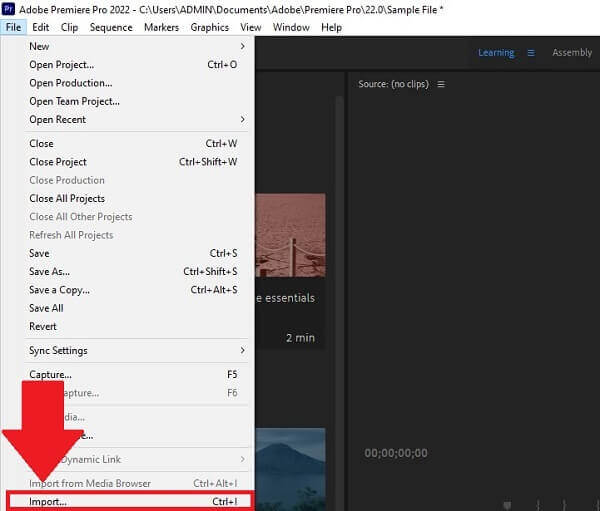
Then, make sure to upload your video clip. To do so, go to File > Import. Choose the video you wish to crop.
Step 3.Navigate the video effect
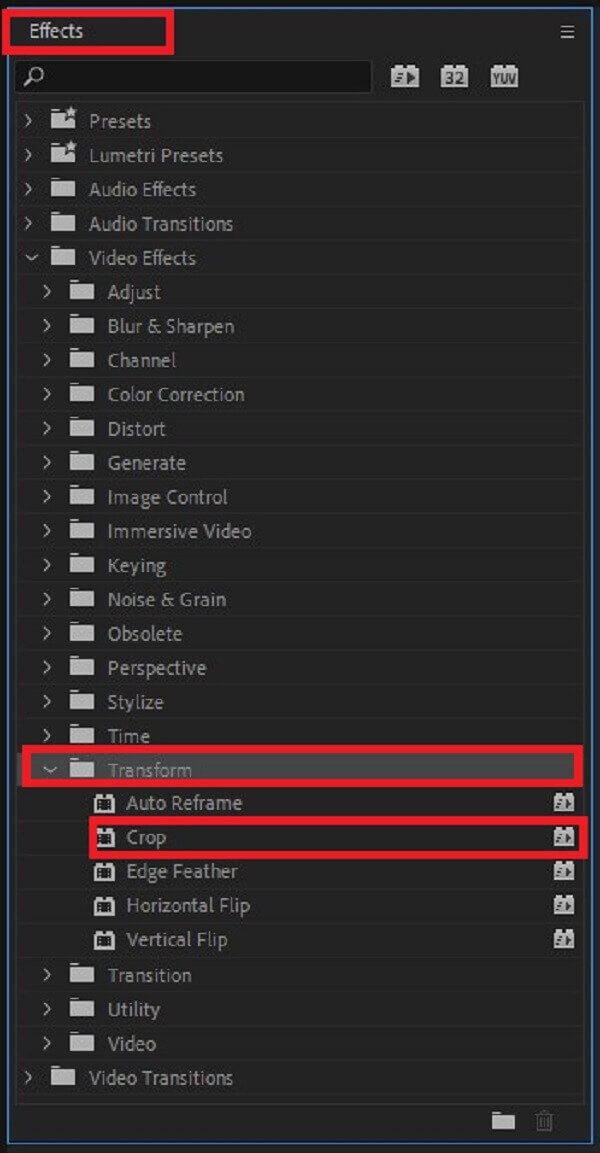
Look for the Video Effect > Transform > Crop. Drag the crop button to the video clip on the right side of the screen.
Step 4.Set the crop setting
After adding crop to your clip in Adobe Premiere crop video now. Go to Effect Control and select the crop dimensions from the clip’s bottom, top, right, and left sides.
Note: Make sure that the aspect ratio of your previously cropped video is the same as the one you want for your required output format before proceeding

Step 5.Preview the cropped video
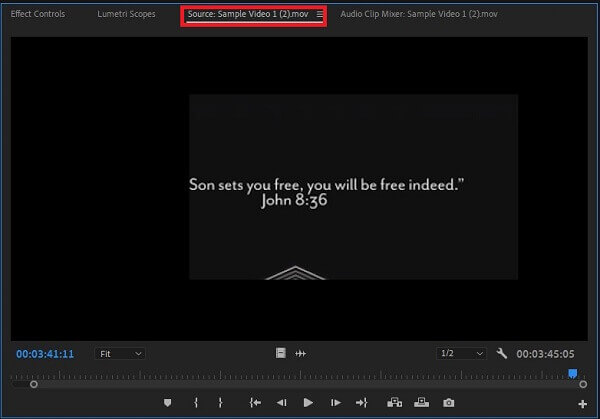
After cropping, you can now view your video by hitting the Source Tab before converting it.
Tip: Before taking edited videos out of the computer or saving them to a hard drive, it is usually preferable to watch them first. Inspect the video to ensure that your cropping limitation is reasonable and does not interfere with the video’s actual content.
Step 6.Export the video now
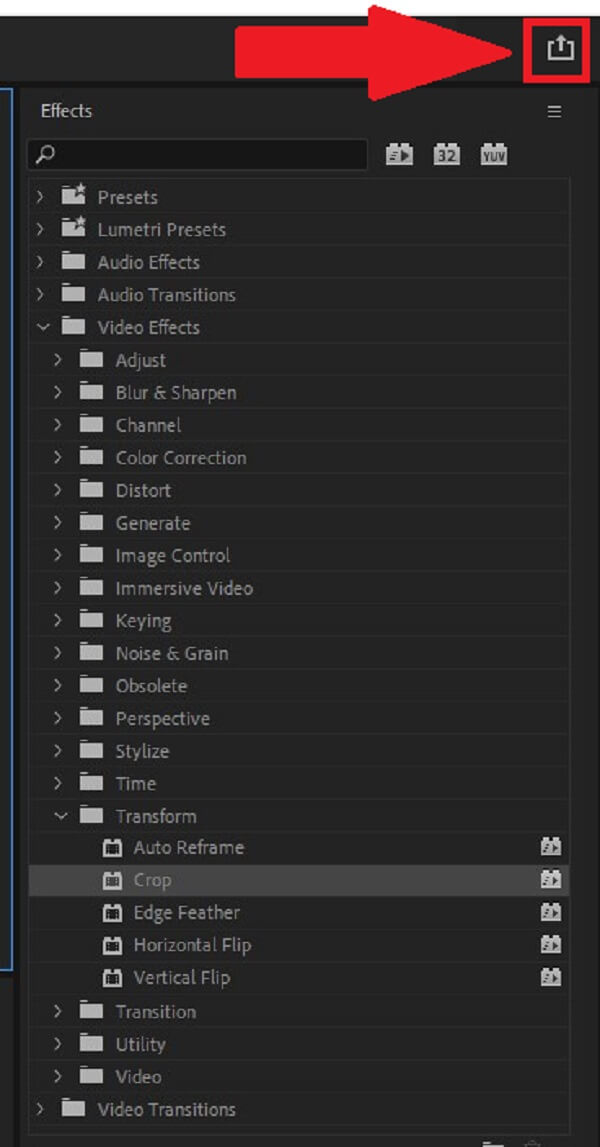
Finally, to enjoy your newly cropped video clip hit the Export button at the right-side corner of the interface.
Part 2.Step-by-step Guide of Resizing a Video by Premiere
You can resize a video on Premiere to zoom in or zoom out the video as needed. There are a variety of approaches you might take to do this. Here are the ways on how to change the aspect ratio in Premiere and its frame size.
Setting the Frame Size of the Video
Adobe Premiere Pro makes an auto attempt to adjust for the pixel aspect ratio of the input image. If an asset’s pixel aspect ratio is still skewed, you can manually change it to fix the error. It is essential to correct pixel aspect ratios before equalizing frame aspect ratios. It is necessary because an inaccurate frame aspect ratio can emerge from a miscalculation of the pixel aspect ratio. In setting the video’s frame size, here are the simple steps to follow.
Step 1.Launch the Adobe Premiere Pro. Hit File > New > Sequence.

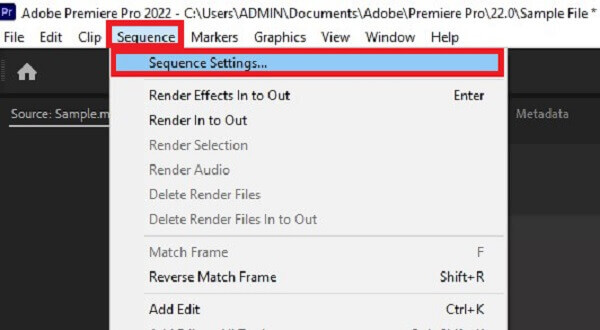
Step 2.Then, on the menu bar, hit the Sequence > Sequence Settings.
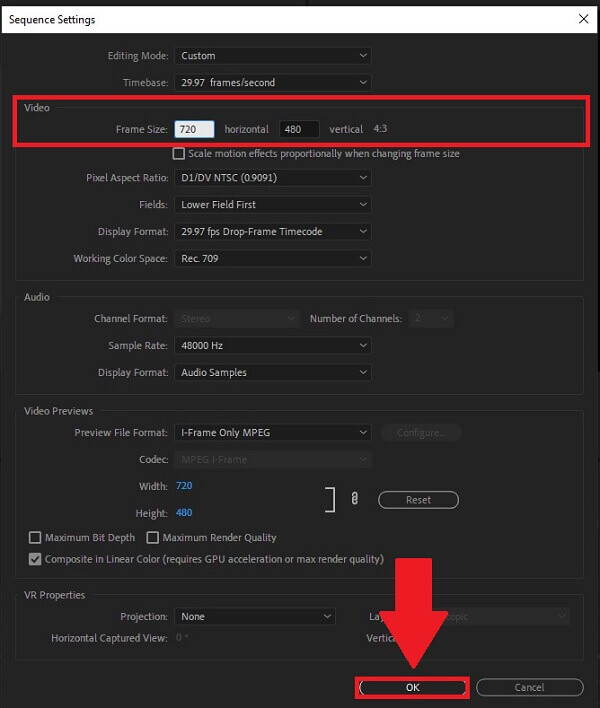
Step 3.It will direct you to the new popup window. You can change the video’s frame size horizontally or vertically, according to your preference. When finished, hit the OK button.
Changing Aspect Ratio of Video in Premiere
To change the aspect ratio in Premiere, follow the guide below.
Step 1.Download and run the Adobe Premiere.
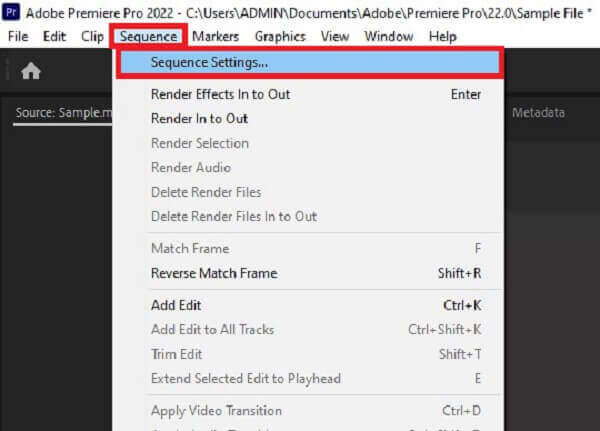
Step 2.Locate Sequence and go to Sequence Settings.
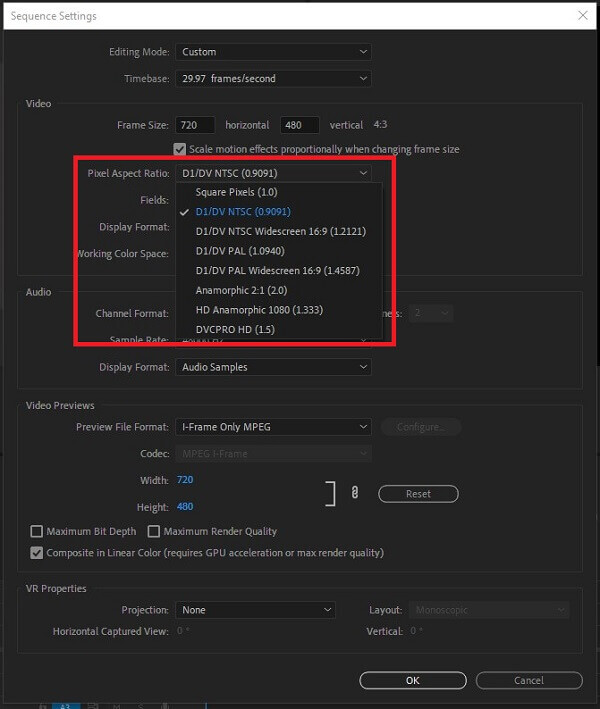
Step 3.After clicking the Sequence Settings, a window will pop up. Navigate the Pixel Aspect Ratio. From the list of aspect ratios, you can choose your desired ratio. Finally, hit the OK button to save changes.
Part 3.Easier Method of Cropping Videos on the Computer
If you think that cropping a video in Premiere is quite complicated, don’t worry. We’ve got you covered. Video Converter Ulitmate makes it simple to crop your videos in the most natural way possible. It is your all-in-one photo and video editing software. Using this software, you can rotate, trim, cut, flip, and crop your video before converting it to the format of your choice. Enjoy editing while at the same time converting your file to high-quality videos in 8K/5K/4K/1080p without sacrificing any of the original quality.
Furthermore, it has a straightforward user interface, which means that even beginners will appreciate the tool’s simplicity. Aside from the said features, you can use the program to create your animated GIF video with high-quality output and convert your files between more than 500 different video and audio formats. It is no doubt that millions of individuals are drawn to this tool. Meanwhile, here are a few easy procedures that will assist you in cropping video quickly and efficiently.
Distinctive Features
- 1. Can play converted videos on almost all operating devices
- 2. Works with more than 500+ audio and video formats
- 3. Creates GIF and compress video files
- 4. Plays and converts 8K/5K/4K/1080p high-quality videos
Free Download
For Windows
Secure Download
Free Download
for macOS
Secure Download
Step 1.Launch the converter tool
First and foremost, download and install the Video Converter Ultimate software by visiting the official website. Otherwise, you can click on one of the download icons listed above.
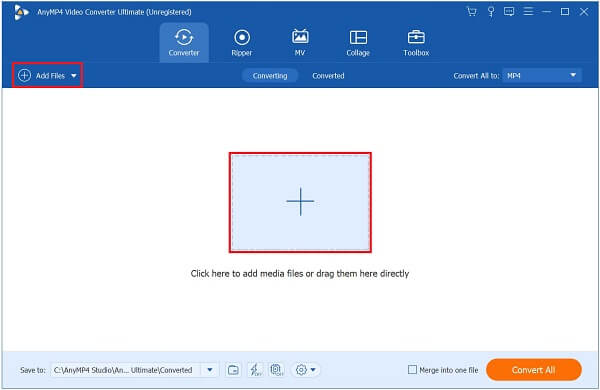
Step 2.Unload the clip you preferred to crop
Following that, there are two options for importing your video into the main interface. To begin, drag and drop your file into the center of the interface. Alternatively, click on the Add Files option to begin importing your file.
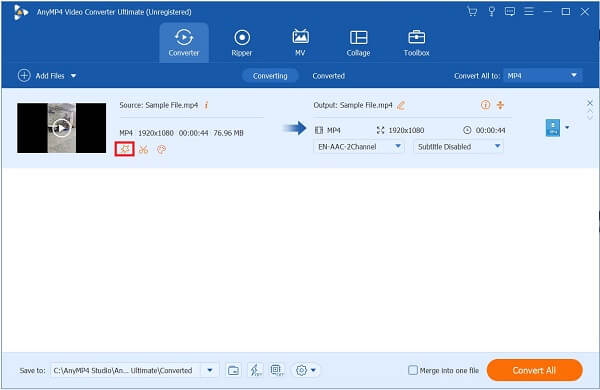
Step 3.Look for the edit button
After successfully importing the video clip, hit the Edit button near the newly added video clip.
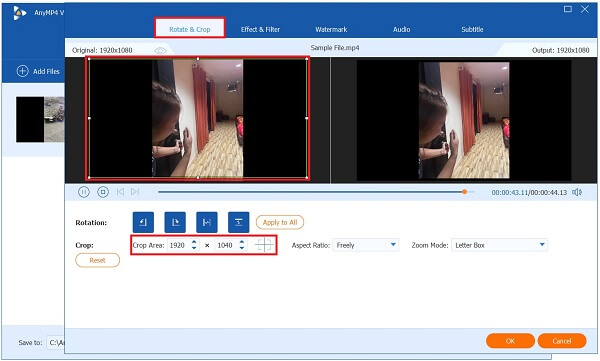
Step 4.Crop the video clip
After clicking the edit button, it will direct you to another window. Go to Rotate and Crop, and manually crop the video by moving the handlebar, or you can automatically choose the crop area of the video. When the video is set, hit the OK button.
Step 5.Enhance the video
Before converting, you can hit the Enhance Video to change the resolution, remove video noise, adjust the brightness, and reduce video shaking. Then hit Save.

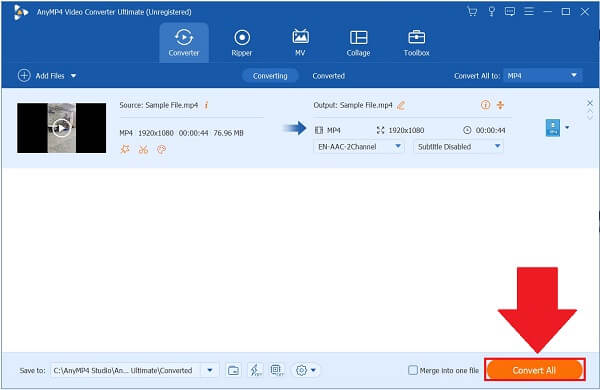
Step 6.Transform the video now
Finally, click the Convert All button to save your newly cropped video.
Part 4. FAQs of Cropping Videos in Premiere
-
Where can I find the cropped videos after converting them to Premiere?
Adobe Premiere Pro holds an automatic save folder for every project you make. The folder where Premiere saved the recent cropped video is next to the following project file, near the Audio Previews and Video Preview folder. And you can export your video made by Premiere Pro to MP4, FLV, and other popular formats
-
What is why I cannot change the frame size of my video in Premiere?
If you cannot alter the frame size of the clip, it is because it is already set0 automatically based on the Editing Mode of the clip. To change it, locate Sequence > Sequence Settings. Locate the Editing Mode and change it to Custom.
-
How can I edit in Premiere Pro zoom in on video?
Choose a video in your timeline. Then, select Effect Control panel > Scale > Position properties. Next, select the stopwatch and assign a keyframe for both Scale and Position to enable keyframing.
Wrapping up
That concludes the discussion! Adobe Premiere Pro is, without a doubt, capable of resolving your video cropping issues. And you can learn various ways to crop videos in Premiere from this post. Nonetheless, if you find Adobe Premiere Pro’s learning curve too high, Video Converter Ulitmate comes in handy and is filled with various commendable features that will make cropping video at ease. Download it now and give it a try!