Sep 08, 2025Posted by Kevin Miller to Create Blu-ray
As high-definition video becomes increasingly mainstream, more users are choosing to burn a Blu-ray disc. Whether preserving home movies or creating playable physical discs, Blu-ray stands out as an ideal choice due to its high capacity, superior picture quality, and excellent compatibility. However, efficiently burning Blu-ray discs without compromising image quality remains a challenge for many users. This article will guide you through the core processes and tool selection for Blu-ray burning, helping you successfully complete your burning tasks.

- Part 1. Why People Like to Burn a Blu-ray
- Part 2. Best Way to Burn a Blu-ray Without Losing the Quality
- Part 3. Burn a Blu-ray with Nero Burning ROM
- Part 4. Burn a Blu-ray with True Burner
- Part 5. Burn a Blu-ray with VideoByte DVD Creator
- Part 6. Burn a Blu-ray with Wondershare DVD Creator
- Part 7. FAQs about Burning Blu-rays
Part 1. Why People Like to Burn a Blu-ray
As technology proliferates in wide variety, some of the technology that existed even before is also improving. For example, a simple Compact Disc or CD became much higher-quality, known as the great Blu-ray Disc. For that, many people still love to burn their media files, especially their videos or files, on a Blu-ray. Indeed, we cannot deny that Blu-ray still benefits most of us nowadays. Here are some reasons why we said so:
Because of solid coating technology, it is extremely scratch resistant. It possesses good scratch protection and will increase its lifespan. The coating on Blu-ray discs is substantially more rigid than that on CDs or DVDs. Different manufacturers employ different names and proprietary processes to do this, but a tougher coating equals better protection.
The expected lifespan is longer than that of a CD or DVD. For that, we can now expect secure and protected media files from generation to generation. Indeed, Blu-ray discs are better for preserving moments by burning your files. In line with that, collectors will have a great deal with this medium, especially those media practitioners working for media companies.
People still love to burn Blu-ray because of its greater clarity, more colorful images, or better video quality, especially the 4K Blu-ray movies. This statement is our way of emphasizing how high the quality of Blu-ray can give us.
Part 2. Best Way to Burn a Blu-ray Without Losing the Quality
Let us start with the best program that can convert videos to Blu-ray, seemingly, the choice of Blu-ray Master, unlike the Blu-ray Creator. It is a good program designed to create Blu-rays using different video files such as MP4, FLV, VOB, AVI, 3GP, MKV, and many others. Furthermore, this software offers various functionalities and features to help you convert your videos into Blu-ray format and have high-quality playback on compatible devices, especially on Blu-ray players.
What is more amazing about this software is its customization options that you can quickly see on its main interface. These options include the subtitle editor, where you can edit the subtitle's language, position, delay, etc., before you create a Blu-ray disc. You can add your desired audio track and edit the video by cropping it, adding effects, and watermarking it.
Key Features:
• It allows you to convert or burn a great range of formats to a Blu-ray.
• Burning navigations that include burning speed, number of copies, and target Blu-ray format.
• It provides you with pre-designed menu templates and more customizations.
• Infused with video editing tools, such as a trimmer, cropper, watermark creator, and effects editor.
• Preview and snapshot tools to enjoy.
Free Download
For Windows
Secure Download
Preparations before Burning the Blu-ray
This part will tackle two crucial details to prevent troubles in making the burning process successful. We all need to know the compatible disc and what to do to have a Blu-ray drive that can read our discs.
Then, if your computer does not have the Blu-ray drive and if you are planning to buy an external Blu-ray drive, or install here are the things you need to follow:
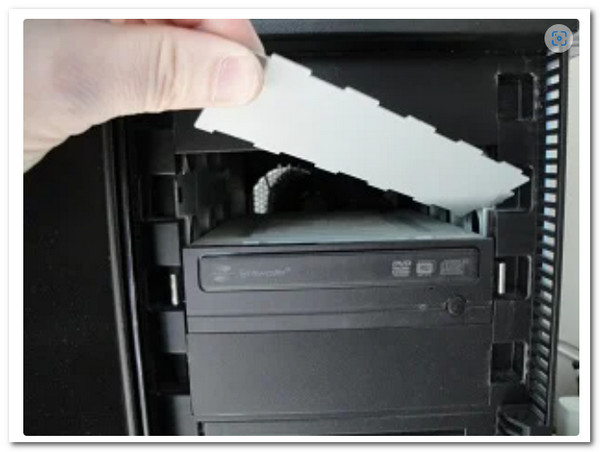
Step 1.Before we begin, please turn off your computer's power source. Then, gradually remove the Drive Cover from your PC. You must twist it how many times as we create it until it breaks off.
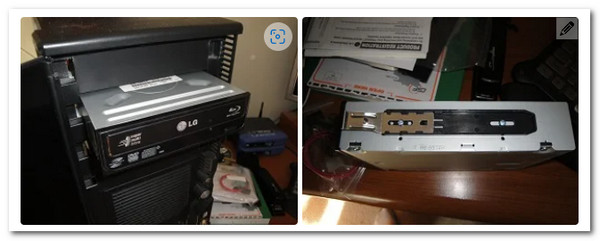
Step 2.It's time to put the Drive on your PC. It is also important to remember some PCs require a screw for security and lock, whereas others do not. However, we merely need to place the Drive appropriately to avoid problems.
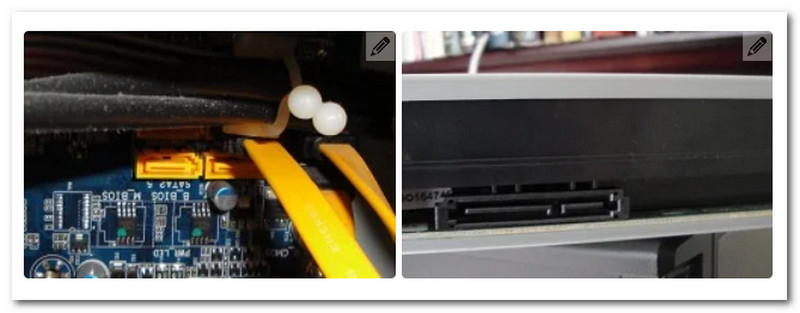
Step 3.The cables must then be connected for the driver to work. Therefore, we need to find the L-shaped line and connect it to the Drive. Then, we must identify the SATA cable among the elements and connect it to your connector's motherboard.
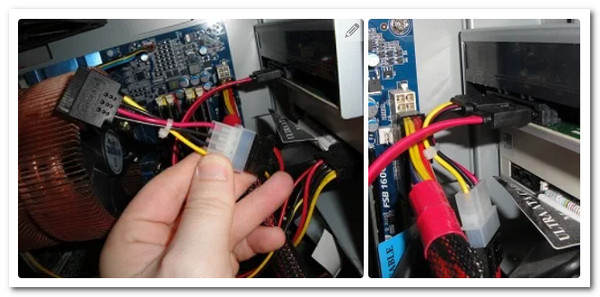
Step 4.Proceed with the SATA Power Cable. Similar to the last step, we need to connect it. This wire is often crimson and more significant than the preceding one. When you are finished, switch on your computer and begin the burning process.
How to Burn a Blu-ray Efficiently
Once you set up the drive, you can follow the steps here to burn the Blu-ray with AnyMP4 Blu-ray Creator.
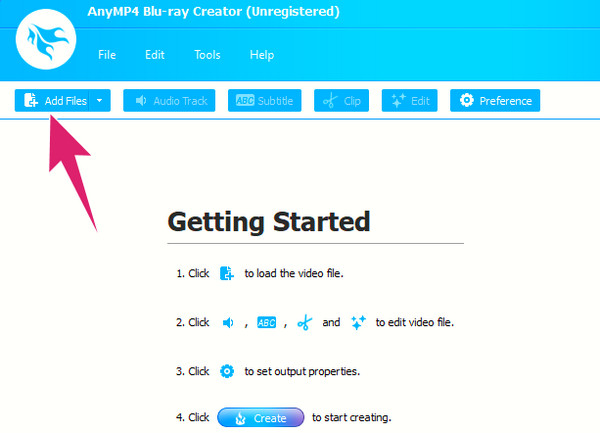
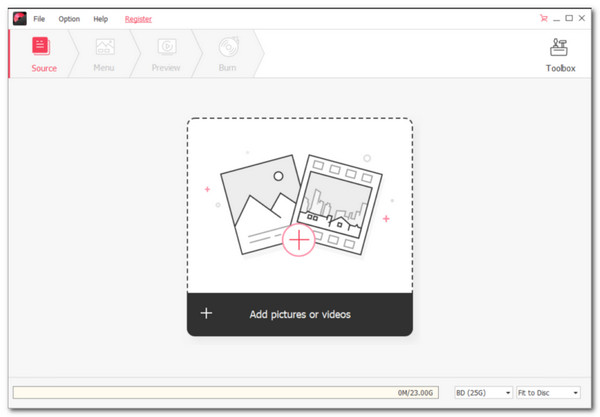
Step 1.Fire up the software after the rapid download and installation process. Then, launch or upload the videos you want to burn by clicking the Add Files button. Yes, you can add multiple videos if you want.
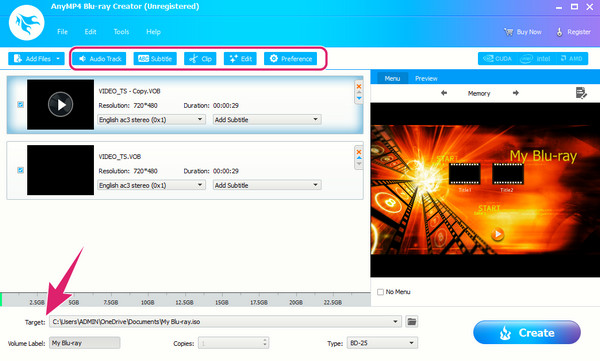
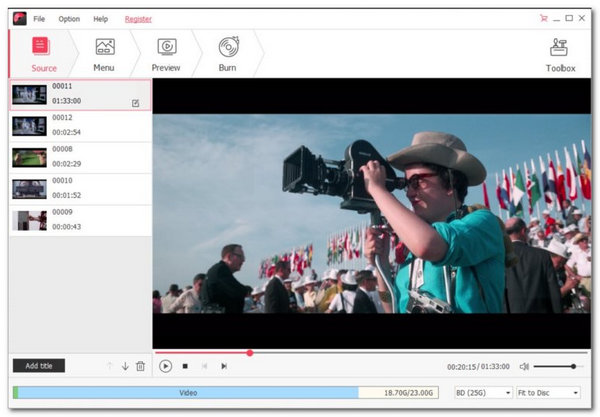
Step 2.When the importation is done, navigate to the Target menu option and set your destination folder. Also, you have the liberty to access and navigate the editing options in the ribbon section.
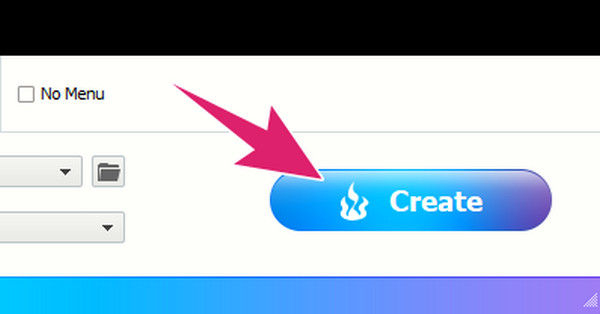
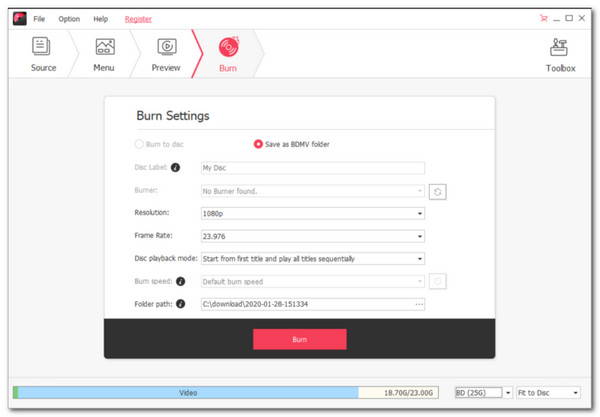
Step 3.As quick as that, you can now hit the Create button to start the burning process. Please note that you also create Blu-ray ISO from a folder using this tool and follow the same process.
The simple steps are now complete. Using this Blu-ray Creator to burn Blu-ray discs is highly efficient. After importing multiple HD videos, I easily set the output path and customized the menu, which completed the entire BD-R disc burning within 20 minutes. More importantly, the burned files feature crisp image quality and smooth playback. The overall experience is exceptionally user-friendly, making it ideal for users needing to quickly archive files or create finished discs.
Part 3. Burn a Blu-ray with Nero Burning ROM
Nero Burning ROM is a famous disc authoring program developed by a German software company, Nero AG. Nero Burning ROM, a versatile Blu-ray software is designed for creating, copying, and burning various optical discs. It supports various disc formats that include Blu-rays, DVDs, and CDs. Furthermore, this software lets you make data discs, video DVDs, and audio CDs and create Blu-ray discs with a menu. Aside from that, it also offers advanced features such as disc spanning, which enables you to split large files across multiple discs.
Key Features:
• Burn Blu-ray from MOV, MP4, MKV, AVI, etc.
• Copy, label, span, and verify disc content.
• Extra advanced editing tools like splitter, designer, and printer are presented.
How to Use Nero Burning ROM
Step 1.Download and install the burning tool onto your computer. Then, insert your blank Blu-ray disc into your disc drive.
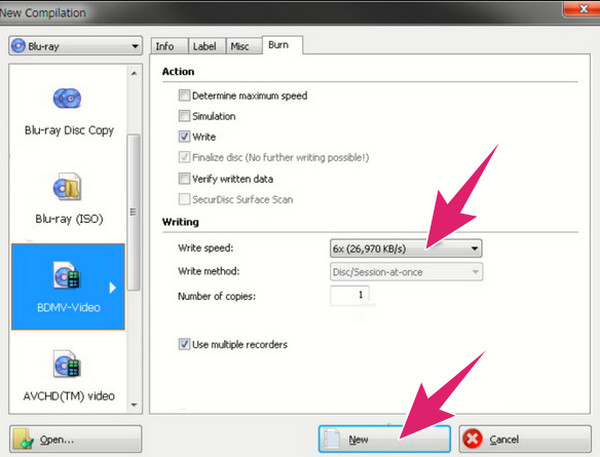
Step 2.Next is to launch the software and choose the type of burning you want to use, such as the BCMV-Video. Then, set your desired parameters, such as the writing speed and number of copies.
Step 3.Then, go to the Window tab menu, and choose the Horizontal (Compilation Bottom) as your burning mode. After that, you can now import the videos you want to burn and hit the Burn button to begin the process afterward.
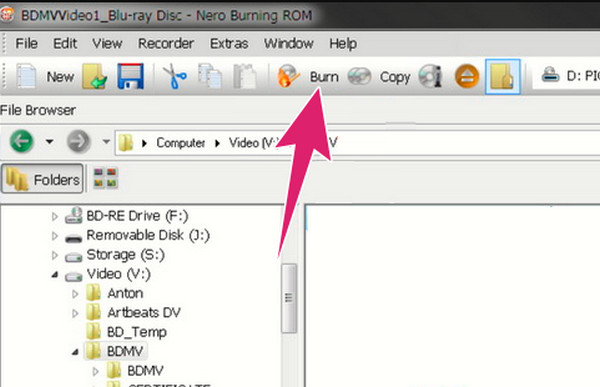
Nero Burning ROM delivers stable performance in Blu-ray disc authoring, supporting multiple video formats such as MP4, MKV, AVI, and MOV. Its menu design offers some customization flexibility, which is suitable for users requiring structured content. Moreover, the Compilation Bottom mode provides more intuitive management of multiple files. However, its interface appears dated and may be less user-friendly for beginners. Additionally, the software launches slowly and consumes significant system resources, making it best suited for computers with higher specifications. Overall, Nero is better suited for experienced users seeking high-quality output, while beginners may require additional learning effort.
Part 4. Burn a Blu-ray with True Burner
Another way to convert MP4 to Blu-ray is through this True Burner. This top Blu-ray burner software is a free, compact, and easy-to-master burning program. Furthermore, this tool enables you to burn a Blu-ray and DVD of various kinds, including those bootable, multisession, and standard formats and styles they have. In addition, using this burning software, you can also create or burn MP3 discs. However, if you are a Mac user, this True Burner is not yet for you since it only supports Windows computers.
Key Features:
• Write and verify the written files of an ISO.
• Boot discs, and it creates multisession.
• Support medium and XL discs.
How to Convert MKV to Blu-ray
Step 1.After grabbing this burning software on your desktop, you can already insert the blank Blu-ray too. Then, open the software, click the Select Data Disc option, and hit the Add button to import your MKV files.
Step 2.Set the burning parameters by clicking the Settings button. From there, you can set the size, speed, and writing parameters.
Step 3.After that, you can already hit the Burn button to start the burning process.
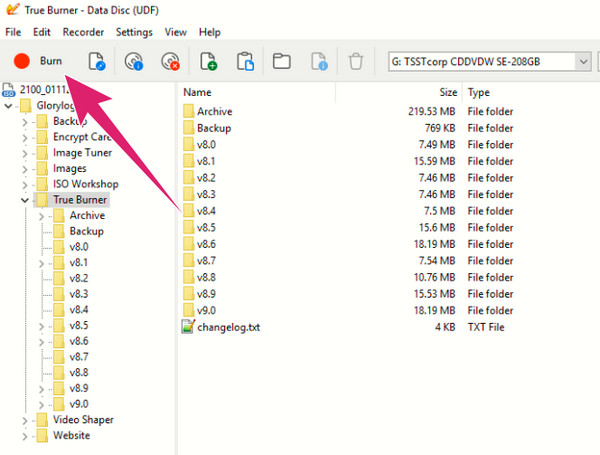
Here are the steps for using it. Overall, True Burner is suitable for users who need to quickly burn data discs, but it is not ideal for creating playable Blu-ray video discs. In practical use, it imports MKV files smoothly, offers straightforward parameter settings, and its ISO writing and verification features are quite useful. However, it lacks menu creation and video format conversion capabilities, and burned videos cannot be played on standard players. Additionally, the interface provides minimal guidance, so that it is less beginner-friendly.
Part 5. Burn a Blu-ray with VideoByte DVD Creator
Video DVDByte Creator is another method for burning videos to Blu-ray discs, ideal for users seeking a quick burning solution. It features a clean interface, supports importing multiple video formats (MP4, MKV, AVI, MOV, etc.), and automatically detects optical drives and blank discs. While its advanced functionality is not as extensive as professional software, it remains a practical choice for basic Blu-ray authoring needs.
Key Features:
• Supports Blu-ray and DVD discs with automatic disc type recognition.
• Features a simple navigation menu for enhancing playback.
• Users can preview videos and menu effects before burning.
• Supports common video formats including MP4, MKV, AVI, MOV, and 3GP.
Step 1.Download and install Video DVDByte Creator. Please open it and see the Blu-ray Disc icon.
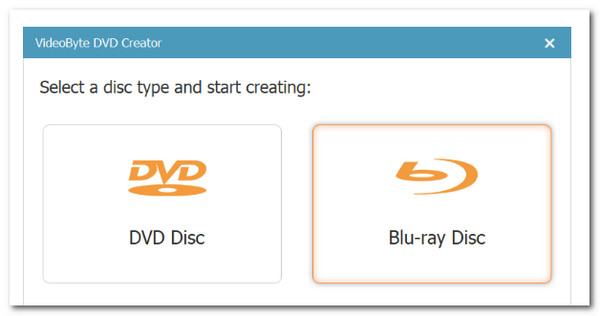
Step 2.Now, insert a Blu-ray drive (if your computer does not have one) as we insert a blank disc.
Step 3.Click the Add Files button and select the media files you want to burn.
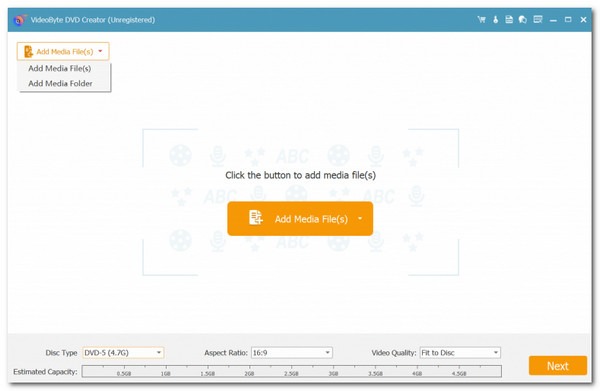
Step 4.We can start burning the disc by choosing a burning engine, then go on and click the Start button to burn.
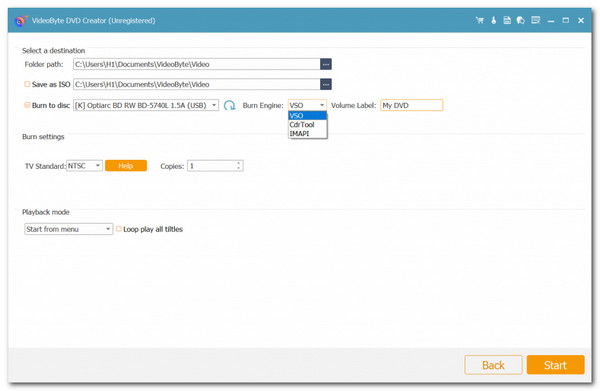
In general, Video DVDByte Creator is better suited for users seeking a quick operation. It prioritizes a streamlined burning process and broad format compatibility over complex menu design or advanced video processing. For those who want to complete the Blu-ray burning task as quickly as possible, it offers a lightweight yet efficient solution. But it may lack some customization features.
Part 6. Burn a Blu-ray with Wondershare DVD Creator
Wondershare DVD Creator is a comprehensive video burning tool supporting Blu-ray and DVD output, ideal for users who wish to edit videos and design menus before burning. It not only supports multiple video formats but also comes with built-in tools for video enhancement, subtitle addition, and menu templates, satisfying diverse needs from home users to content creators.
Key Features:
• You can edit, add subtitles, adjust brightness, and more before burning.
• Offers multiple menu styles with customizable backgrounds and buttons.
• High format compatibility: it supports mainstream formats like MP4, MKV, AVI, MOV, WMV, and more.
Step 1.Install and launch the program and choose to Create a Blu-ray Disc. From there, please Add Videos/Pictures. We can add the files we want to burn on a Blu-ray disc.
Step 2.Next, it is an optional step if you want to enhance the video before the burning process.
Step 3.Then, insert the disc into the drive. You may now modify the information, click the Burn button, and finish the process.
The above are the complete steps for burning Blu-ray discs using Wondershare DVD Creator. It features abundant menu templates and practical video editing tools. I adjusted brightness and added subtitles before burning, with a smooth overall experience and stable burning without errors. However, there are some limitations. For instance, menu customization options are somewhat limited, as you cannot freely adjust button positions or background music. Additionally, the software launches relatively slowly and occasionally experiences brief lag when importing large files.
Part 7. FAQs about Burning Blu-rays
-
Can I burn 4K to Blu-ray?
Yes, you can. Most of the Blu-ray discs today are capable of holding 4K videos. However, there are still some things to consider when doing so, such as the Blu-ray compatibility, capacity, and encoding to support 4K.
-
Can I re-write the Blu-ray I burned?
It depends on the kind of disc you use. If you use a BD-RE type of Blu-ray, you can erase and re-write the burned content. On the other hand, if you are using a BD-R, then you can only write once.
-
Can I use any Blu-ray player to burn Blu-rays?
No. Because not all Blu-ray players have the burning capability. This is true for the older Blu-ray players since they have limited features or even focus on Blu-ray playing alone. Thus, if you want to use a player to burn Blu-rays, you must first check for the player's capabilities.
-
How many hours does it require before we burn a 1-hour movie to Blu-ray?
The process of burning a Blu-ray will require a couple of times. It varies depending on the length of the file you have. Therefore, if you are burning a 1-hour movie, then it must take at least 50 minutes to 1-hour burning process.
-
What is the difference between DVD and Blu-ray?
Comparatively, Blu-ray optical disks outperform DVDs in terms of holding high-quality data. In DVD, a red laser with a wavelength of 650 nm is used to retrieve data, whereas Blu-ray utilizes a blue-violet laser with a wavelength of 405 nm. That brings Blu-ray to the top.
-
What is the most recommended type of Blu-ray Disc?
We came across several queries on the internet that were usually phrased along the lines of Blu-ray disc top of finest. Ultra HD Blu-ray discs answer this query since they deliver high-resolution video and audio services.
Conclusion
This article introduces five methods to burn a Blu-ray, ranging from comprehensive professional software to lightweight free tools, each with its own use cases and pros and cons. If you want to quickly and efficiently create playable Blu-ray discs without sacrificing quality, Blu-ray Master picked Blu-ray Creator is the most recommended choice. It supports multiple video formats and offers practical features like menu design, subtitle addition, and video enhancement. It suits both beginners and advanced users. Download it now and start your high-definition burning journey!
More from Blu-ray Master