May 29, 2025Posted by Kevin Miller to Play DVD
Why do many people hope to connect the DVD player to the TV? Simply put, the reasons include a better DVD watching experience and special TV playback features. Are you still troubled about how to do it? This complete guide will guide you to hook up the DVD player to the TV in 3 feasible ways.

- Part 1. Preparation Before Hooking Up the DVD Player to the TV
- Part 2. Hook Up the DVD Player to the TV with HDMI
- Part 3. Hook Up the DVD Player to the TV without HDMI
- Part 4. Bonus: Easy Way to Watch DVDs on TV
Part 1. Preparation Before Hooking Up the DVD Player to the TV
Can you connect a portable DVD player to the TV? The answer is yes. Before starting the process of hooking up the DVD player to the TV, you need to make some essential preparations:
Identify connection methods: There are different DVD player and TV connection methods, including HDMI, component cable, AV cable, etc. You need to check the back of both your DVD player and your TV to find out their available connection types.
Choose the most proper method:
- Prioritize HDMI if available for the best quality.
- Use component cables if HDMI isn't available on one of them.
- Use the AV cables if the other options are unavailable.
Prepare the needed cables: After determining the connection type, prepare the proper cables in advance.
Prepare the DVD player and TV: Power off the DVD player and TV to avoid the hazard of electric shocks and protect the devices. Place the DVD player near to the TV to facilitate the connection process.
The above is the complete information about preparation. Next, we will introduce you to all three ways to hook up the DVD player to the TV. Read on.
Part 2. Hook Up the DVD Player to the TV with HDMI
The first connection type to connect the DVD player to the TV is to use an HDMI cable. If you are available for this method, this part will help you. Otherwise, you can read part 3 and part 4 to see the other methods.
Step 1.Respectively plug the two ends of the HDMI cable into the DVD player's and TV's HDMI sockets.
Note: There are multiple HDMI sockets on the TV, and each is labeled as HDMI 1 or others. Remember the socket you use, and later you will choose it in the TV settings.

Step 2.Insert one DVD disc into the DVD player. You need to make sure that the HDMI connection is secure, not too tight or too loose.

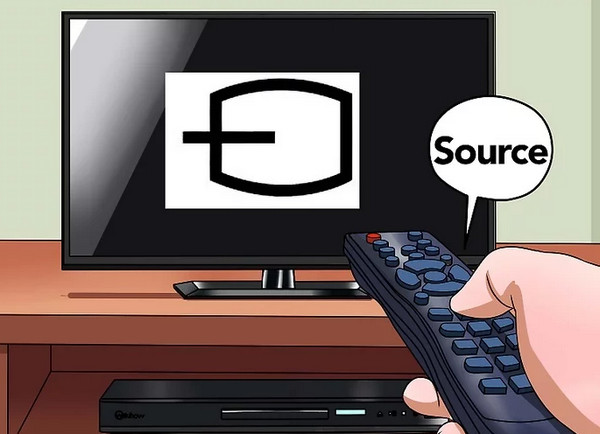
Step 3.Power on and open the DVD player and TV. On the TV screen, locate and click the source button to go to the correct input. The button, sometimes referred to as 'input', lets you change the source of the sound and video data that your TV receives. The TV's input should be the same as the one you used for the cables.
Part 3. Hook Up the DVD Player to the TV with HDMI
Some people may not have an HDMI port to connect a DVD player to the TV. Now, the detailed guide on hooking up the DVD player to the TV is here for you to refer to.
Hook Up the DVD Player to the TV with Component Cable
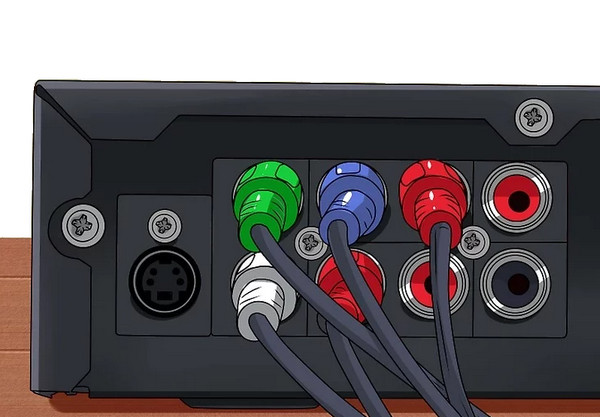
Step 1.After preparing the component cable, plug the ends of five cables into the DVD player's and TV's corresponding sockets.
Note: Pay attention to the cable colors and plug them into the right port: plug the white audio cable into the white inputs and the red video cable into the red inputs.
Step 2.Open the DVD player and insert the DVD disc you are ready to watch into the player.
Step 3. Power on the TV and use the remote to press the Source button to test the audio and video effects of your DVD.
Tip: If your DVD video and audio are correct, that means that your connection is correct. Otherwise, you need to check your cable connection.
Hook Up the DVD Player to the TV with an A/V Cable
In addition, this part is the method of how to hook up the DVD player to the TV with an A/V cable.
Step 1.Same as the above two methods, plug the two ends of the A/V cable into the sockets of the DVD player and the TV. The sockets are colored white, yellow, and red, and make sure your cable color and the socket color are the same.

Step 2.Power on the DVD player and oprn it. Insert one DVD disc into the player to test the connection.
Step 3.Use the source button to enter the correct interface, and you can check that whether the video and audio effects of DVDs are correct.
Part 4. Bonus: Easy Way to Watch DVDs on TV
If you think the connection methods are too complex and you don't want to prepare the cables, you can use the Blu-ray Master Free DVD Ripper to rip DVDs to digital formats and use the USB drive to transform the videos to the TV for easy playback.Blu-ray Master Free DVD Ripper performs well in the DVD ripping process for its rich output formats and excellent DVD ripping speed. It can load DVD discs quickly and convert them to MP4, MKV, MOV, FLV, and other formats, so you can choose the TV-compatible formats. Moreover, it also provides customization settings for you to set the encoder, resolution, bitrate, and other parameters. With the latest acceleration technologies, it presents a 20× faster ripping speed compared to other ripping tools. Besides, it offers the full DVD information on the interface, and you can manually check the titles, subtitles, and audio tracks you want to retain. Now, click the buttons below to download this software on your computer and follow the detailed steps to complete this process.
Free Download
For Windows
Secure Download
Free Download
for macOS
Secure Download
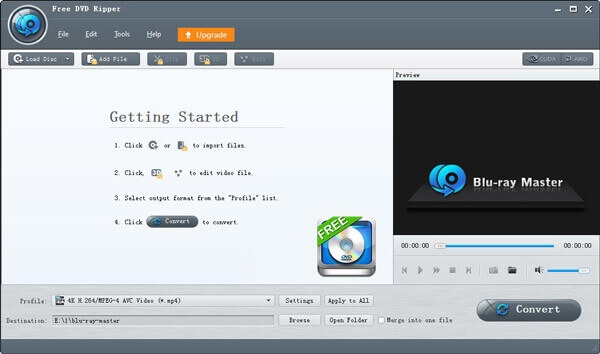
Step 1.Launch the Blu-ray Master Free DVD Ripper, and choose Load Disc to add the DVD file to the software. Select one loading mode in the pop-up window.
Note: Remember to insert one DVD disc into the optical drive before loading this disc.
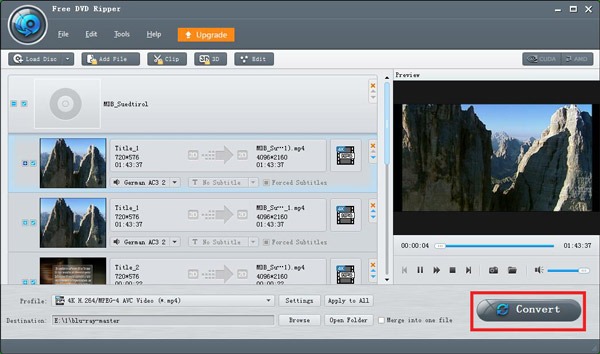
Step 2.Click Profile on the bottom line to choose H.265 MP4 as the output format. The MP4 format is a popular and widely supported format. If you want, you can also choose other output choices.
Note: If you need, you can click the built-in editing bar to further adjust video effects, like

Step 3.Lastly, plug the USB drive into your computer. Click Browse beside the Destination to set the ripped videos to the USB drive. Then, select the Convert button to start the ripping process.
With the above steps, you have transferred the DVD to the USB . Then, you need to transfer the DVD videos from the USB drive to the TV.
Step 4.Plug the USB drive into the USB port of the TV. Then, press the External Input button on the TV remote and choose USB Flash Drive on the TV screen.

Step 5.The last step is to choose the DVD videos, and then the DVD videos can be played on the TV.

Wrapping up
Now, you have learned how to hook up a DVD player to the TV in 2 ways. With the detailed text explanation and illustrations, you can easily do this. Further, we introduce an alternative way to watch DVD files on the TV, and you can try Blu-ray Master Free DVD Ripper for free. If you have other similar problems, you are welcome to share them with us!
More from Blu-ray Master
Play DVD Movies
Easily play Blu-rays, DVDs, and various video/audio formats with rich playback features.
100% Secure. No virus