How to Change Video Speed on Windows, Mac, iOS, and Online

October 10, 2022 15:05Posted by Selena Thomas to Edit Video
Sometimes, having a different speed within a video makes it more exciting to watch. For this reason, many moviemakers and video editors take a speed changer as one of their video editing tools. On the other hand, how can we change a video speed without damaging the quality that much? Because as you know, changing the speed affects the video quality since it changes the rate. Fortunately, we provide you with five astonishing ways that you can use to change the video rate without damaging the quality. We did this thing to help you with your video editing task. Thus, steps and guidelines are tagged along here, so you can completely do the job well.
So, what are you waiting for? Start reading the content below, and begin to acquire new learnings on how to change the speed of a video.

First stop, we have this Video Converter Ultimate, the all-in-one video editing tool for Mac, Windows, and Linux users. Although its name says that it is an ultimate converter, this software’s toolbox makes it the best video editing tool of all time. One of the aces of this toolbox is the video speed controller that helps users to change their video speed by slowing it to 0.125x and speeding it up to 8x faster. Furthermore, it gives users control over their video output’s quality, resolution, format, framerate, and encoder. Aside from that, it also provides them the options for the audio output’s bitrate, channel, format, and sample rate.
On top of that, it comes with hardware acceleration technology that makes all the processes work 70 times faster. This same technology also protects your device while giving you smooth navigation. Indeed, this software is really something that one should acquire!
Best Features of Video Converter Ultimate
How to Edit the Speed of a Video in Video Converter Ultimate
Download the Software
The first move to do is to acquire or download the software on your computer device. Click the Download button above and proceed to install it afterward.
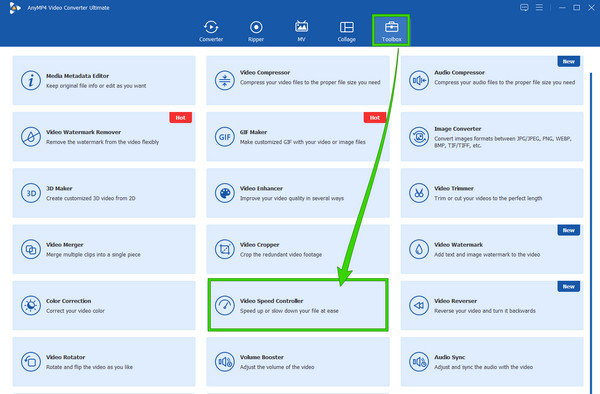
Go to the Video Speed Controller
After the free and fast installation process, launch the software. Then, on the interface, click to see the tools in the Toolbox. From there, hover over the Video Speed Controller option among the list of video editing tools.
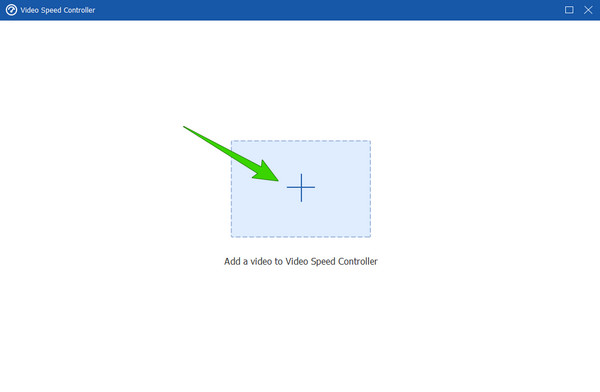
Upload the Video File
After clicking the Video Speed Controller tab, it will lead you to the importation of the file. Click the Plus icon at the center of the interface to upload the video file.
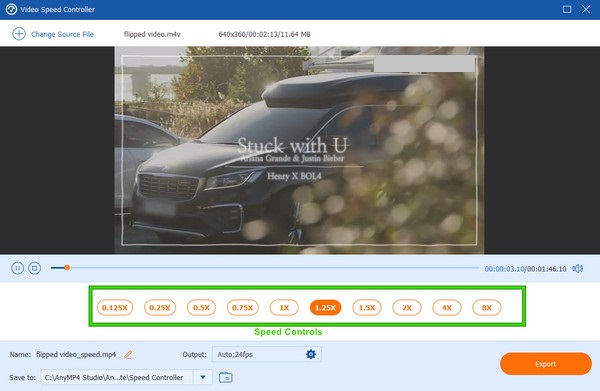
Navigate the Speed Control
Once you upload, the video will automatically play in the preview section once you upload it. And this is how to change video playback speed; under the preview, click the speed rate to you to apply for your video. Note that the options from left to 1X are the options to slow, and the options to the right are the options to speed up.
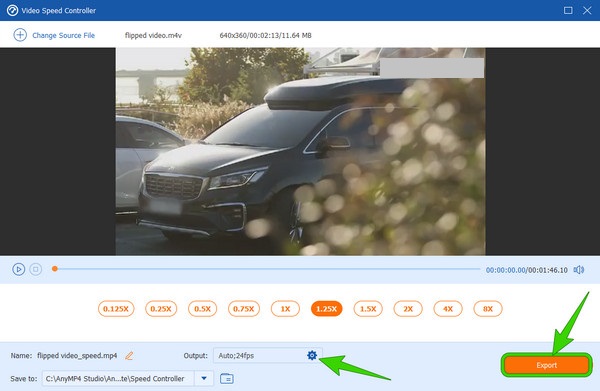
Export the File/span>
Finally, you have the option to save the video file already. To do so, click the Export button at the interface’s bottom right corner. But please note that you can customize the file’s quality and resolution by clicking the Coggle icon in the Output section.
Another desktop software that has complete video editing tools is none other than Premiere Pro. It is one of the most popular and influential editing software professionals use. One of its essential functions in video editing is its ability to modify the speed of videos like speeding up in several ways, including the advanced method that professional users usually do. This advanced method is by means of the Time Remapping of the tool, in which guidelines are discussed below.
How to Edit Video Speed in Premiere Pro in an Advanced Way
Launch the Premiere Pro on your desktop. Then begin to upload the video file that needs the speed modification. Then, hit the uploaded video twice for you to expand it.
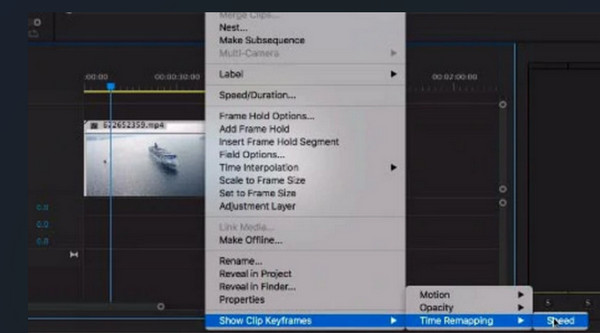
Next, you need to right-click the video file and hit the Show Clip Keyframes selection from the menu list. Then, hit the Time Remapping selection and the Speed option after.
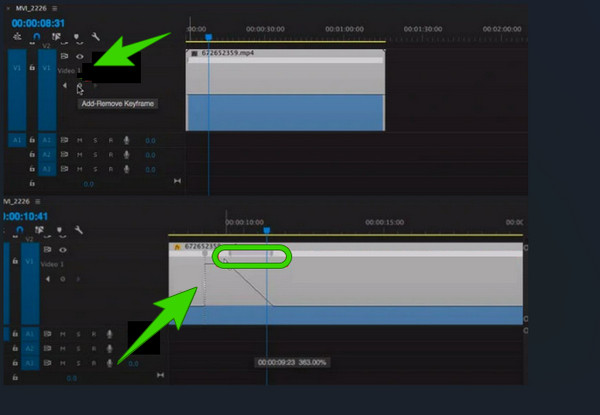
This time you will need to add keyframes that you must place on the part of the video that you need to change speed. Then, move over the dragging bar and pull it up if you want to increase the speed or pull down to slow down your video clip.
After that, you will need to make a ramp. To do so, you must split the keyframes in two. Then, you will now have a smooth transition for your video.
Are you looking for another solution for Mac? iMovie changes video speed like no other if you are a Mac user. So, you can use iMovie to speed up and slow down your videos. Using it will benefit you since you won’t need to install any software because it is one of the aces of Apple that is already incorporated on Mac. Nevertheless, iMovie is one of the best video editing picks, providing essential tools such as a video cropper, stabilizer, rotator, and more. Therefore, Here are the quick guidelines for changing the video’s speed rate using iMovie on Mac.
How to Change Video Playback Speed on iMovie
Open the iMovie app, then start to upload the video by clicking the Import Media icon.
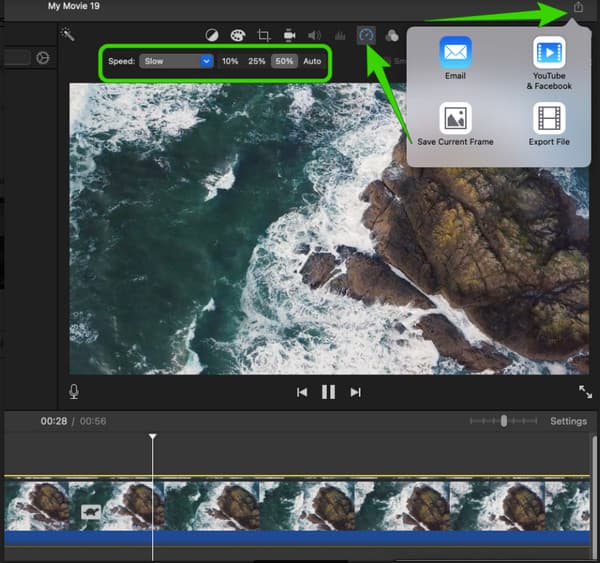
Next is to bring the uploaded video to the timeline by dragging it down. Then, click the video and follow by clicking the Speed option on top of the preview. From there, choose what rate speed you want for your video.
Now, when all is set, hit the Share icon located at the top right corner and click the Export File option.
Hyperlapse is a video editing app that Instagram produces. It was purposely produced as a video speed-changing app that you can enjoy using on your iPhone. Besides speed controlling, Hyperlapse also comes with a video recorder, where you can capture raw videos that you want to edit. However, as mentioned here, Hyperlapse only works on iOS, meaning Android users cannot rely on it. Hence if you want to know how to change the speed of video on an iPhone using Hyperlapse, then you must see the guidelines below.
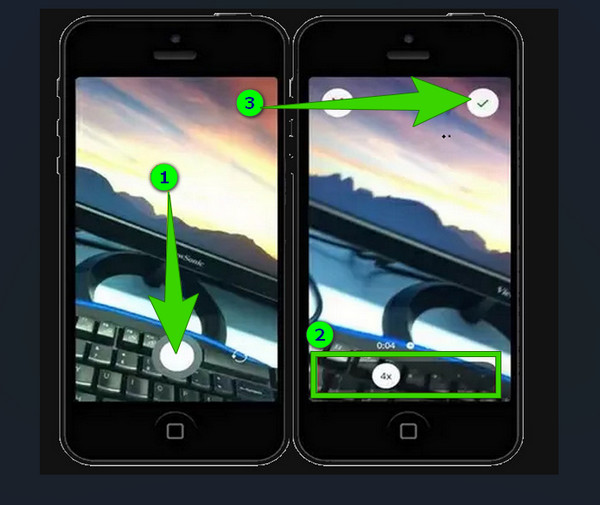
Launch the app after grabbing it from your app store. After launching, tap the Record button to start recording a raw video.
When you get to finish the recording, you can start adjusting your video’s speed. Slide the slider to the left to slow down and to the right to speed up the video.
After that, tap the Checkmark at the top right corner to export the video to your local gallery.
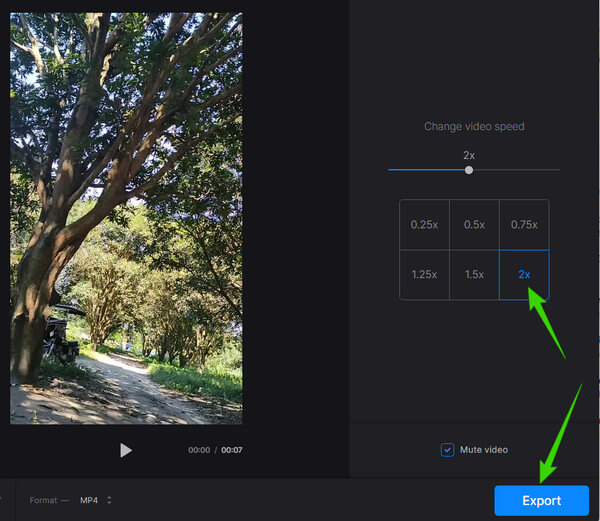
Now, if the software and apps are not in your preferences and you want to change video speed online, feel free to use Clideo. Clideo lets you change the speed of your video from 0.25x to 4x, depending on your need. In addition, it also provides excellent tools that you can choose from, like video cutter, merger, meme maker, resizer, and more. However, if you want to see how Clideo can work on changing the speed of your video, then you can follow the quick steps below.
Visit the speed changer site of Clideo, then hit the Choose File tab to upload your video.
Once your video is uploaded, click the 2x option from the speed control.
Then, hit the Export tab to download the video.
Is changing video speed online free of charge?
Yes. Most video speed changer online offers a free service. However, it would help if you watch out because the free tools often imprint watermarks on the outputs.
Can I turn the slow-mo video into its original speed?
Yes. You can do this task effectively with the speed-changing apps presented in this article.
Does changing the video speed affect the FPS?
Yes. Because changing the speed of the video means lowering or increasing the video’s FPS.
Now that you know how to change your video speed using the tools we have for you on different platforms you wish. Furthermore, with the given tools, you can unleash the video editing skill that is hidden inside you. But if you want to acquire the professional style, use the Video Converter Ultimate.
More Reading
Easiest Methods on How to Speed Up a Video on iPhone
Do you want to know how to speed up video on iPhone? This article will introduce applications and give you enough information that will be useful to you.
Best Speed-Up Video Application for Your Desktop, Android, and iPhone.
This article will provide good and excellent fast-forward video applications for your Desktop, Android, and iPhone that you can use to speed up your videos.
Top 9 Greatest Video Speed Controllers for Windows and Mac
Want to adjust the speed of your video? Here, we list out the best video speed controller online and offline that you can use for free.
Best Video Speed Controllers for Chrome and other Browsers
Best video speed controllers for Chrome, Firefox, Microsoft, and Safari browsers. Identify which they are and assimilate each if you click on this article post.
Speed up Video