How to Apply Fade Out and Fade In Effects to Audio with 7 Remarkable Tools

January 19, 2023 10:25Posted by Selena Thomas to Edit Video
You might have heard about the various beautiful effects of creating cinematic videos or short movies. One of the best effects to use on a video is the transition of the sound. And the fading in or out of background music as well. With the kind of technology that we have nowadays, creating these effects in our videos has been available anytime. In addition, many available video and audio editing tools have increased. Unfortunately, only some of the tools you see out there are effective. Sad to say, most tools are just singing their own praises, so why not stick to the popular yet tested to be reliable tools? Indeed, iMovie can fade audio as part of its incredible effects, and there is also this Premiere and other powerful ones. Therefore, allow us to impart comprehensive learning about reliable programs with their simplified steps for fading in or fading out the audio in your video.

Let’s begin with the best audio fade-out/fade-in hero on this post, Video Converter Ultimate. It is a video editing software perfect for beginners and professionals alike. Thanks to its intuitive interface, that makes all the video editing procedures easy. Therefore, If you want a program that is powerful and yet user-friendly at the same time, you better choose the Video Converter Ultimate. Furthermore, this software can edit and enhance your videos, pictures, and audio with the help of its Artificial Intelligence technology. Not just that, it is also infused with other advanced technologies that make it even more powerful, like Hardware and GPU acceleration. It is why, if you desire to create an audio fade out and fade in effect to your video, you can breezily and potently do it with Video Converter Ultimate.
What is more? This excellent tool provides you with many different options to edit your audio. While giving you a one-click audio fade function, it also allows you to loop-play, trim, delay, mute, and add multiple audio tracks to your file. Meanwhile, this video editor is available on both Mac and Windows, with support for more than 500 different file formats. All must agree that it went to the top of the other popular tools today. With that note, here is a simple instruction on how this tool processes this task.
Obtain the Software
This is how to fade in/fade out audio quickly. You must first download the video editing program on your computer by clicking the compatible Download button above. After the smooth downloading process, install the software and then run it.
Upload the Video File
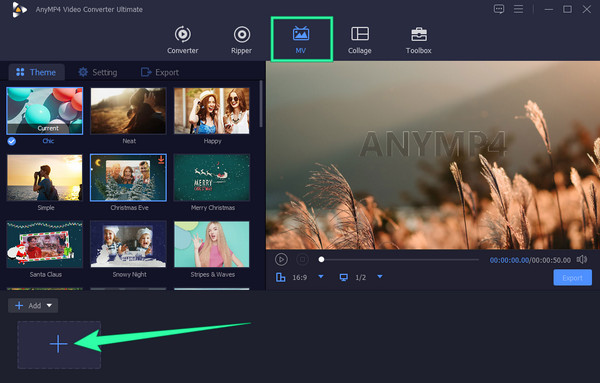
Upon running the software, it will direct you to its main interface. Click the MV tab among the menus above to access the next window. Then, hit the Plus sign at the left bottom-most of the interface to upload your file.
Apply Your Desired Audio Effect
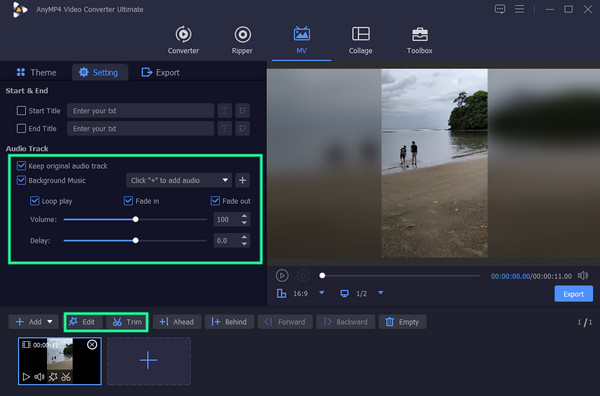
Once the video file is uploaded, go to the Setting tab at the top left of the UI. Then, tick the Fade in and Fade out checkboxes to apply them to your video. If you cannot check the effects, you can put a checkmark first on the Background Music box, then uncheck it afterward. Also, you have the option to trim and edit your video if you want.
Access the Export Menu
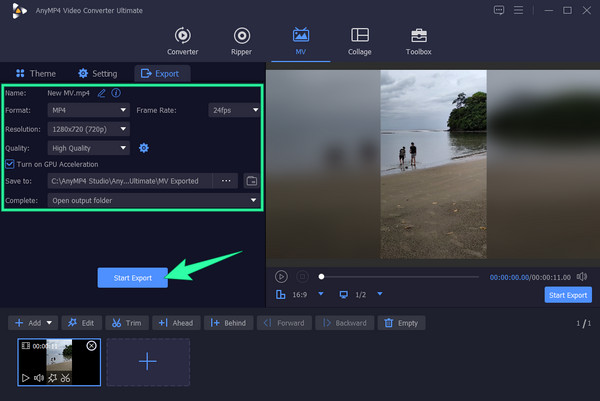
Afterward, head to the Export tab beside the Setting tab, then apply other presets such as format, resolution, framerate, and resolution. Also, you can set a destination folder for your output when you click the Ellipsis in the Save To section. Then, hit the Start Export button to start the saving process.
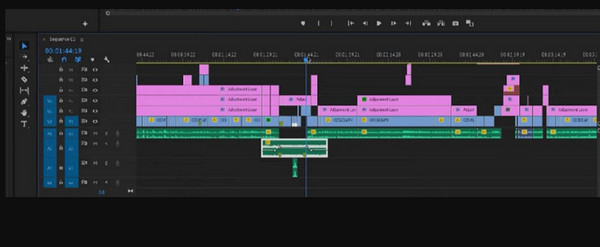
If you want to acquire truly professional audio and video editing software, Premiere Pro is one of the tools you can rely on. This video editing program allows you to work on various video and audio effects, including the popular Premiere Pro’s fade-out audio function. Upon using this famous software, you will notice that all the audio tracks appear on its timeline in green waveforms, and this tool enables you to remove them as you desire. We cannot deny how accurate or precise this software is regarding its editing process on video and audio files. You can expect to have excellent quality for your output. However, Premiere Pro has a native term for handling a fade audio application that only professionals could appreciate. Thus, if you want to learn how this software works on applying faded audio, the following steps are provided for you to rely on.
This is how to fade out audio in Premiere. Launch Adobe Premiere Pro after you successfully install it. Once opened, start to import your video by going to the File menu and selecting the Open tab. Note that you need to upload the video and audio files you need to use.
When the video is uploaded, hit the Audio Track in the timeline. Then, look for the Effects tab and click it to see its options. Once the options appear, hit the Audio Transitions option, followed by the CrossFade, then the Constant Gain selection.
After that, drag the Constant Gain to the end part of your uploaded audio. Then, remember to save your video file.
Similar to the previous software presented, the fade audio effect of Final Cut Pro is also excellent. This software offers many practical yet powerful tools for video and audio editing. These indelible tools are for applying effects, syncing video and audio, removing noise, and enhancing video displays and sounds. However, as this software provides excellent reasons to love it, it is noticeable that there is still room for improving it, and it is only workable on Mac desktops.
Launch the software, and start to load your video file to it. Then, drag it into the timeline.
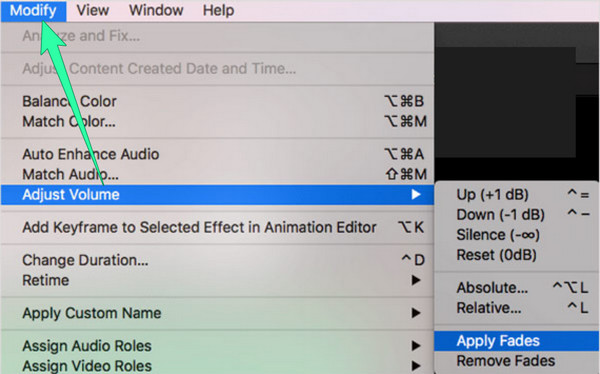
Now click the Modify tab, select the Adjust Volume option, then the Apply Fades option.
After that, you can check your video for the audio fade effects already applied in the beginning and end parts of the video. Then, save the changes.
Moving on is another software of Adobe, After Effects. This tool is an advanced program that enables you to modify the audio parameters using its DB meter, wherein 0 is the baseline. If you go lower than that, it will let you decrease the audio volume. Meanwhile, applying faded audio in After Effects is easier than with Premiere. It commonly lets you tweak the fade-in and fade-out layer from its opacity property. Indeed, it is the more accessible version of Premiere Pro. However, just like it, After Effects requires a high system condition before you can acquire it.
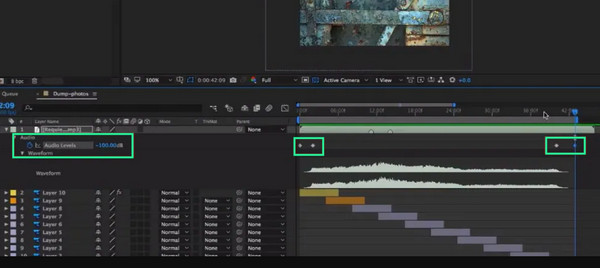
Launch After Effects and open the video file by uploading it to the timeline. Now, hit the arrow and the audio arrow, followed by the Waveform arrow.
Then, begin to add keyframes to your file. Place the play head where you want to place the audio fades, then place the keyframes and adjust the audio level settings after.
Once your keyframes are set, you can check your output to save. Click here to get how to speed up videos in After Effects.
Want an alternative method that will help you with your task? Try DaVinci Resolve’s fade-out audio effect. DaVinci Resolve is likewise a tool with powerful features. Furthermore, it helps you create a crossfade effect with many incredible transition effects, aside from its audio fades effects. Moreover, It enables you to easily detach audio from a video clip, allowing you to attach the detached audio to other video files. Unfortunately, this easy way of detaching audio does not apply to all its functions, for it still gives challenging procedures for others.
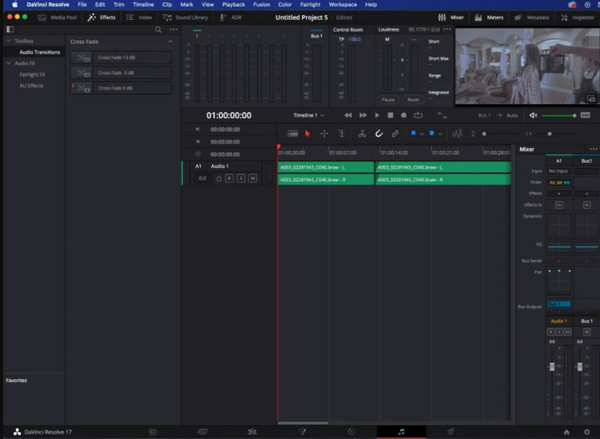
Open your file using this software, and go to its Fairlight page after.
On this page, click the Effects and select the Audio Transitions option. After that, you must choose your preferred crossfade option and bring it into the timeline.
After that, feel free to check and then save the new file.
And here comes the popular video editing software of Apple, the iMovie. You can label it as the universal tool for Mac and iOS devices since it is a built-in tool. Hence, as mentioned previously, you can depend on iMovie to fade audio since it is one of its nice effects. Besides, you also can use iMovie to add texts to videos. On this note, may you not crave this software on your Windows desktop because it won’t ever fit it.
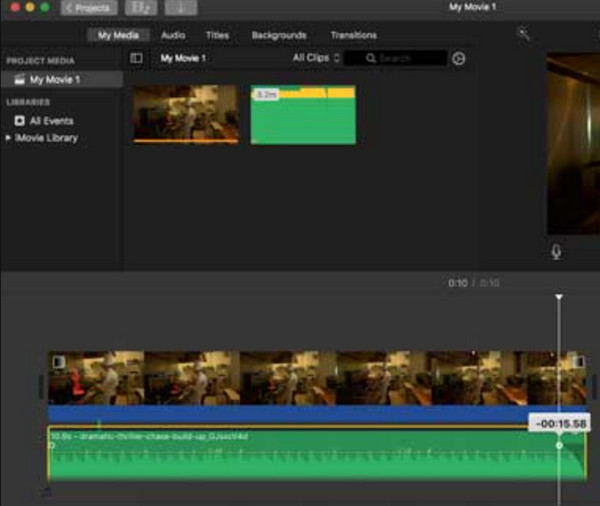
Click the New Project option once you launch iMovie. This will let you upload your video as well. Once the file is in, click the Project option and choose Show Waveforms.
Click the waveform to edit the fading audio effect by dragging the fade bar.
Lastly, drag the play head to where you want to apply the fade-in and fade-out effects. Then, save the project.
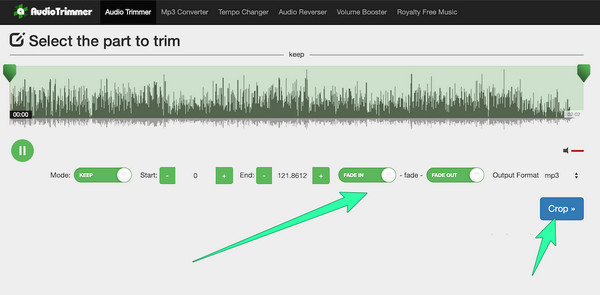
You better use the Audio Trimmer tool to have a better experience with the audio fade-out effect online. It is a free online file editor that instantly lets you fade in and fade out music, songs, audio, and other audio files. However, as given for an online tool like this, you can only expect it to work with the required internet strength. Thus, if you have a strong internet at home, you may follow and execute the simple instructions below.
Visit the tool’s website, and import the file you want to work on.
Once the file is in, click the FADE IN or the FADE OUT button, whichever you want.
Then, click the Crop button to apply the changes. Then, save the file.
Do the fade-in and out effects lessen the quality of my video?
No, if you will use the tools presented in this post.
Do fade-in and fade-out only apply to audio?
No. You can also apply this fade-in and fade-out effect in video transitions.
How long can I enjoy the fade-out audio in my clip?
It depends on the applied setting. Commonly, it lasts up to ten seconds.
All the programs, including iMovie, have audio effects. And all of them are excellent when it comes to fade in or fade out audio in the video so that you can choose freely. However, if you are just a beginner and an aspiring professional editor, choose the one with a simple procedure yet excellent features like Video Converter Ultimate.
More Reading
How to Delay Audio: Full Guidelines with the Best Tools
Do you want to know the fundamental steps for delaying audio of video? This is surely a unique yet exciting act to perform. See this post to learn methods.
Add Audio to Video with 3 Video and Audio Merger Tools
How do I add music to an MP4 video? How to replace audio in a video? How to merge audio and video online? Learn 3 ways to add audio to video from this post.
Various Ways to Fix Audio and Video Out of Sync on Windows
It’s troublesome to watch a movie if the audio and video are out of sync. Know how to fix audio and video out of sync using these various programs below.
Know the Best Way to Fix OBS Audio Delay [Windows and Mac]
Are you suffering from OBS audio delay issues? Please find out the reasons for the OBS audio delay and how to troubleshoot them by reading today’s post.
Edit Video Audio