How to Stabilize Videos in Premiere: A Walk-Through Guide

December 29, 2022 10:00Posted by Selena Thomas to Edit Video
It is inevitable to have shaky and grainy videos after recording. Fortunately, this uncontrollable situation has a lighter weight now since there are many ways to fix it. One of the professional ways to go through this is by using Adobe Premiere Pro since it has been proven to be a reliable video editor to use. For this reason, we want to provide you with complete steps on how to stabilize videos in Premiere by giving you the full guidelines to do so. We understand how time-consuming it is to fix a video using this software since it is not as friendly as you think. Nevertheless, many still choose it due to its undeniably excellent video editing features. Thus, know the instructions by reading the entire content below.
We couldn’t agree more that Premiere is a great video editing program. Still, the question is, can you stabilize the video in Premiere? Well, it is a yes to answer this. Adobe Premiere Pro is a software capable of turning your videos into neat, stabilized ones and producing them in high quality. Furthermore, this excellent video editing program uses a handy tool called the Warp Stabilizer, which processes the stabilization without any complications. If you are wondering how to use this Warp stabilizer of Premiere, you can rely on the steps below.
Open the Premiere Pro that is installed on your computer. Then, instantly import the video you need to fix, and place it on the tool’s timeline to start stabilizing shaky video in Premiere.
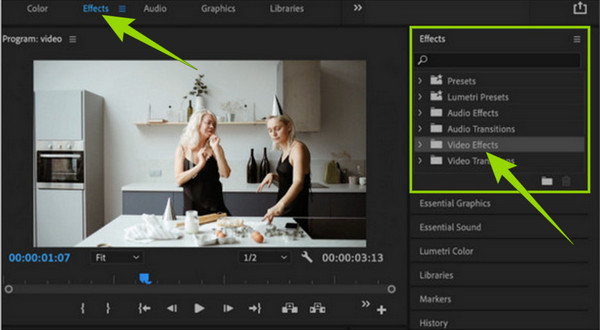
Once the video is on the timeline, go to the Effects menu at the right corner of the interface. Click the menu, hover over the Video Effects folder under the Effects option, then open it.
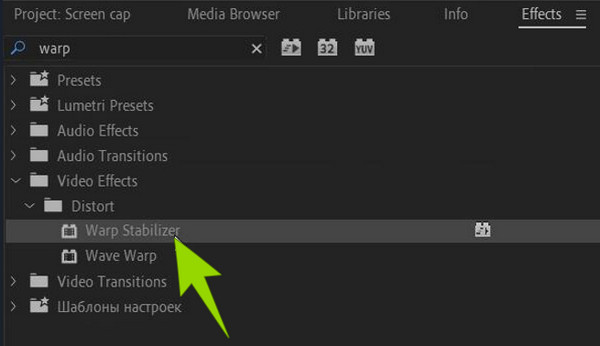
Once the Video Effect is opened, scroll down and look for the Distort folder. By opening this folder, you will see the various options for your video file. However, this time you must choose the Warp Stabilizer selection. After selecting this option, the tool will start to analyze your video.
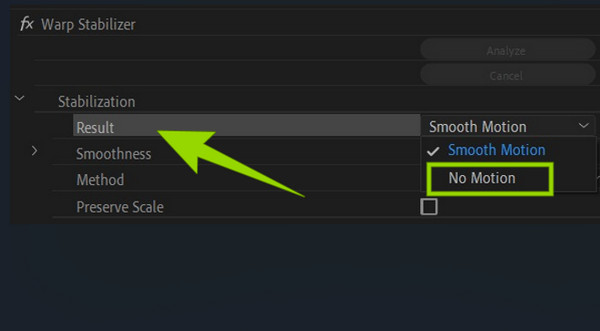
This is how to stabilize a shaky video in Premiere Pro. While the video is being analyzed, you can proceed to the adjustment. Tweak the Smoothness parameter to modify the overall video. Thus, to have a still camera effect, go and hit the Stabilization tab, then select the Result tab and the No Motion option after. However, choose the Smooth Motion option if you only want to eliminate the shakiness of the video with the original camera movement.
Finally, to apply the changes, hit the Analyze button. Then, check the result and proceed to save the edited video. You also can improve video quality in Premiere.
If you realize that removing noise and grain from video in Premiere Pro does not suit you, then we have a much easier way for you to use. Video Converter Ultimate is another excellent video editing software with a simple and easy-to-understand procedure for stabilizing a video. It is due to the advanced technology that it uses within its video enhancer, where its stabilizer lies. This video enhancer is powered by AI, making it beneficial for users. Imagine, with that artificial technology, you will be able to stabilize and make your video neat in just a few clicks. On top of that, it will not require you to be an expert to do so, unlike stabilizing shaky video on Premiere. For it will only let you upload your video. It will do all the tasks for you!
What’s more impressive is its ability to upscale the resolution, remove the noise, and optimize the brightness and contrast of your video while in the stabilization process. Not just that, it lets you manually tweak your video’s format, segment, and resolution within the same page, giving you a personal touch of your output. Meanwhile, here are the main functions and features of Video Converter Ultimate that you need to watch out for.
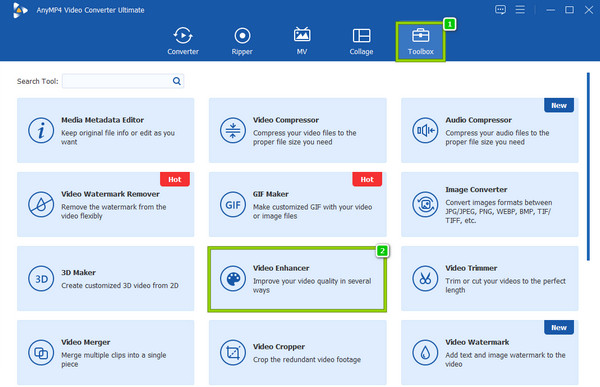
Launch the best video editing software after acquiring it via free download. Then, on its main interface, go to its Toolbox section and look for its Video Enhancer.
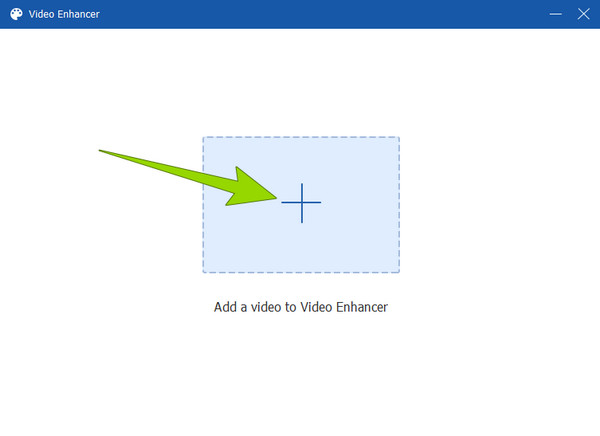
After clicking the Video Enhancer tool, it will bring you to a window where you must import the video. Hit the Plus icon at the center of the window and get the video from your local folder.
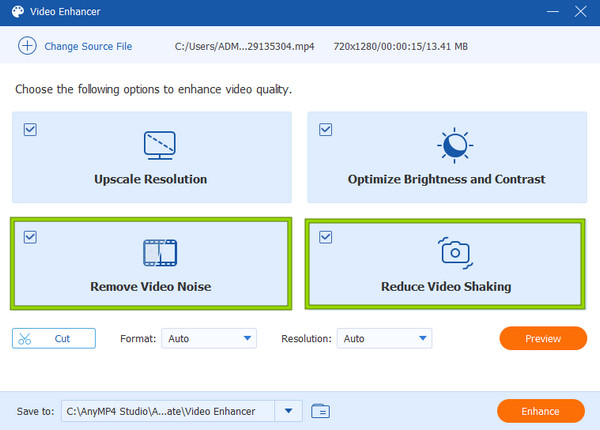
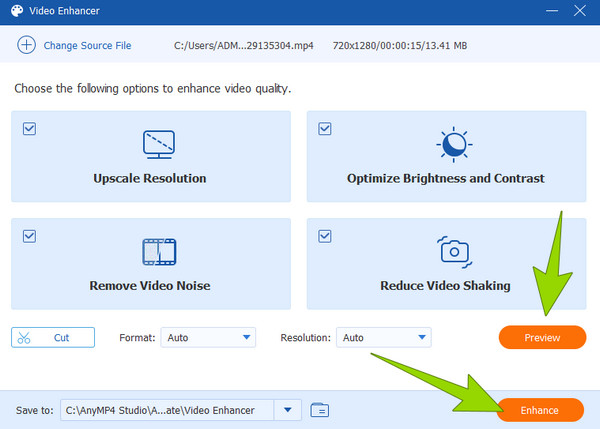
On the new window, tick the Reduce Video Shaking and Remove Video Noise options. Also, you can toggle the other options if you want to apply them to your video.
For this additional step, you can access the Resolution section if you want to modify the quality display manually. Choose among the resolution options and click it.
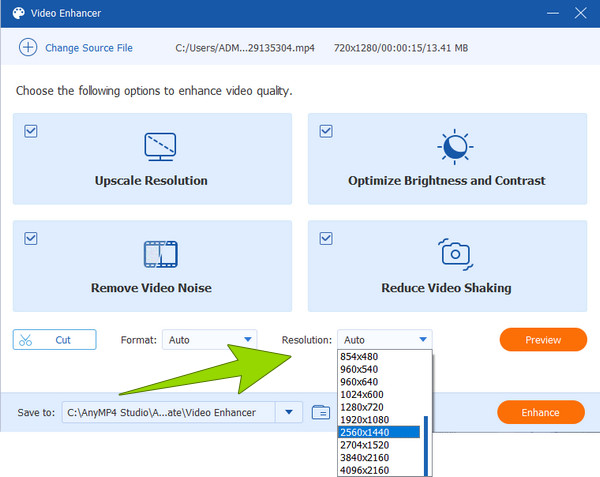
Finally, you can click on the Enhance button to apply the changes you made. Otherwise, if you want to double-check the changes, you can hit the Preview tab first.
Is it safer to remove grain from video online than Premiere?
No. If you are in a situation where you need to choose between an online tool and Premiere, then it is much safer to do the task with Premiere. However, many online tools are safe to use. But if you doubt the online process, it’s better to use Premiere, or its best alternative, Video Converter Ultimate.
Can I use Adobe Premiere for free?
Yes. Adobe Premiere Pro lets you use it for free using its 7-day free trial. During this free trial, you can enjoy the full version of the software.
Why did my video get cropped after using Premiere’s Warp Stabilizer?
You need to look for this issue when using Premiere’s Warp Stabilizer. This feature sometimes crops the video too much to clean the video. Hence, to avoid this circumstance, pull back and adjust the crop settings in the warp Stabilizer.
With complete and detailed tutorials on stabilizing videos in Premiere in this post, you can edit your shaky videos anytime. As we mentioned previously, having shaky is inevitable. But thanks to powerful video editors like Premiere and Video Converter Ultimate, this won’t be a hassle anymore!
More Reading
2 Highly Commendable Ways on How to Crop Video in Premiere
How to crop video in Premiere? This post will assist you in learning how to crop video in Premiere effectively by providing a full instructional approach.
How to Create DVD from Adobe Premiere Pro (Beginner Friendly)
Want to burn your files into DVD but do not know how to start? In this guidepost, our team will guide you to do it using Adobe Premiere Pro.
Full Guide on How to Create a Slideshow in Premiere Pro
Learn the tips and tricks in creating a slideshow in Premiere Pro. This guidepost will help you understand Adobe Premiere Pro better for your next slideshows.
A Walkthrough Guide on How to Speed Up Videos in Premiere
Have you desired to use Premiere for video editing? Do you want to know how to fast-forward a video on Premiere? Then, click this post to learn the procedure!
Enhance Video