Aug 27, 2025Posted by Kevin Miller to Create DVD
Although modern media consumption has largely shifted to streaming and digital files, many users still want to burn their iMovie projects to a physical DVD. This has become a challenge since Apple discontinued its DVD authoring application, iDVD, making it difficult for users of newer macOS versions to create professional-looking DVDs with menus and chapters. By burning DVDs, people can enjoy creations on a television, have a tangible copy for safekeeping and as a physical backup, share memories with friends and family who may not have access to digital files, and archive projects for the long term. This article will share 2 easy ways to burn iMovie to DVD with helpful tips and tricks.

- Part 1. Prerequisites Before Burning
- Method 1: Burn iMovie to DVD Using Blu-ray Master Picked DVD Creator
- Method 2: Using Mac's Built-in Finder (For Basic Burning)
- Part 4. Troubleshooting Tips
- Part 5. FAQs
Part 1. Prerequisites Before Burning
A. Export Your iMovie Project
Before you burn iMovie files to DVD, you need to prepare the video files you want to burn to DVD. We will simply show you how to do it.
Step 1.Launch iMovie, open the project you want to export, and ensure it is finalized and ready to be exported.
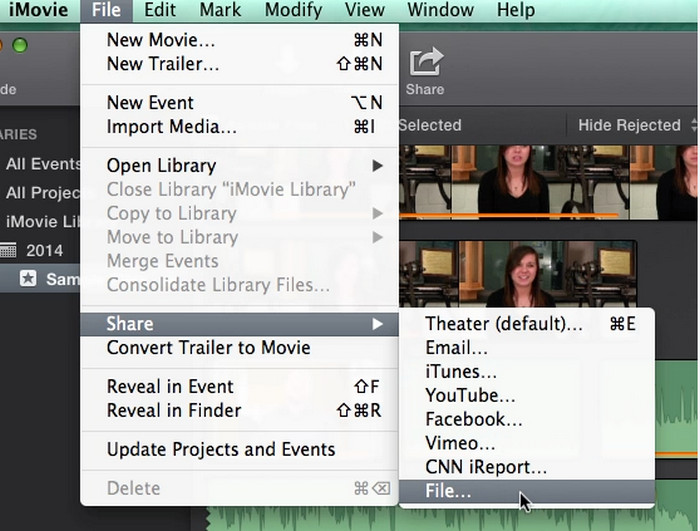
Step 2.Select the movie you want to export, and click File in the top menu bar. Then, choose Share > File to proceed.
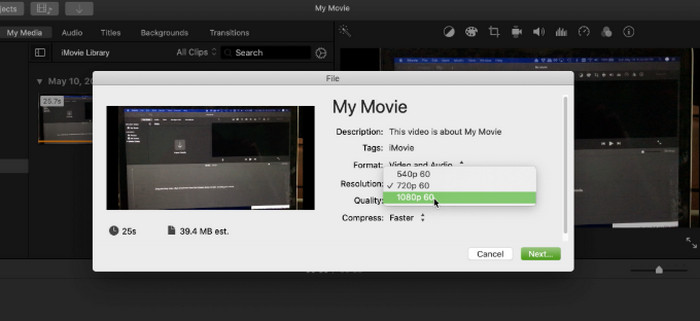
Step 3.A dialog window containing different export settings will show up. You can modify your movie's output parameter in this window. Once your preferences are established, select Next to export iMovie to MP4.
B. Blank DVD Discs
The blank DVD type you used to burn data on is important for subsequent DVD playback on DVD players. Two of the most popular varieties are DVD-R and DVD+R.
DVD-R: Widely regarded as being more compatible with older DVD players. When burning video DVDs that you wish to play on several devices, it's frequently the safest option.
DVD+R: Usually burns a little faster and has a more sophisticated error-correction system. Although the majority of contemporary DVD players are capable of reading both formats, DVD-R is the more dependable choice if you're not sure of the target player's age.
The capacity of a typical single-layer DVD is 4.7 GB. You'll need to divide your project into several sections or use a dual-layer disk (DVD+R DL or DVD-R DL) if your exported video file is larger than this.
C. DVD Burner Drive
Your Mac requires a DVD burner drive in order to burn a DVD. A built-in internal drive was a feature of older Mac computers, such as some iMacs and MacBooks. But the majority of contemporary Macs don't.
You will need to buy an external optical drive if your Mac does not have an internal drive. These drives use a Thunderbolt or USB connector to connect to your Mac. Although numerous third-party vendors also provide dependable external drives, Apple's own USB SuperDrive is a well-liked choice. After connecting, your Mac will identify it as a burner, allowing you to build your disc using DVD authoring software.
Method 1: Burn iMovie to DVD Using Blu-ray Master Picked DVD Creator
The first recommended tool for burning iMovie to DVD is Blu-ray Master DVD Creator, which excels in fast and stable DVD burning performance. It is a powerful tool that allows you to input MP4, MKV, AVI, FLV, MOV, and other video file formats into the software and burn them all to DVD discs, folders, and ISO image files. It also offers many editing tools for you to adjust video, audio, and subtitle effects.
Moreover, it provides many menu templates for you to customize your DVDs. It is available for both Windows and Mac computers.
Now, let's see how to burn iMovie to DVD using Blu-ray Master DVD Creator.
Step 1.Download and install Blu-ray Master DVD Creator via the download buttons below.
Free Download
For Windows
Secure Download
Free Download
for macOS
Secure Download
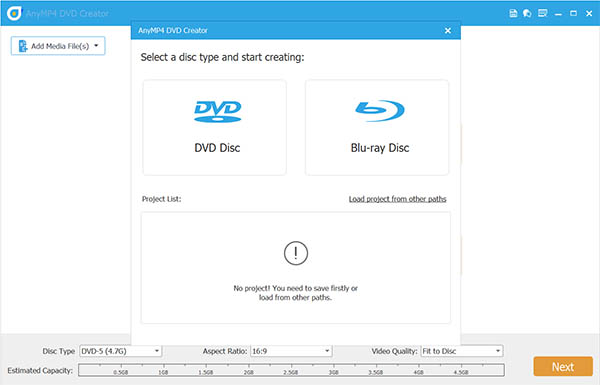
Then, launch the software and choose DVD Disc in the pop-up window.
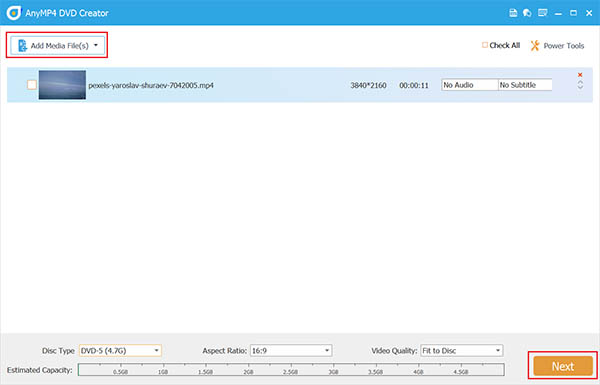
Step 2.Click Add Media File in the center of the interface to add the exported iMovie files. Then, you can set Disc Type, Aspect Ratio, and Video Quality at the bottom. Click Next to proceed.
Note: You can also click Power Tools to open the right panel to use various editing tools to adjust your video effects.
Besides, the software would show the estimated size of your imported files at the bottom, and you are allowed to import iMovie files that totally up to 5GB.
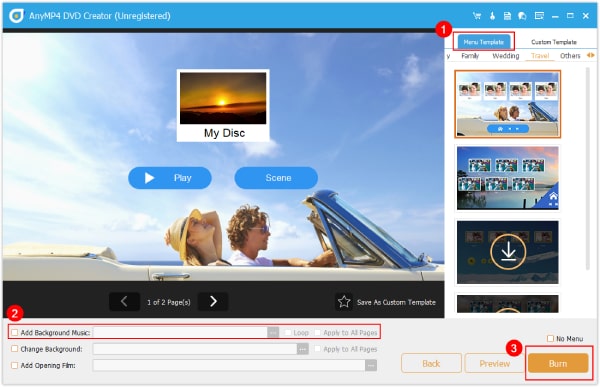
Step 3.You will see many menu templates of different topics, and choose the desired one from them. You can also add background music, change the background, and add an opening film with the provided settings.
Next, choose the Burn button in the corner to go on.
Step 4.Finally, set the destination and TV standard, and click Start to begin the iMovie to DVD process.
Pros
- It supports a wide range of formats for input, including the formats that iMovie can export.
- It provides editing tools for you to select and add external audio tracks and subtitles to the videos.
- It has a clear and intuitive interface for you to burn iMovie to DVD.
Cons
- The free trial version provides a limited time for burning DVDs.
- It does not support advanced audio formats like Dolby Atmos or DTS HD Master.
Method 2: Using Mac's Built-in Finder (For Basic Burning)
The Finder, macOS's built-in file management software, acts as the user interface for locating and arranging files, directories, and apps. Additionally, Finder comes with a basic built-in feature for burning files to and DVDs. With the use of this function, you can make 'Burn Folders' in which they can store files that they wish to burn; these files are handled as aliases to conserve space. Finder has the ability to write the iMovie video files straight to a blank disc when it is placed into an internal or external optical drive.
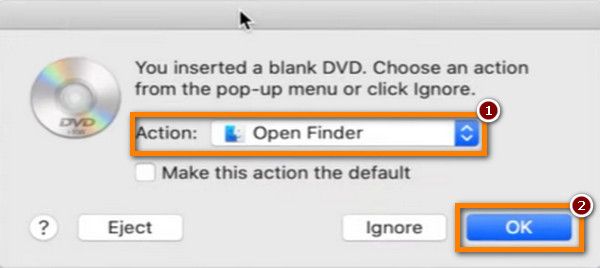
Step 1.Launch Finder on your computer, and insert a blank DVD disc into the optical drive.
Step 2.Await the appearance of the pop-up window menu. Select the Open Finder option and click the OK button after that. Your inserted disc will then be shown in Finder.
Step 3.Choose the exported iMovie files you wish to burn. Next, copy and paste it onto the blank DVD that you have inserted. Click the Burn button in the top left corner to proceed.
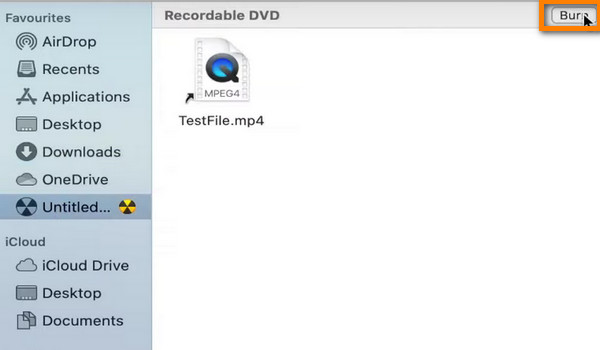
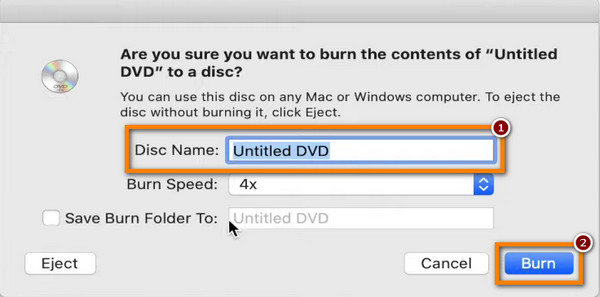
Step 4.Customize output settings in the pop-up window, and select Burn again to start the burning process.
Pros
- It is a built-in tool in Mac computers, which provides great convenience.
- Its steps are easy and intuitive for even beginners.
- It is a free tool with no extra fees.
Cons
- It lacks advanced features for DVD burning.
- If the disc quality is poor or the burning speed is set too high, the Finder may be prone to errors.
Part 4. Troubleshooting Tips
During the DVD burning process, you will encounter many problems. Here are some tips to explain the various situations.
My DVD Won't Play on My Standalone DVD Player
This is a frequent problem with a few potential explanations, most often having to do with the burned disc's compatibility with your device.
Disc Type: Not every recordable disc type can be read by every DVD player. DVD+R discs can be problematic for older devices in particular. A DVD-R disc is more compatible with a greater variety of players, so try using one.
Burning Speed: Attempting to burn a DVD as quickly as possible may result in faults that prevent some players from reading the disc. Try burning the disc once more, but at a slower pace (for example, 2x or 4x). Accurate writing of the data is ensured by slower burning.
Media Quality: Playback problems may arise if you use cheap or subpar blank CDs. For optimal results, buy premium, name-brand discs.
The Burning Process Failed
A failed burn is frequently brought about by one of the following:
Disc Quality: The burn may not pass if the blank disc is defective or scratched. Take a look at a fresh disk.
Burning Speed: Similar to problems with playback, an excessively high burning speed can overload the drive and result in a failed burn. Select a slower speed.
File Corruption: There's a chance that the video file you exported from iMovie is unstable. Before trying to burn the iMovie project, try exporting it once more to a fresh file. Additionally, avoid using your computer for any other demanding tasks while the burn is underway, since this may disrupt the data flow and result in a failed burn.
My Mac Doesn't Have a DVD Drive
You will require an alternative solution because optical drives are no longer integrated into modern Macs.
Purchasing an external optical drive to load DVD discs is the simplest way to solve this problem. One choice is the Apple USB SuperDrive, but there are several, frequently less expensive external drives made by third parties.
Can I Burn a Blu-ray from iMovie
Yes, you can. Similar to burning iMovie to DVD, you need to first export iMovie video files, and then use the professional Blu-ray burning software to burn a Blu-ray from iMovie.
Why Did Apple Remove iDVD
Due to the growing popularity of digital alternatives and the waning value of traditional media like DVDs, Apple discontinued iDVD. The last time the program was included with a Mac was in 2011. Video burning onto physical CDs became less necessary as high-speed internet became more widely available and digital streaming services and cloud storage gained popularity. Apple's attention switched to its own systems, like iCloud and iTunes (now the TV app), which let consumers store and exchange digital video material.
Part 5. FAQs
-
Can I burn iMovie to DVD without iDVD?
Yes, you can. Since Apple discontinued iDVD, many modern DVD burning software enables you to burn iMovie to DVD with ease.
-
What format should I export from iMovie to burn to DVD?
The best format to export from iMovie for DVD burning is generally an MP4 or MOV file. These are standard formats that are widely compatible with DVD creation
-
Will the DVD play on a regular DVD player?
Yes, as long as you use DVD authoring software to create a proper 'video DVD' format.
-
Is Blu-ray Master DVD Creator free?
No, it is paid software. But it provides a free trial period for you to test its burning effects.
Conclusion
With the detailed information about how to burn iMovie to DVD, you can now easily export your iMovie video files and burn them to DVDs. Follow the detailed steps and notice the provided tips for the successful burning process. If you prefer rich burning settings, Blu-ray Master DVD Creator is the best choice, and try it immediately!.
More from Blu-ray Master
Videos to DVD