Oct 17, 2025Posted by Kevin Miller to Create DVD
One may think that DVDs are considered outdated. Still, you might regret later taking them for granted right now. In a world where almost everything becomes accessible online, you may still need to add a personal and sentimental touch to your photographs or videos. But, if we are using a mere DVD disc, how can you make your creative side work? Hence, one way to achieve this is to create a DVD menu.
Of course, if you want to make the best menu for your DVD, you also need the best tool to do it. Stay tuned to this guidepost, and we will guide you to pull odd in creating a DVD menu in premiere pro and DVD Creator.

- Part 1. Make A DVD Menu with Blu-ray Master DVD Creator
- Part 2. Create A DVD Menu with Adobe Premiere Pro
- Part 3. Make A DVD menu with WinX DVD Author
- Part 4. FAQs About Making DVD Menus
Part 1. Make A DVD Menu with Blu-ray Master DVD Creator
Since there are a lot of competing tools in the market, do not go far from DVD Creator. This offline tool is known for its sleek interface, allowing even beginners to create the DVD menu successfully. DVD Creator contains various templates suited for your themes, whether the video you recorded during the Christmas season, birthday, graduation day, summertime, etc. What is more, you can customize your template by adding your name, positioning the play button, making your work impressive. Aside from its primary work to author DVDs, it contains a built-in video editor where you can spice up your files before showing them.
To give you a detailed guide on making a DVD menu, refer to the steps given below:
Step 1.Install the Program
To begin, click the free buttons below to download the program on your device. After that, open to run and follow the setup wizard to install.
Free Download
For Windows
Secure Download
Free Download
for macOS
Secure Download
Step 2.Import the files on the software
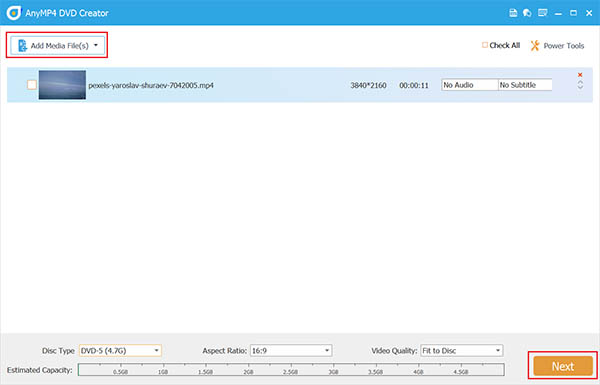
Select the DVD Disc button as your disc type when the program launches. Then, hit the Plus icon on the center of the interface. Select the video files you want to include in your DVD when your computer folder appears in the pop-up window.
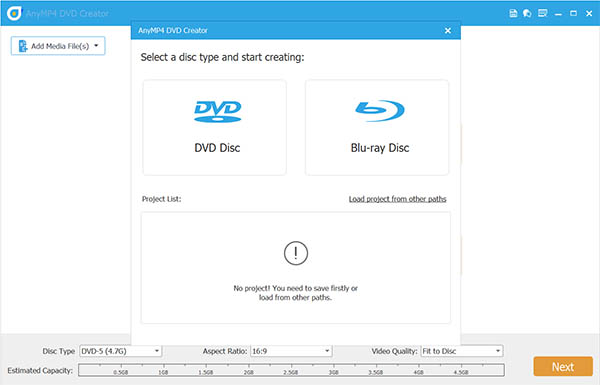
Along the bottom of the interface, you will have to configure the technical settings according to the type of DVD Disc you have. First, check the storage capacity of your disc, and select if its falls under DVD 5 or DVD 9. Then, move on to the Aspect Ratio to determine the frame size of your file when played on the screen. Lastly, on the Video Quality, select one from low to high. After doing this, tick Next.
Step 3.Customize your DVD menu template
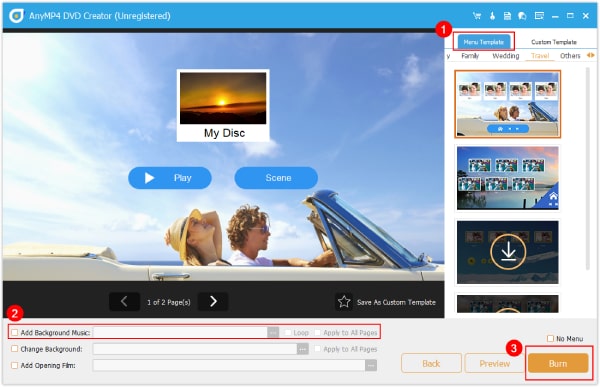
Now, this is the fun part. From the left part of the interface, there are unquantifiable templates you can match for your project's theme. On the editing panel, move the Play and Scene buttons wherever you want to place them. Next, rename the My Disc to your likings, such as your name, Christmas eve, my favorite season, etc.
Step 4.Add Background Music
On the other hand, check the Add Background Music and upload your file. By checking the Loop, it means that the playlist will play repeatedly. If you prefer a different picture for your template, tick the Change Background. You can hit Preview to check your output, or if you are already satisfied, proceed to Burn.
Step 5.Start Burn DVD
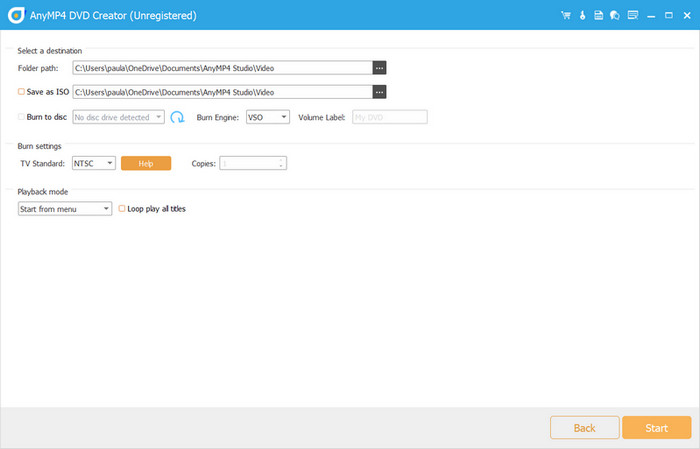
Lastly, adjust the output settings and click the Start button to begin the DVD burning process.
You must now be clear about how to create a DVD menu. With these simple and intuitive steps, you can easily make your personal DVDs more stylish and attractive. If you are not satisfied with the provided menu templates, you can also customize them by importing music and beautiful background images. It is a paid software that you can try its free trial to evaluate its performance.
Part 2. Create A DVD Menu with Adobe Premiere Pro
Adobe Premiere Pro is one of the timeline-based video editing software most professionals use. However, if you need to create a DVD menu for your files, you need to use Adobe Encore and Adobe Photoshop. To put it simply, after you are done editing your files on Adobe Premiere, you have to export them on Encore.
Without further ado, this is the simplified way that you can follow:
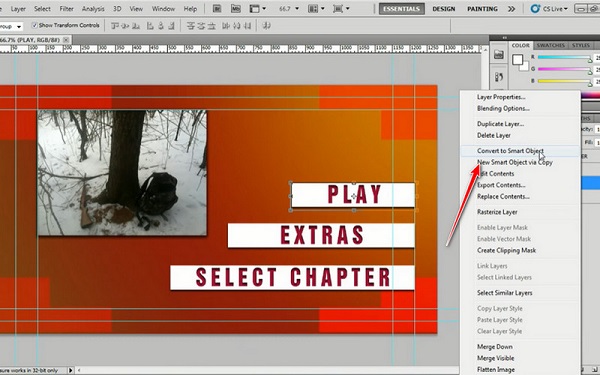
Step 1.Using Adobe Photoshop, create an image for your chapter menu. In the template, add text for the title of your DVD Disc and create a box that will indicate the play and the chapter button. After doing this, hit right-click to your layers on the layer panel and select Convert to Smart Object. After that, save the file.
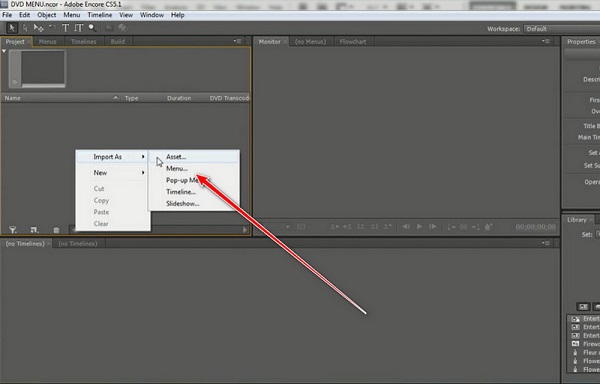
Step 2.Next, open your Adobe Encore and select New Project. Hit right click>asset on the project panel and select the video files you edit from the Premiere. Do the same thing, but this time, after hitting right-click, select Menu and import the project you created a while ago on Photoshop.
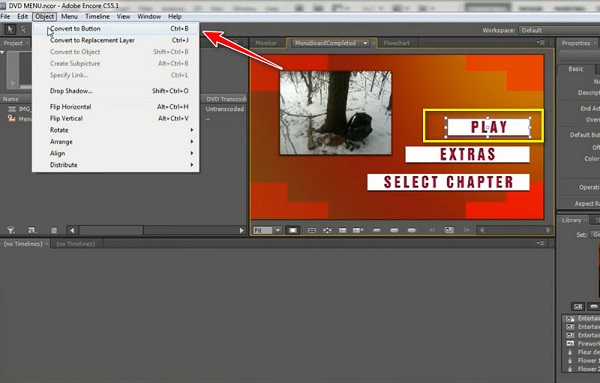
Step 3.Select the boxes from your created template on the preview panel. Hit right-click and select the Play layer. Then go to Object> Convert to Buttons. Do the same for the other layers you put in your menu to convert them into buttons.
Step 4.After that, drag your imported video according to the button you want them to be played with. At last, before burning your DVD file, check the DVD menu on the Project Preview, which you will see at the tool tab.
For professionals, Adobe Premiere Pro offers comprehensive tools for them to make DVD menus in detail and export the created menus for quick use. It is a pity that this tool doesn't have menu templates for you to use. After DVD menu customization, you need to use these menus with another DVD authoring tool.
Part 3. Make A DVD menu with WinX DVD Author
Now, proceed to explore the last DVD burning software, WinX DVD Author, a powerful tool that enables the conversion of multiple video files to DVDs. As a free and user-friendly DVD authoring software, you can use it to create DVD menus within several clicks. It features basic editing tools like trimming and cropping, and lets you personalize your discs with background music, chapter menus, and subtitles. It supports a wide range of video formats, including MP4, AVI, MKV, and FLV, allowing you to create DVDs without limitations. Compatible with Windows 10 and 11, it’s a lightweight yet powerful solution for home video archiving or sharing multimedia content in a physical format.
Follow us to see the detailed DVD menu creation process.
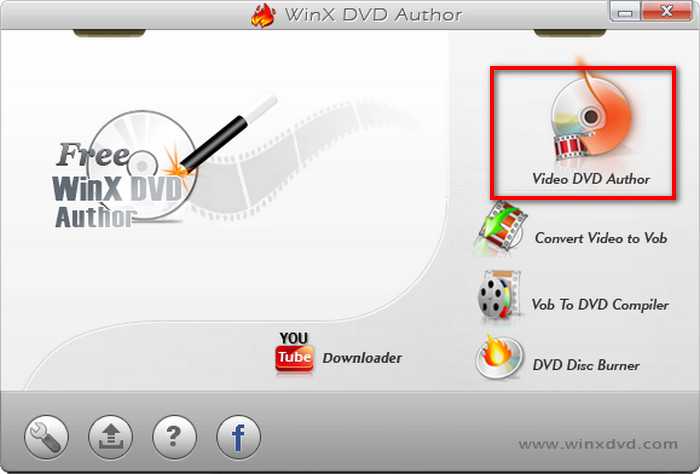
Step 1.Download and install WinX DVD Author via the official website. Open the software on your computer and choose the Video DVD Author option.
Step 2.Click the + button at the bottom to import the video files you want to burn. You are allowed to import multiple video files of different formats.
Then, you can see the information about the loaded videos, and click the Next button to proceed.
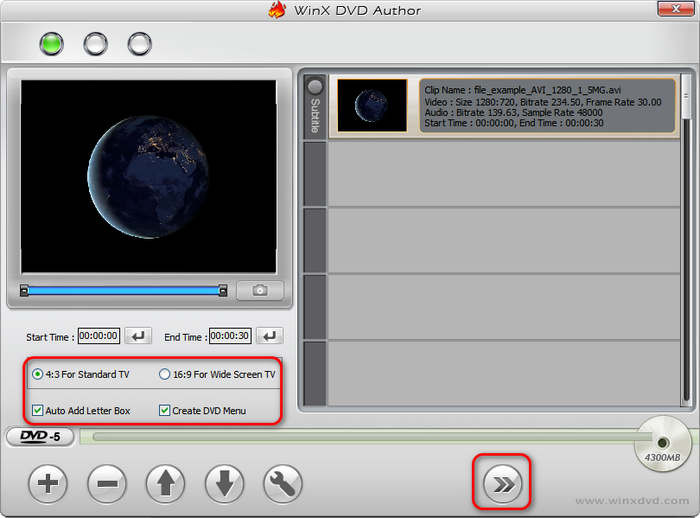
Step 3.In the menu interface, you can see various menu templates. Choose one preferred, or you can use the provided settings to customize the background text, music, and others.
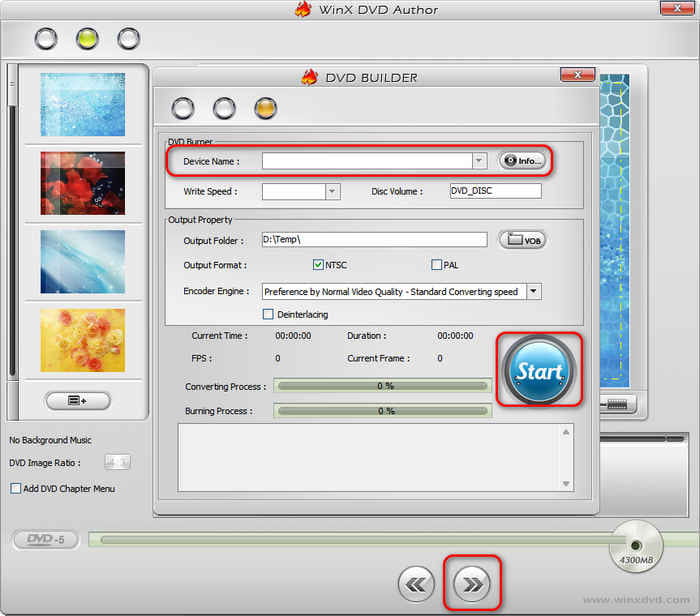
Step 4.Click Next to enter a new window. Set the information of the created DVDs and choose the Start button to begin the burning process.
Now, you have learned how to use this easy tool with intuitive steps. When we try this tool, we are happy with its efficient video burning process. Many people praise its ease of use and friendliness. However, it is a Windows-only tool, and some people reflect that its interface is a little outdated.
Part 4. FAQs About Making DVD Menus
-
Can I make a DVD menu in Windows Movie Maker?
Definitely, no. Windows movie maker is a native program for Microsoft Windows. Primarily the purpose of this tool is to edit your videos, but it is not for DVD menu creation. You can do it through Windows DVD Maker if you want to create one. If you want to create a DVD menu, you’ll need to use Windows DVD Maker or explore the best Windows DVD Maker alternatives that offer more customization, compatibility with Windows 10/11, and advanced authoring tools.
-
How to create a professional DVD menu on a mac?
Unfortunately, unlike windows, there is no built-in program to do DVD authoring on your mac devices. However, this does not mean you can no longer do a DVD menu. Adobe Premiere Pro can do the work if you need a professionally made DVD menu for yourself. Besides, this program is packed with great features to spice up your work while editing them.
-
Is there a DVD menu creator online?
Unfortunately, there are no online programs that can do DVD authoring and menu making. One reason is that this type of activity is comprehensive. Besides, DVD authoring sometimes takes too long, and the video files consume a large amount of space that an offline program may not be able to hold.
Wrapping up
Indeed, you will not walk away without a lesson learned on how to make a DVD menu after reading this article. As they say, a video is like a storyboard, but it will be more remarkable if your DVD menu creates a strong impression right away when your audience inserts it on their player. While Adobe Encore Requires is an excellent tool, it may not be easy to maneuver for beginners. On the other hand, you will not be required to install a third-party program and do the DVD burning and DVD menu directly with Blu-ray Master.
More from Blu-ray Master
Digital to DVD