How to Crop Video on Mac in 3 Easy Approaches (With Pictures)

January 07, 2022 10:39Posted by Selena Thomas to Edit Video
Have you ever been frustrated by unnecessary things getting in the way of your video footage? Have you mistakenly included a dirty background and wished to eliminate a specific area of your film? Have you been unaware that you downloaded a movie with black bars that didn’t suit the screen on your computer? If any of these issues are evident, these can be resolved quickly and easily by cropping the video with the assistance of the best free video cropping software for Mac. Indeed, the video cropping tools for Mac that we have recommended in this post are more than just standard video cropping tools. They can also be used as professional video editing programs on both the Mac and Windows operating systems, as we have demonstrated in this article. So you can use this application to make your video files look precisely how you want them to look by adding your personal touches to them. Continue reading if you want to learn how to crop video on Mac.

Three of the most popular options – Video Converter Ultimate, iMovie, and QuickTime Player – have been examined to assist you in selecting the best editing tool that will provide you with the greatest overall experience in cropping video on Mac. Starting with Video Converter Ultimate, let’s see how it goes.
If you’re seeking the quickest and most convenient way to crop video on Mac, Video Converter Ultimate is your best bet. It has built-in editing features that will let you crop, trim, split, cut, and flip your video files. More so, this software includes many unique functions, including its versatile toolbox kit such as GIF creation, converting handmade DVD movies, and many more. It can support more than 500 different video and audio formats as input and output. What is particularly impressive about this tool is that it converts files at a rate that is 70 times faster than any other editing tool without sacrificing file quality. Isn’t it amazing? In addition, you can change the resolution, bitrate, frame rate, and audio setting, as well as apply fantastic filters and tweak the effects. Please allow me to jump right into the simple methods on how to resize video on Mac using Video Converter Ultimate without wasting any time.
Key Features
Select the download buttons
To begin, you can select one of the download icons that have been given above. Alternatively, you can download and install Video Converter Ultimate directly from the official website of the software.
Import your videos
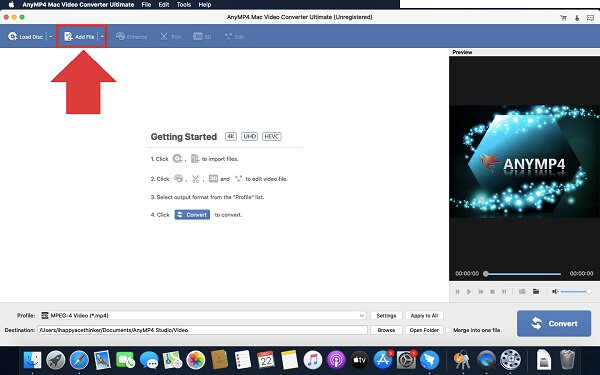
Next, to upload your video into the main interface hit the Add Files button to import your files.
Prepare to edit
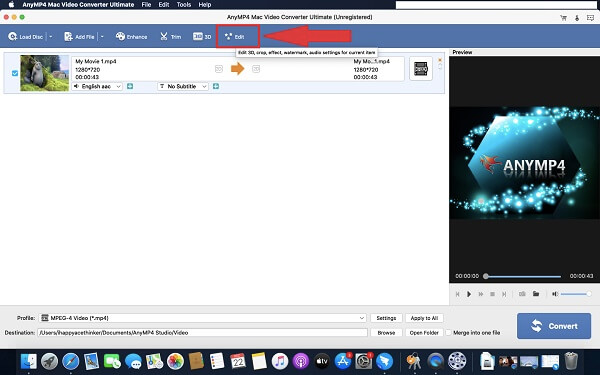
Upon importing the file, click the Edit button to the newly inserted video clip’s left.
Crop the clip now
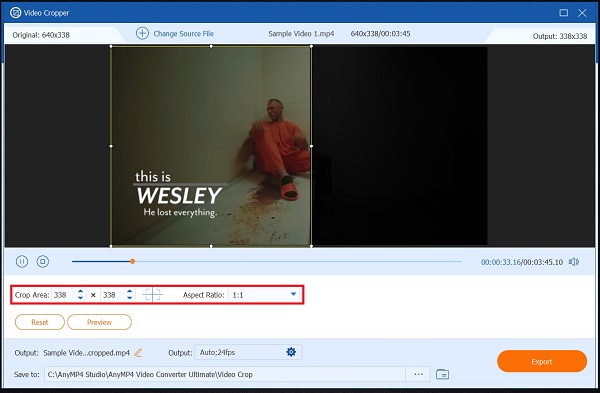
After selecting the edit button, a new window will open. Select Crop and manually crop the clip by dragging the handlebar, or select the crop area of the movie instantly. Once the video is configured, click the OK button.
Change the video format before exporting
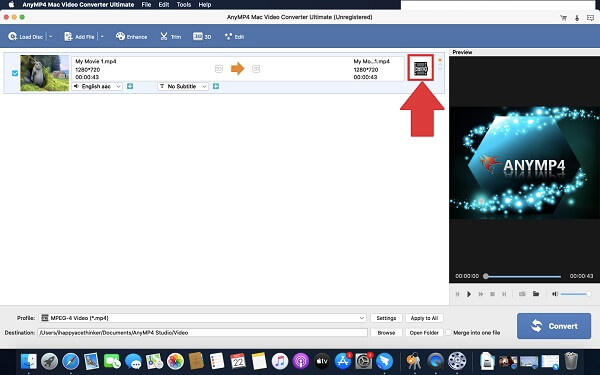
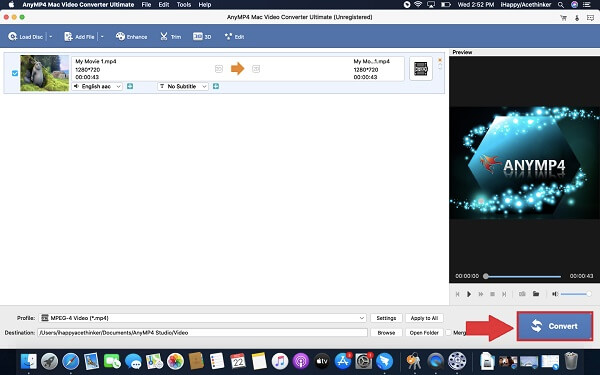
After saving the changes, you can change the video output format according to the compatibility of your device by hitting the Format button.
Export the cropped video on your Mac
Lastly, click the Convert to save changes.
iMovie is a video editing tool developed by Apple that allows users to create a cinematic video from start to finish. It is also one of the best ways to crop video on Mac. And you can rotate videos in iMovie. The iMovie app for iOS and macOS lets users produce videos that commemorate significant recollections of events and beautiful scenery, which they can then share with friends, neighbors, and other acquaintances. Because some users may have little understanding or experience with editing, Apple has designed an exceedingly user-friendly interface for their products. It means that anyone with a basic knowledge of video editing may make and modify videos using this tool. Yet, despite its versatility, MP4 files are not supported by iMovie. For the optimum effects, they must be transformed to H.264 codecs. Switching the codecs simply takes a few minutes, but it gives an additional procedure prior to editing that certain users may find inconvenient. Meanwhile, learn how to crop video on a Mac with iMovie by following the instructions outlined below.
Launch iMovie on your Mac
Upon launching, drop your video to the iMovie’s timeline.
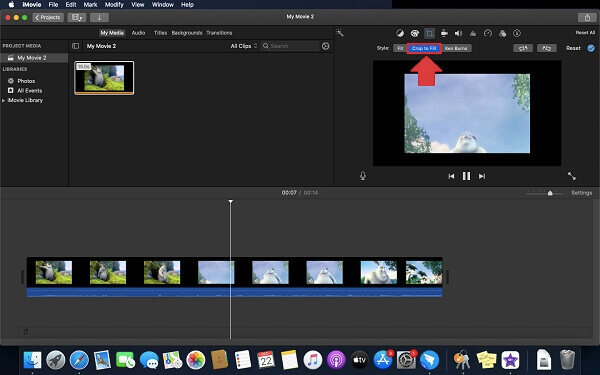
Locate the crop to fill
Locate the cropping button and select the Crop to fill the selection.
Transform the clip
Crop your clip by adjusting the movable frame’s size and position.
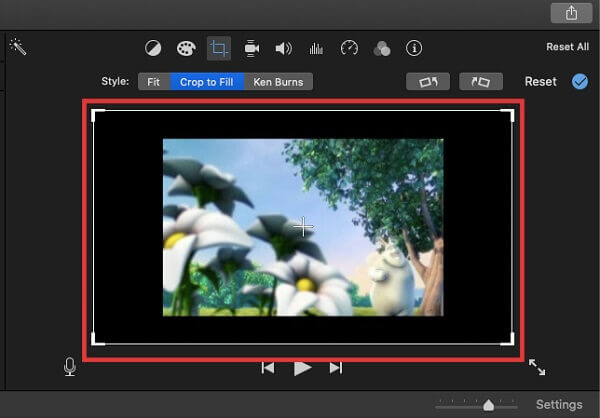
Save the cropped video
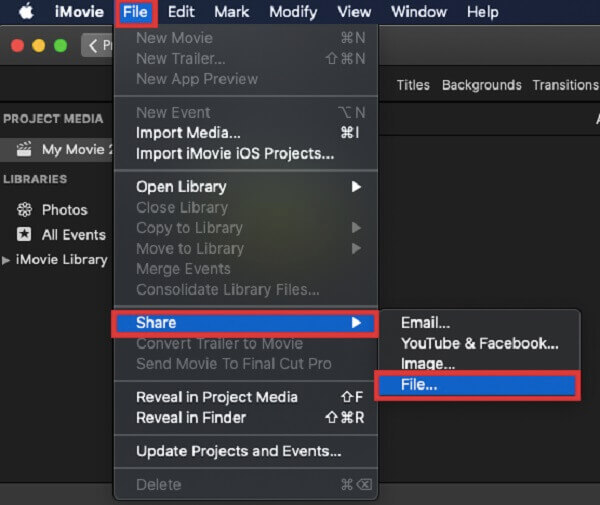
Once you are good with the cropped video, select the Crop to fill option to apply changes. Then, locate the File option in the Share menu to save the recent cropped video.
Navigation and finding the media you’re looking for is a breeze because of QuickTime’s primary, simple-to-use interface. Because it comes pre-installed with macOS, QuickTime Player is often the default program for many users. Nevertheless, even if the application is not installed by default, there are various reasons to make use of it. The program works so well with HD videos is incredible; it allows you to watch and enjoy great videos from any HD or full-HD films or videos, which is awesome. The audio playback compatibility, on the other hand, is faultless. It integrates audio with your browser, allowing you to watch videos straight from its window rather than needing to download them to your computer’s hard drive first. Regrettably, one of its drawbacks is numerous commonly used file types, such as FLV, MKV, WMV, and AVI, do not support playback; you must convert them before playing them like WMV on Mac with QuickTime. After considerable anticipation, here is how you crop video on a Mac using the QuickTime Player application.
Playback the video
Play then pause the video at the part you desired to crop.
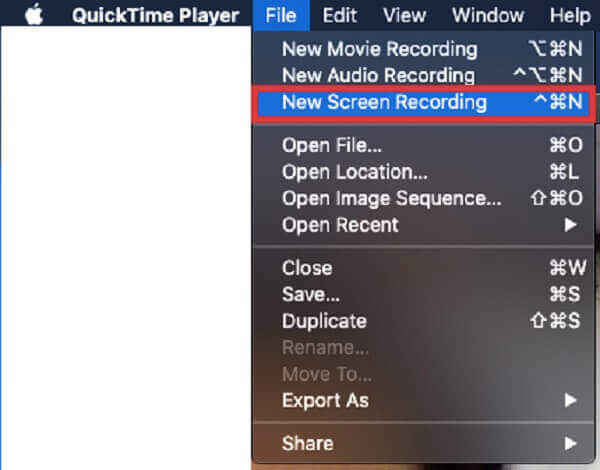
Download the QuickTime on your device
Download and launch the tool on your Mac. Select the recording option above New Screen Recordinginside the File drop-down list.
Drag to select a part of the video recorded
Begin recording your video by selecting Start Recording.
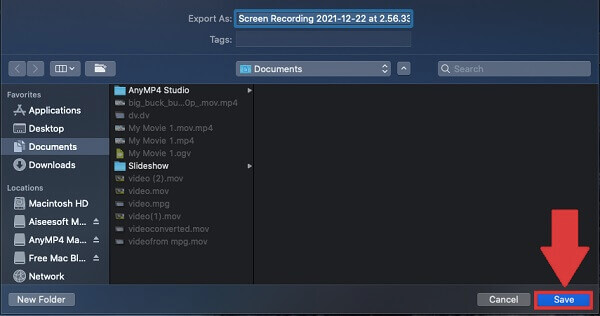
Save changes
After the video has finished playing, select Recording to save the cropped video clip.
What is the best way to resize video on Mac using QuickTime?
To reduce the size of a video in QuickTime, launch the software from your Applications folder and select File > Open File to upload your clip. To begin resizing your video hit File > Export As.
What is the best way to crop a video on my camera roll?
Launch Photos and choose the video you want to crop. After you’ve accessed the video you wish to, click Edit on the upper edge of the screen. At the bottom of the Edit screen, click the Crop-Rotate icon. Click and hold the handlebars to crop the video and save changes.
How can I change my Macbook aspect ratio?
If you wish to change the aspect ratio, select, then right-click Crop and Zoom. Next, in the pop-up menu, you can directly alter the aspect ratio with 16:9, 4:3, 1:1, or 9:16 as desired.
To summarize, just a few of these Mac video cropping apps can automatically crop your clip; iMovie, on the other hand, is entirely free to use. On the other hand, QuickTime Player is an exemplary media player and video trimmer, but it is not a great video cropper on the Mac, in my opinion.
Install Video Converter Ultimate for Mac if you want to crop video on Mac quickly and intuitively. One factor contributing to its widespread use among Mac users is its adaptability. Simple video editing, conversion of video and audio files, downloading of videos, and ripping of DVDs are all possible with it. Now you may get it for free and check out all its advantages!
More Reading
Concrete Guide to Rotate a Video in iMovie on iPhone and Mac
How to rotate a video in iMovie app? This guide shows you the steps on both iPhone and MacBook Pro/Air/iMac and correct the image orientation easily.
Step-by-step Tutorial to Flip a Video on iPhone or iPad Properly
To flip a video on iPhone, you can follow our comprehensive guide and correct the video that is captured sideways without any trouble.
How to Flip a Video in iMovie on Mac, iPhone, and iPad
Can you flip a video in iMovie? How to flip a video horizontally in iMovie? This post will give you a step-by-step guide to reverse video in iMovie on iPhone and Mac.
Top 15 Video Collage Makers for Windows/Mac/iPhone/Android
Here are the top 15 best video collage maker applications for you to make amazing artworks on Windows, Mac, iPhone and Android devices like professionals.