How to Make a Photo Slideshow Using the Best Desktop Slideshow Makers

June 09, 2022 01:20Posted by Selena Thomas to Edit Video
It is one thing to take photos of the places you went to, events you have attended, and memorable moments you had with your friends or family. But it is another thing to stitch them in a slideshow. Photo slideshows give life to the pictures and help you reminisce about the unforgettable moments you enjoyed most, especially when the slideshow is coupled with beautiful music tracks that help you recall memories.
By then, you can just watch them while lying in the comfort of your couch. Instead of moving your fingers scrolling through your albums, you can simply leave the slideshow playing while enjoying watching it. To accomplish this, you need a tool to create stunning photo slideshows. That said, this post will show you the practical tools to get this job done automatically. Continue reading below to learn further.

Bluraycopys Video Converter Ultimate is a very accessible tool for all advanced and amateur users with its highly-intuitive interface and simplicity. It holds its place as a top program for making slideshows when dealing with a myriad of static photos. Converting these photos into a video slideshow with background music will surely bring your static images to life. Not to mention, you can add any photo file type to the tool, including JPG, JPEG, BMP, TIFF, GIF, EMF, and so much more.
Aside from that, the tool comes with plenty of stylish themes suitable for various occasions such as Weddings, Sports, Happy, Fashion, etc. Plus, a handful of unique effects to choose from. Adding your desired narration or music is possible. On the other hand, here is a step-by-step tutorial on how to create a photo slideshow using this program.
Video Converter Ultimate Key Features:
Download and install the program
Get the software by clicking the Free Download button above. Wait for the exe file to be downloaded fully and then proceed with installing the program. After that, launch the application on your computer.
mport photos to the slideshow maker
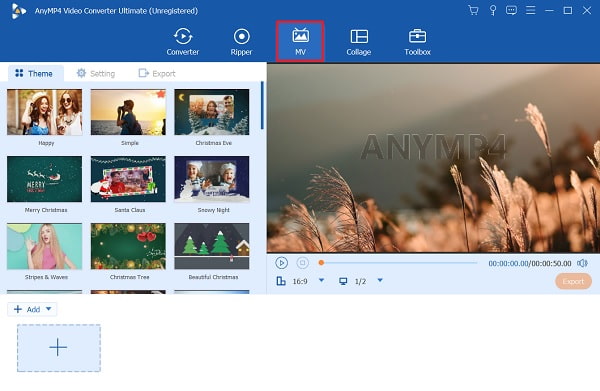
After launching the program, go to the MV tab and select a theme for the slideshow. Then, hit the Plus icon at the bottom of the interface. From the folder of your computer, select the images you wish suitable for slideshow picture frames and the photos you want to include for the slideshow. You can optionally add the entire folder for large image quantities.
Set the image time slots
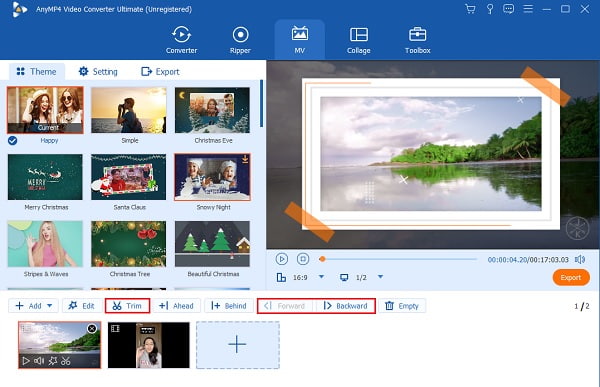
Now, you can adjust the image time slots according to your desire. Pictures will be displayed for 5 seconds by default, but you can shorten them using the trimming tool of the app. Just select your target image and hit the Trim button. You can also change the sequence using the Forward and Backward buttons from the menu.
Apply effects
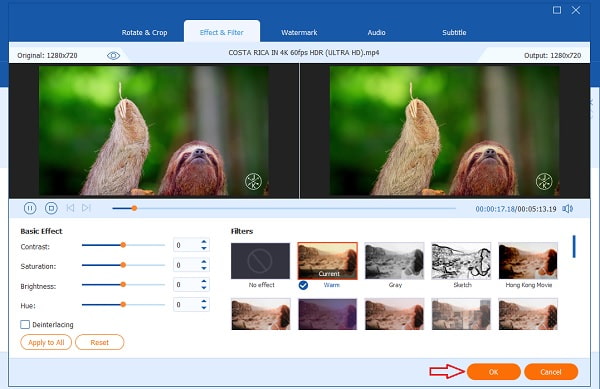
This time, enhance your photo slideshow by editing it. Tick the Edit button and go to the Effect & Filter tab. Here, you will have several effects and filters to choose from. To adjust the orientation and size of your images, simply go to the Rotate & Crop tab. Click the OK button if you are delighted with the results.
Add background music
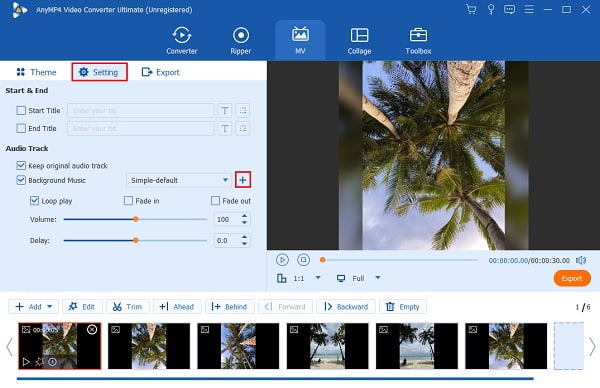
You may change the original music from the theme by adding new background music. Go to the Settings tab and uncheck the Keep original audio track checkbox. Put a checkmark on the Background Music and hit the Plus icon to add your desired music track.
Export the photo slideshow
If you are delighted with the results of your slideshow, hit the Export button on the preview section to save your slideshow. Then you will see options to adjust the file format, video resolution, and frame rate. Finally, hit the Start Export to save the video’s final version.

If you want to make an Apple photos slideshow on your Mac computer, there is no need for you to download a third-party program. The Mac computer comes with a native tool to help you stitch your photos into one to make a beautiful slideshow. Using the Photos app, you can instantly generate a slideshow out of your photos using the Play Slideshow feature. On the other hand, you can unleash your inner artist by creating a slideshow yourself using Photos. This feature will grant you advanced settings for making a complex slideshow. You will be able to add text, add music, rearrange slides, adjust duration, and much more. To make a photo slideshow on Mac, please see the detailed steps below.
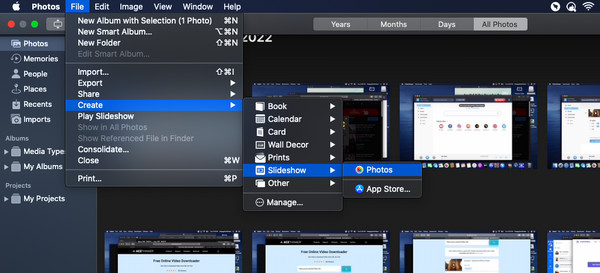
Launch the Photos app and select the photos you wish to include in the slideshow on your Mac. Next, go to File > Create > Slideshow > Photos.
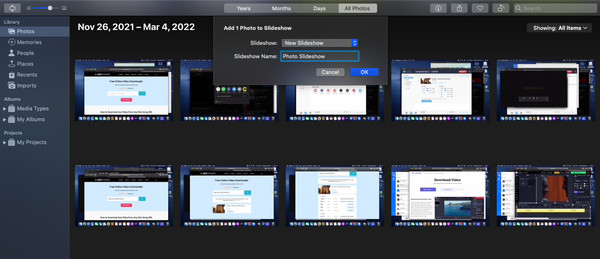
From the menu that will appear, choose the New Slideshow option. Key in the name of your project and hit LOK to confirm.
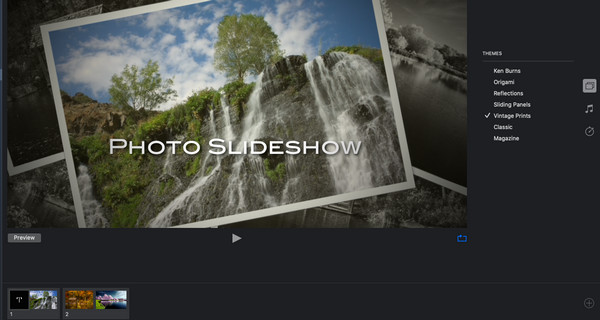
Arrange the sequence in which the images are shown by dragging your selected photo to the desired location. Also, you may select from the themes available to automatically adjust the slide transition, font, placement, and zoom.
You can also adjust the photos to fit the screen by ticking on the Scale photos to fit screen check box.
Edit the photo slideshow by adding essential elements. You will have the option to:
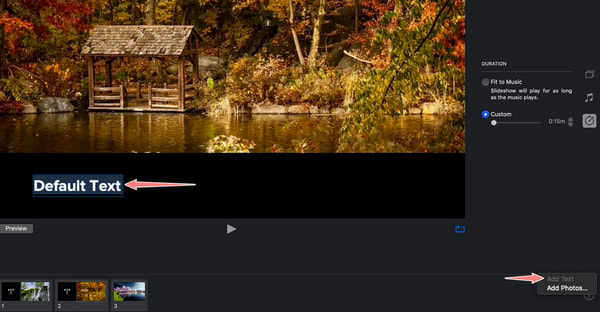
◆ Add text to a slideshow. You can edit your slideshow by adding text to a photo. Hit the Plus sign icon at the bottom right corner and choose Add Text from the drop-down menu. A text box will then appear. Input the text you want to insert into your photo.
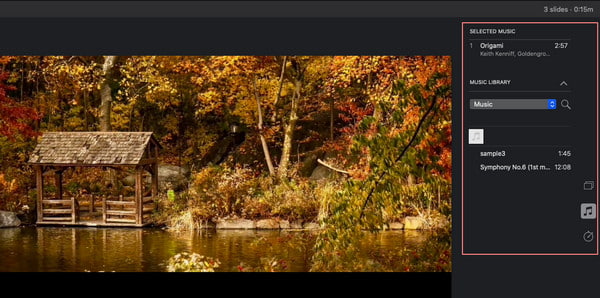
Add music to a slideshow. You can add background music to your photo slideshow from the Apple Music library. To this end, select the Music settings. Then, select a music track from the library. Ensure that your Apple ID is logged in to show the tracks in the library.
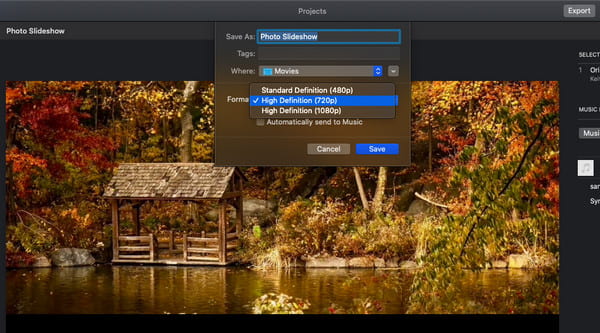
Save the photo slideshow as a video. To do this, navigate the File menu and hover your mouse cursor over the Export option. Select Export Slideshow, followed by the saving location, and hit the Save button. You also can make a slideshow on iPhone.
How to remove the dark border around the photo?
To this end, you may remove the black border using the cropping tool of the app. For this, you can use the Bluraycopys Video Converter Ultimate and crop the images to remove the black borders.
Can I add a logo watermark to the photo slideshow?
Yes. This operation may be helpful if you want to protect your slideshow from copyright. You may add a text or image watermark as you like. Bluraycopys Video Converter Ultimate can add text or image watermark to your videos with ease. Here’s how you do it.
– Open the program and choose the Toolbox tab
– Under the Toolbox tab are the extra tools for video and photo enhancements. Choose the Video Watermark option.
– Add the photos or videos you want to have a watermark for copyright protection.
Can I make a slideshow out of my videos?
Yes. Provided that the program you are using allows video slideshow making, you can make a slideshow out of your videos. Video Converter Ultimate supports almost any video format, allowing you to make a video slideshow.
This time, you should know how to make a stunning photo slideshow on your Windows computer and Mac. Both methods have the essential features to come up with a great and eye-catching photo slideshow. Therefore, if you are spending your time taking photos, you can make them more memorable by stitching them into a slideshow. Similarly, you can share it with your family and friends to share how you feel and help them reminisce about those beautiful moments as well.
Meanwhile, if you wish to have a robust and advanced slideshow maker, you should go with the Bluraycopys Video Converter Ultimate. In fact, this tool is compatible with your Windows and Mac computers. Whether your photos are saved on either of the computers, you can make a slideshow quickly.
More Reading
Canva Slideshow Review: Online Design Tool for Beginners
Canva slideshow creator comprehensive review. Everything you want to know about this successful online design tool for novice designers can be found in this review post.
Familiarize Yourself on How OBS Crops Video [With Picture]
Yearning to learn cropping on OBS? By reading this article, you will learn how OBS crops video in various ways and the issues that can arise when using OBS.
Learn How EzGIF Resizes Video Online and Offline [Windows]
How to crop video in EZGIF? Come to know how EzGIF resizes video in five simple steps along with the excellent solution to crop video by reading this article.
4 Quick Methods on How to Turn Up Volume on AirPods
Here you will learn how to turn up the volume on AirPods and see the better way to boost the volume of your music by reading today’s blog.