Best Guide on How to Make a Slideshow in Photoshop

July 28, 2022 10:00Posted by Selena Thomas to Edit Video
Adobe Photoshop is a reliable and powerful image editor for Windows PCs and Mac devices. But do you also know that you can use this tool for creating slideshows? Yes, Photoshop can do slideshows effectively. It is the same way you do when editing videos. And the slideshows you made are saved as a video file. The benefit of this file format is that you can play it on media players or share it on social media platforms and video streaming sites. Photoshop is not that hard to master if you are willing and diligent in learning it. Enough with the introduction. Let’s proceed with learning how to make a slideshow in Photoshop.
Here’s a Photoshop slideshow tutorial that you can use as a future reference whenever you need a guide to follow. It is better to compile all the images you will use for the slideshow, as this will save you time. Let’s begin making a slideshow.
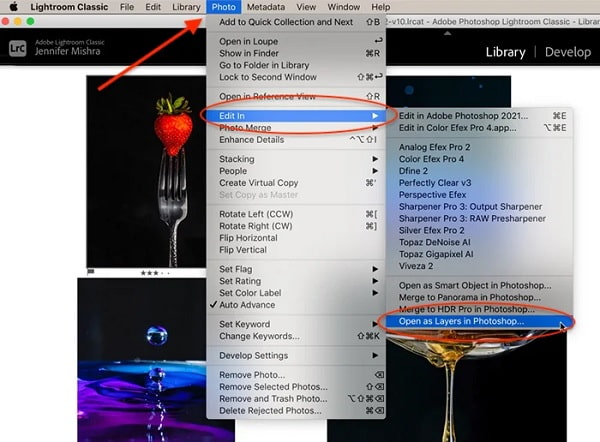
Download Adobe Photoshop and install it on your computer. And if your images are in Lightroom, select the pictures. Go to Photo>Edit In>Open as Layers in Photoshop.
Load the media files one by one by right-clicking them to select Open With>Adobe Photoshop. They will show as tabs in Photoshop. Drag and drop the background layers to the first image tab to create a new layer
The video timeline is not visible by default. To reveal the panel, tap the Window menu and select Timeline. An editing window will appear on the bottom part of your screen with the timeline.
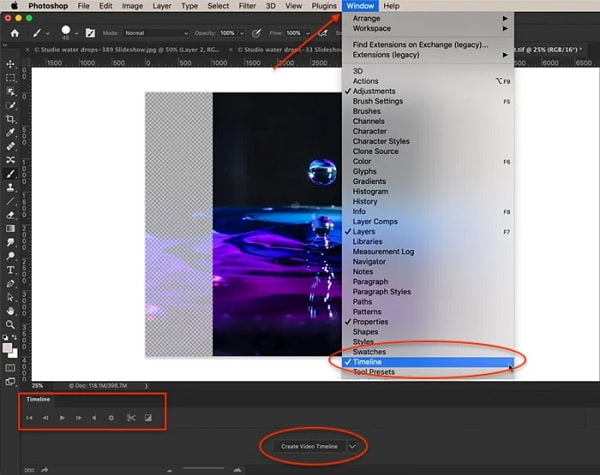
Tap the Create Video Timeline for Photoshop to add all layers in the timeline and add an audio layer. By default, the first image that will appear is the bottom layer. You can change the sequence by grabbing the photo and dragging it to a different position in the timeline
To add transition and effects, just open the transition icon, and the default duration is one second. To add effects, tap the arrow in the right corner of each purple bar. There are various effects like pan, zoom, and rotate.
For the last step, Hit the arrow icon below your screen to create a video slideshow. This will open the export workspace. Change the Photo Image Sequence to Adobe Media Encoder. Tap Render to export the slideshow.

Our Photoshop slideshow making tutorial ends here. This is just the basic level, which might already be hard for some. But for the next part, we will use a great alternative program of Photoshop to make slideshows. Let’s move on.
Photoshop has a steep learning curve, and we all know that. You need to have a lot of patience and will to get used to it. The good thing is that alternative programs in Photoshop are user-friendly and have excellent slideshow output. Video Converter Ultimate is a fun and capable program that can create slideshows on par with Adobe Photoshop. It may be a file converter tool, but it does not lack features to create slideshows within moments. There are templates with unique themes for enhancing your slideshow. Filter and effects to beautify your images and video clips. You can also add media files, including music, without restrictions. Moreover, you add text and subtitles, which is perfect if you’re making a movie or tutorial video. This outstanding program is free to download on devices with Windows and macOS.
Key Features:
Use the detailed guide below using this commendable program to create a slideshow similar to Photoshop.
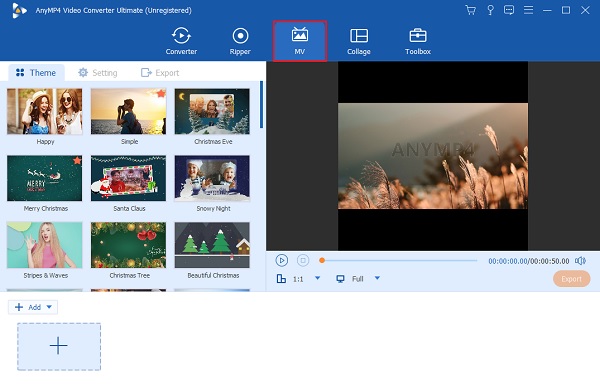
Open any web browser like Safari or Chrome and go to the homepage of Video Converter Ultimate or click the Free Download button provided above to acquire the slideshow maker. Run the .exe file to install the program on your PC. After that, open the application and choose MV to start making a slideshow.
Tap +Add to import photos from your computer. Select the media files to add them to the program. You can change the arrangements of the media files to the sequence you desire in the timeline. There is no limit to how many files you can import to the application.
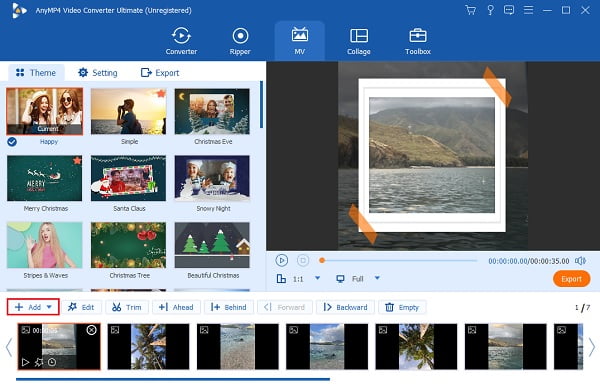
Afterward, click the Edit button to make some modifications to your media files. On the In the effect & Filter tab, you can choose filters to apply to your images and video clips. Click the OK button to set the changes you made. Don’t forget to use templates like Simple and Happy on your slideshow.

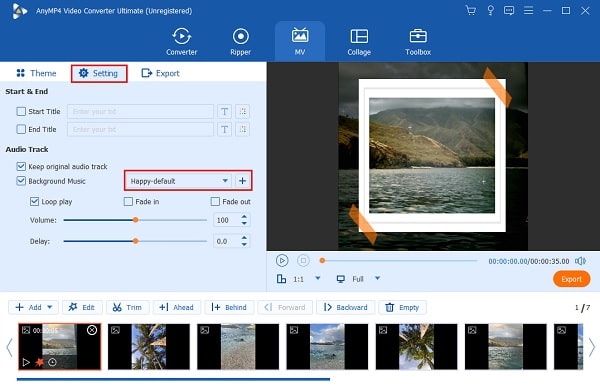
You then head to Setting to alter the slideshow’s background music. Click the drop-down list or the Plus button to open your file folder to choose any song you like. Select the music to import the soundtrack to the slideshow maker with music.
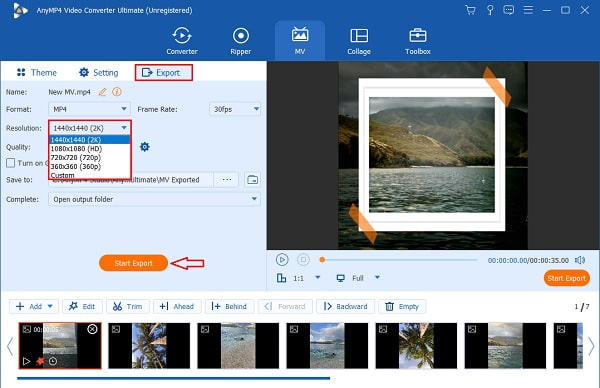
For the last part, head to Export. It is advisable to have the highest resolution possible for the best viewing experience. Click the Resolution’s drop-down list and choose between 360p to 2K HD. Choose a file output location to save your slideshow. Tap tart Export to start exporting the slideshow. Wait for it to finish, then play the slideshow and enjoy watching.
How to add music to Photoshop slideshow?
Adding music to your slideshow on Photoshop is simple. Just follow the simple guide below.
1. Click the Musical Note icon on the timeline to insert music into the slideshow.
2. Select Add Audio to browse your songs and import them into the app.
3. Tap New Audio Track to add more than one song to the slideshow.
How to resize images for your slideshow in Photoshop?
You can easily resize images in Photoshop by following the steps below.
To change the image size to your liking, tap Image>Canvas Size to resize the photos that fit into your canvas.
It is much better if your photos are in one size. To do that, go to Layer>Smart Objects>Convert to Smart Object. then click Edit>Free Transform
How long will it take to learn and familiarize Photoshop?
Learning the basics of Photoshop takes almost 5 hours. And it is estimated to be 20-30 minutes from start to finish to be able to do the things you see they do on the internet, like making banners, editing photos, adjusting colors, and creating slideshows.
Congratulations! You are now skillful enough to create a slideshow with Photoshop. The slideshows you make using Photoshop look professionally made, and that is great. However, you need a lot of time to practice and money to purchase Adobe, which is a bit of a letdown. But worry not, as Video Converter Ultimate can help you create a slideshow on par with Photoshop. This program is great for beginners, has lots of editing tools, and is free to download. It can also produce slideshows with satisfying results. Make your next slideshow now with this tool.
More Reading
Full Guide on How to Make a 3D Movie For Beginners [2024]
Thoroughly learn how to make 3d movie animation just by reading this post. We will guide you all the way from start to finish in making 3D movies at home.
How to Make a Slideshow with Facebook [Best Quick Guide]
Learn the proper way to make a slideshow with Facebook with the help of this article. There are steps you can follow to help you create slideshows that stand out.
How to Make a Slideshow with Music on All Platforms [2024]
Discover the fastest and easiest ways to create a slideshow with music with this guidepost. Detailed steps are included for desktop, Android, and iOS devices.
Full Guide on How to Create a Slideshow in Premiere Pro
Learn the tips and tricks in creating a slideshow in Premiere Pro. This guidepost will help you understand Adobe Premiere Pro better for your next slideshows.