How to Make a Slideshow on iPhone: 3 Workable Methods

May 27, 2022 09:00Posted by Selena Thomas to Edit Video
A slideshow is a compilation of your photos turned into a video. These are usually used for presentations in schools or work purposes. As well as for occasions like birthdays and anniversaries. One great thing about slideshows is that you can add background music and effects while your photos are sequentially viewed on a screen. You can also create slideshows using your iPhone and other smartphones aside from using your computer, making it convenient for us. Here’s how to make a slideshow on iPhone using these three useful methods to make your special day better.

The default way to make a slideshow video on iPhone is by using the Photos app. The procedure to do this is very easy. You just need to select the photos you will use for the slideshow. There’s no need to download a 3rd party app on your iPhone to create a beautiful slideshow. You can also create a Memory Movie, a compilation of photos during a specific day or month.
Quick way on how to do a slideshow on iPhone with the Photos app.
To start, open your iPhone and search for the Photos App. You can easily find it on your home screen. The logo is a color wheel. Tap the app to open it.
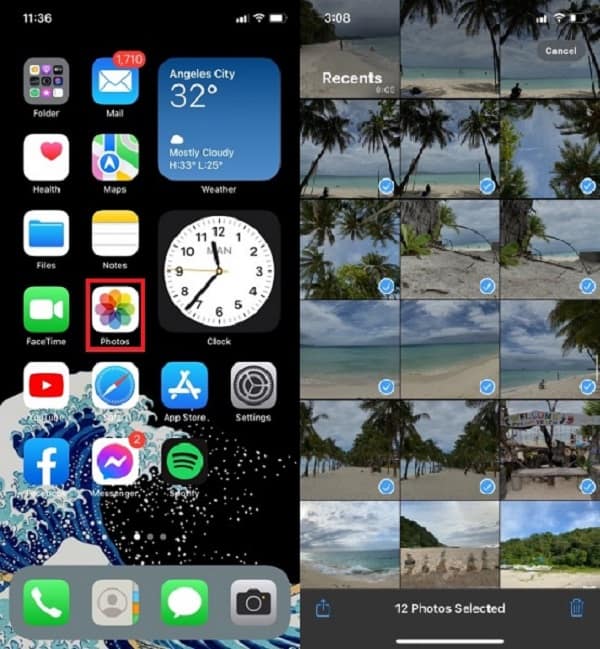
Select multiple photos by tapping the Select button on the top right corner. A blue check will mark the images you will include in the slideshow. After selecting the photos, choose the Share icon located at the bottom left corner of the screen.
On the Share icon menu, choose Slideshow to proceed in creating one. A default slideshow will be made.
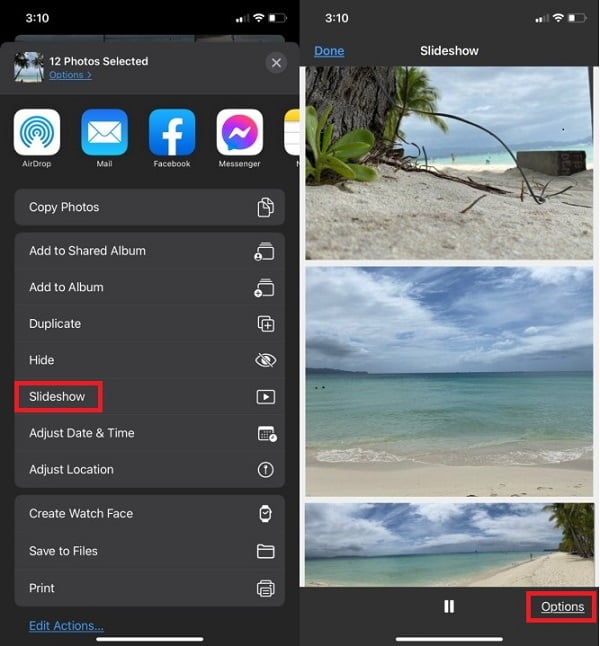
You can modify the newly created slideshow by clicking the Options button.
After tapping Options, you can change the themes and background music of the slideshow. You can also use your music on your iTunes Library to improve it. Furthermore, you can also adjust the transition speed between each photo. Tap Done to apply the changes.
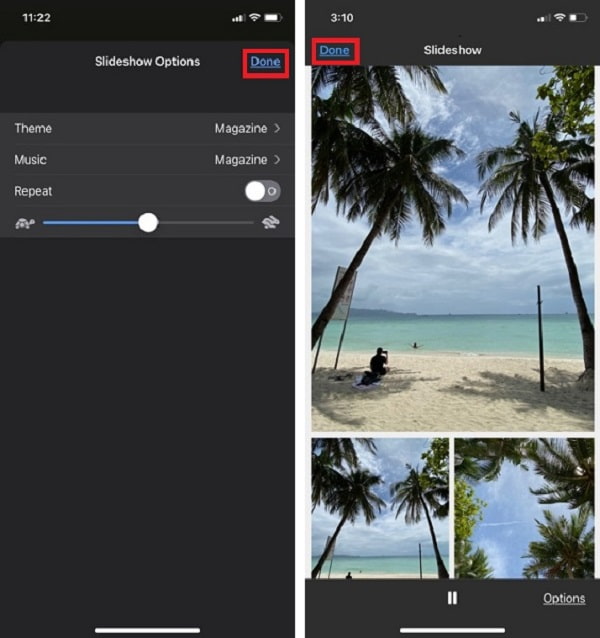
To exit the slideshow, tap Done on the top left corner of the screen.
This is how to make a slideshow on an iPhone for free using the Photos app. You can also use this app to make GIFs on iPhone from photos. The next part is about using one of the highly recommended desktop programs for creating slideshows.
Creating a slideshow on an iPhone is a bit difficult because of the small screen size. And you cannot wholly rely on the slideshow maker function of the Photos app because of its limited features. There are few transition effects, and you cannot add subtitles. In this case, you can use a program on your computer that can create slideshows with plenty of features for video enhancements. BlurayCopys Video Converter Ultimate is one of the best tools for creating slideshows. The MV maker has plenty of themes for you to use to enhance your slideshows even further. You can add subtitles and audio tracks per photo as well. Aside from creating slideshows, you can also convert files to different file formats. It supports 500+ file formats, including MP4, AVI, 3GP, WMV, MOV, etc. Moreover, it also has a DVD ripping function and GIF maker.
Features
Here’s a detailed step in creating a slideshow for the iPhone using the recommended tool.
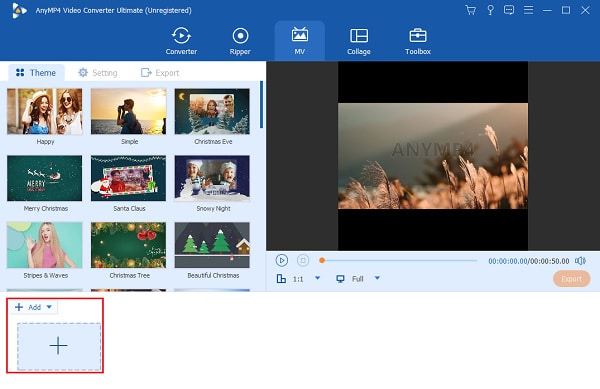
Visit the website and click the download button to start downloading the program. Proceed to install it on your computer. After installing the program successfully, continue to launch the tool to see the main interface. Choose the MV tab, short for Music Video, to proceed in creating a slideshow.
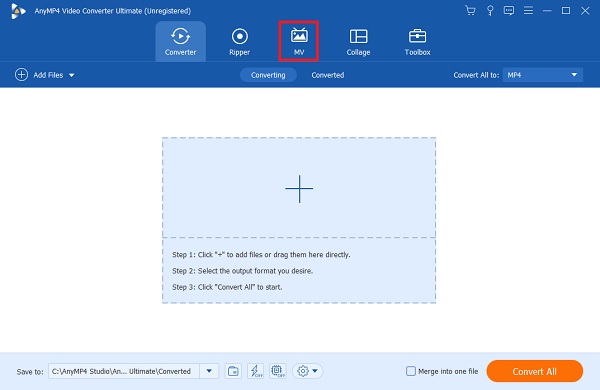
Under the MV tab, you will be greeted with templates and preview playback of the slideshow. Click the +Add button so you can add photos from your desktop that you will use for your slideshow. An alternative way to add pictures is dragging the images and dropping them on the space provided below the window.
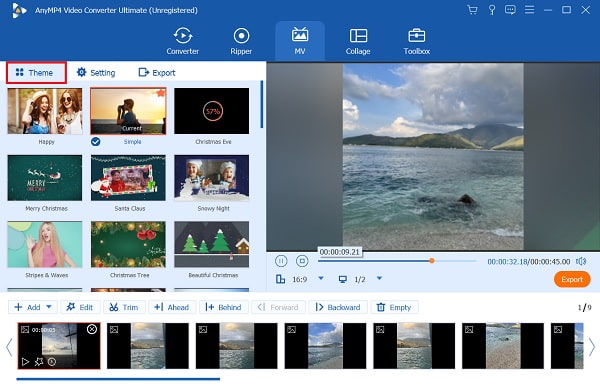
After adding the photos, you can use the buttons above the photos to modify your slideshow. You can edit, trim, and extend the duration of the photos when viewing them. You can also crop videos to square. Under the Theme option, there are pre-downloaded themes for you to use.
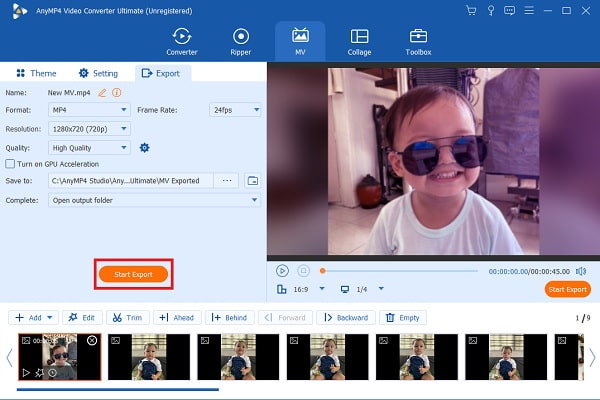
To finish your slideshow, click the Export tab to start finalizing it. Tap the drop-down arrow to adjust the resolution from 360p to 4k, and the frame rate from 12fps to 60fps. You can also choose between MP4, MOV, AVI, etc. as the final output format. In addition, you can choose the output file location for easier and quicker access to the video. Click Start Export to begin the process. After the process is done, you will be directed to the folder to see the newly made slideshow.
You can then transfer the slideshow video from your PC to your iPhone using a file-sharing app or iTunes.
If you think that the Photos app lacks features for making slideshows, you can try to download an application from the App Store. There are plenty of slideshow maker apps for iOS. Some are free to download, and others need to be purchased before you can acquire the app. Splice is one of the free video editing applications that can also create beautiful slideshows on your iPhone. You can add text, captions, audio tracks, and video effects, including transition effects.
Here’s a simple guide on how to create a slideshow on an iPhone using the Splice app.
Download Splice on the App Store and install the app on your phone. Open the app to start creating a slideshow. Click New Project and select the photos you will be using for your video. Then click Next at the top right part of the interface to continue to the next step.
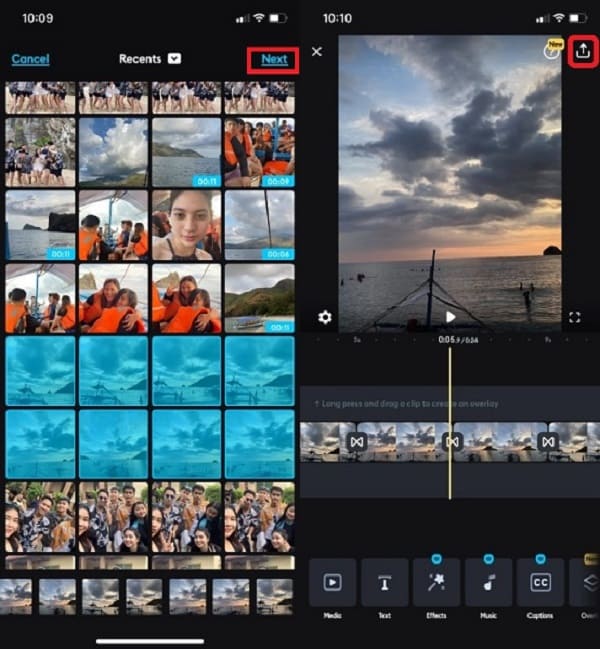
Afterwards, proceed to edit your slideshow. Below the app interface, you will see different editing functions. Functions include adding texts, captions, music, input audio, overlay pictures, etc. Select the Text button to add texts and subtitles, and tap the Music button to add music from your iTunes Library. Click Export, located in the top right corner of the app interface after you finish editing the slideshow.
After clicking the Export button, there are new options for you to modify the quality of the video. You can adjust the frame rate up to 60fps, simply tweak the measure line for the frame rate and choose between 24-60fps. For the resolution there are options up to 4K HD, just select your preferred quality from 540p to 4K. Once you are done changing the frame rate and quality of the video, click Save to store the slideshow on your Phone. The video will be saved automatically to your Photo Library.
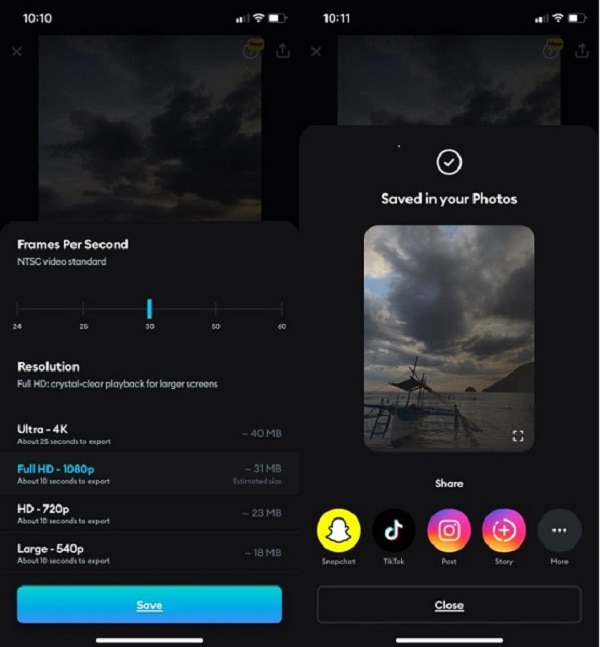
Lastly, you can share your slideshow on social media websites like Tiktok, Instagram, Snapchat, and other popular apps directly from the app.
How to export a slideshow from an iPhone to a PC?
You can try these methods to export the slideshow from an iPhone to a PC. – You can try using the ShareIt app to send and receive files from an iPhone to a PC and vice versa. Make sure that both devices have this application. This program is completely free to use. – You can also use iTunes to export files from an iPhone to a PC. Just simply connect your iPhone to the desktop using a USB cable. Allow your PC to access the files of your iPhone and open the iTunes app to start file transferring.
How to share a slideshow on an iPhone?
Follow these steps to share a slideshow from your iPhone to other devices and social media websites. – Open the Photos app and select the slideshow you want to share. – Then click the Share button positioned on the bottom left corner of the app. – Lastly, choose any social media apps and email services installed on your phone and send them to others.
Can you save the Slideshow you made using the Photos app?
No, you cannot save the slideshow since it is just a feature of the Photos app. You can create an album and separate the images you will use to create the slideshow. That can be exported as a video file.
Creating a slideshow on an iPhone may seem difficult at first. But if you allow yourself to learn, making a slideshow or video will become easy. Today, you are knowledgeable enough to do it without asking for help. And if you prefer creating slideshows on PC, always consider using BlurayCopys Video Converter Ultimate as your go-to video maker.
More Reading
Top 5 Professional-Wise 3D Video Makers on the Market Today
Is 3D making a challenge? Learn about the 5 astonishing 3D video makers, as well as their distinctive features that will turn your 3D video into a masterpiece!
4 Easy Ways to Slow Down A Video on TikTok [2024 Ultimate Guide]
How to slow down a video on TikTok to create dramatic effects? Get to know 4 easy ways in this article and learn how to make your TikTok video go viral.
Know the Best Way to Fix OBS Audio Delay [Windows and Mac]
Are you suffering from OBS audio delay issues? Please find out the reasons for the OBS audio delay and how to troubleshoot them by reading today’s post.
How to Solve VLC Audio Delay and The Best Way to Fix It
Be knowledgeable on how to repair VLC audio delay permanently on desktop and the unique solution to use when the fixes didn’t work by reading today’s post.