How to Capture Screen on Windows 10/8.1/8/7

March 15, 2021 17:30Updated by Selena Thomas to Screenshot
If you want to screen capture on Windows 10/8/7 or earlier versions, you can always get a satisfying result in this article.
We will show you how to take screenshots with the built-in snipping tool of Windows PC. You can simply capture the full screen or any area on your monitor by pressing hotkeys on your keyboard. And we will also introduce the steps to record screen video and audio with high quality on your computer. You can even learn how to annotate the screenshot and recording.
Actually, most windows computers enable users to take screen shots by pressing hotkeys on their keyboard.
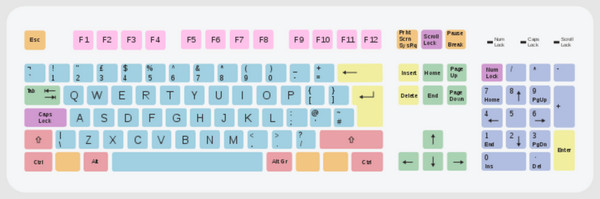
PrtScn
Press the Print Screen key on the top row of your keyboard. On some computers, it may be labeled as PrtScn, PrntScrn, Print Scr, PrtSc or something similar.
After pressing this key, your screen will dim. And there will be 4 screen capturing modes for you to copy anything on your computer screen – Rectangular, Free-form, Window and Full-screen. You can also cancel the snipping by clicking the Cancel icon.
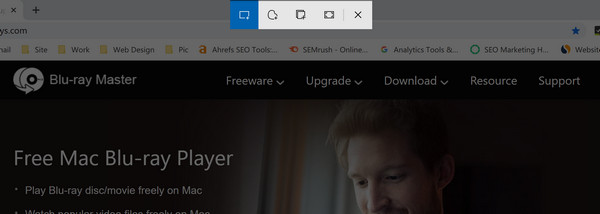
Usually, after you capture the screen, there will be a pop-up window in the lower-right corner of the screen to tell you that the screenshot is copied to the clipboard. Then you can paste it into another program. You can also click on the pop-up window to annotate the captured image.
You can also wake this snipping feature with following hotkeys:
Alt + PrtScn
Windows key + Shift + S
Windows key + PrtScn
Besides, Windows has another screenshot utility called Snipping Tool, with which you can grab a screenshot and save it as an image file directly.
Open the snipping tool on your PC. Different Windows versions apply different ways to open the program.
For Windows 10 / Windows 7:
Select the Start button in the lower-left corner of the screen. Type snipping tool into the search box from the taskbar. Find Snipping Tool from the list of results.
For Windows 8.1 / Windows RT 8.1:
Move your mouse to the lower-right corner of the screen. Then move it up. Select Search. Type snipping tool into the search box. Find Snipping Tool from the result list.
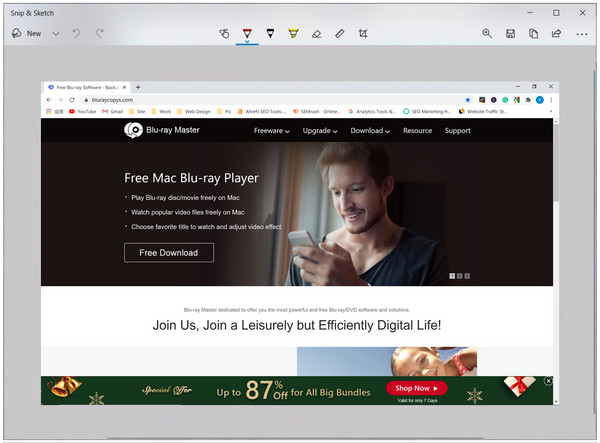
Then you can pick the snipping mode from the Mode drop down. If you choose the Rectangular Snip option, you can drag to screenshot part of the screen. Free-form Snip is similar but allows you to capture the screen with custom irregular shapes. Window Snip means you can take a snapshot of any window on your screen. You can also choose Full-screen Snip to get the entire screen captured.
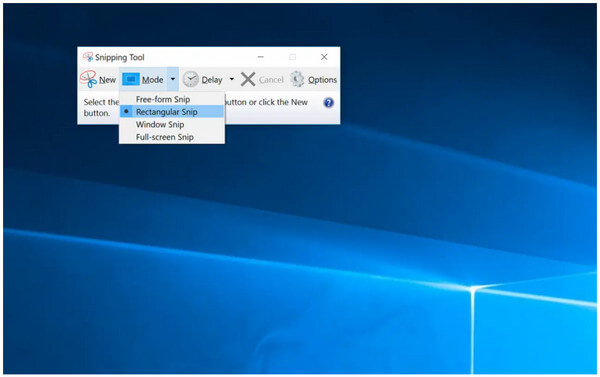
You can also use the Delay menu to specify how long to wait before taking the screenshot. Then click New. You will find your screen is frozen. Just use the mouse to create the screenshot. After that, you can edit, save and share the screenshot according to your need in the Snipping Tool window.
You May Want to Know: Where do Screenshots Go on PC.
Blu-ray Master Screen Recorder is highly recommended to beginners. There is no technical background required. You can record screen video, audio, and webcam flexibly on all Windows computers. The real-time drawing tools allow users to add annotations while recording at the same time. Moreover, you can set hotkeys, schedule recording tasks, customize the output settings within clicks. If it is the first time you start recording, then Blu-ray Master Screen Recorder is your best screen recording software for Windows.
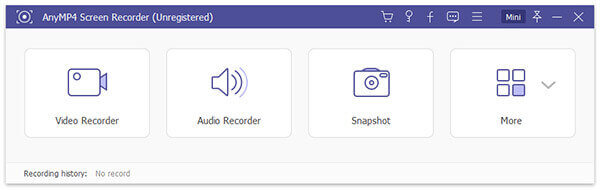
Free download, install and launch Blu-ray Master Screen Recorder on your Windows 10/8/7/Vista/XP/Server computer. To screen record on Windows 10/8/7, choose Video Recorder in the main interface.
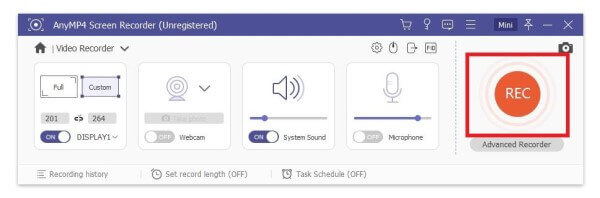
Set the screen record area in the Display section. You can choose Full or Custom to specify the video recording region. Turn on Webcam, System Sound, and Microphone options based on your need. Click the Settings icon to adjust output parameters if necessary. Later, click REC to start recording the PC screen.
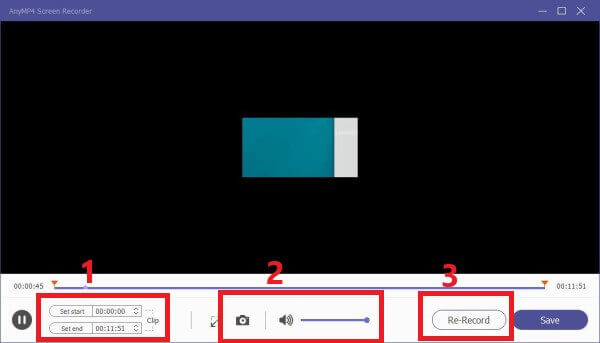
Click Stop to end up Windows screen recording. In the Preview window, click Play to have a check. You can cut out the unwanted parts with the built-in media trimmer. At last, click Save to export your recorded screen video file on Windows 10.
Compared with the Windows screen recorder full version, many advanced recording features are limited in screen recorder freeware. If you want to record a short video or audio clip, you can use a free screen recorder as well.
Blu-ray Master Free Online Screen Recorder is capable to record screen video on Windows 7/8/10 for free. You can record Windows on-screen activity with audio online at zero cost. And there is no large download package. You can save your computer storage space.
1. Can Windows Game Bar take screenshots?
Yes, the Game Bar enables you to take screenshots and record video in most Windows games. But you cannot take scrolling screenshots or record the entire Windows desktop by using Game Bar.
2. How to reduce a lag while recording a game on Windows?
Low-end computers crash during screen recording frequently. It is because the limited system resource is overloading. Streaming video and gameplay recording require a lot of CPU, GPU, and RAM sources. To stop recording from lagging, you can use hardware-accelerated screen recorder software, like Blu-ray Master Screen Recorder.
3. What is PrtScn key?
The Print Screen key is a key located on most computer keyboards. When you press it, you will initiate the snipping tool on your computer. Then you can take screen shots of the current screen and copy the captured image to the computer clipboard.
That’s all to do a screen capture on Windows 7/8/10. You can use the above methods to take screenshots and record screen video on your Windows computer successfully. If you use a low-end computer, or you want to record game video without slowing down, Blu-ray Master Screen Recorder is your first choice. You can free download the screen recorder Windows software to have a try right now.
More Reading
How to Fix “Your Screen Shot Can’t Be Saved” Error
Screen shot can’t be saved in your Mac? When you are prompted that you don’t have permission to save files in the location where screen shots are stored, here are some easy ways you can try to fix the screenshot saving problem.
How to Take Screenshots in Snapchat Without Them Knowing
It is simple to take screenshots in Snapchat. However, it is hard to screenshot Snapchat without being detected. Follow the top 6 methods to screenshot Snapchat without them knowing.
How to Screenshot in FaceTime on iPhone iPad and Mac
This article is the step-by-step guide to screenshot in FaceTime. You can take the still screenshots and live photos in FaceTime to keep the important moments.
How to Take a Facebook Screenshot on Multiple Devices
You want to capture the screen while using Facebook, right? Maybe you want to save the profile picture? Or you want to record someone’s Facebook stories? In this post, we will share you easy ways to take a screenshot on Facebook.