

Aug 28, 2026Posted by Kevin Miller to Rip DVD
Are you still looking for a clever way to organize your DVD collection without breaking the bank? DIY DVD storage ideas offer a creative and budget-friendly solution to tidy up your room and show off your style. Whether you're repurposing old crates, crafting wall-mounted shelves, or customizing drawer inserts, these projects let you tailor storage to your style and space. With a little imagination and basic tools, you can transform everyday items into functional and stylish DVD organizers that make your movie nights even more enjoyable.

Table of Contents
- DIY DVD Storage: Quick Comparison
- 1. Custom Floating DVD Shelves: Sleek & Wall-Mounted
- 2. The IKEA Hack: Stylish & Custom Movie Storage
- 3. Wooden DVD Storage Tower: Built for Small Corners
- 4. Repurposed Wooden Storage Crates: Rustically Organised
- 5. DVD Sleeve Binders: The Ultimate Space Saver
- 6. Custom Fabric-Lined Storage Boxes: Neat & Dust-Free
- 7. Deep Drawer Dividers: Hidden Media Pull-Out
- 8. Under-Bed Rolling Storage: Out of Sight, Easy to Reach
- 9. Go 100% Digital: Rip and Backup Your DVD Collection
- Tips for DVD Organisation and Maintenance
- FAQs about Storing DVDs
DIY DVD Storage: Quick Comparison
Before diving into a project, see this comparison to find the storage method that best matches your budget, available space, and skill level:
| Storage Method | Estimated Cost | Storage Capacity | Protection Level | DIY Difficulty | Best For |
| Custom Floating Shelves | $30 – $60 | Moderate (50–100 DVDs) | Medium (Exposed to dust) | Medium | Open wall space & modern decor |
| The IKEA Hack | $40 – $120 | High (150–300+ DVDs) | High (If using glass doors) | Low – Medium | Living rooms & clean, built-in aesthetics |
| Wooden Storage Tower | $25 – $50 | High (100–200 DVDs) | Medium | Medium – High | Utilizing tight corners & narrow nooks |
| Repurposed Crates | $20 – $45 | Moderate (40–80 DVDs) | High (If using glass doors) | Low | Rustic, farmhouse, or modular setups |
| DVD Sleeve Binders | $15 – $35 | Very High (100–300+ DVDs) | High | Very Low | Maximum space-saving & apartment living |
| Fabric-Lined Boxes | $10 – $25 | Low – Moderate (30–60 DVDs) | Very High (Dust-proof lid) | Low | Hiding collections on coffee tables or shelves |
| Deep Drawer Dividers | $10 – $20 | Moderate (60–120 DVDs) | Very High | Low – Medium | Seamless, hidden media storage in existing furniture |
| Under-Bed Rolling Storage | $15 – $30 | Moderate (50–100 DVDs) | High | Low | Small bedrooms & keeping clutter out of sight |
| 100% Digital Backup | $0 – $50 | Infinite (Hard drive space) | Maximum (Safe from physical damage) | Low (Software-based) | Zero physical clutter & instant digital access |
1. Custom Floating DVD Shelves: Sleek & Wall-Mounted
Floating shelves are the gold standard for modern home decor. They lift your collection off the floor, turning your movie cases into visual wall art without taking up valuable floor space.
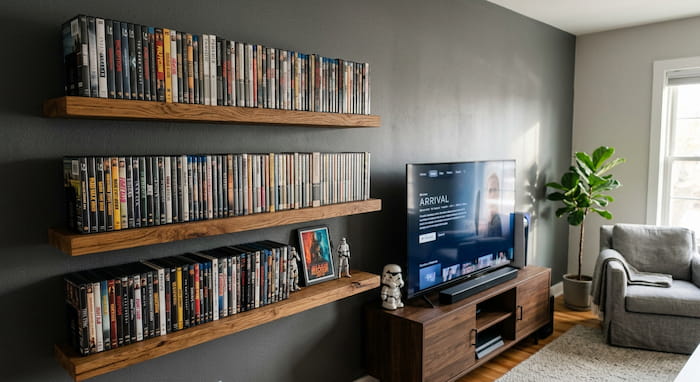
Materials Needed:
- 1×6 MDF or pine boards
- Heavy-duty floating shelf brackets
- Wood screws
- Wall anchors
- Wood glue
- Sander
- Paint/stain
How to DIY It:
Step 1.Cut & Sand: Measure your wall space and cut the boards to your desired length (standard DVD cases are about 7.5 inches tall, so leave at least 8.5 inches of clearance). Sand the edges smooth.
Step 2.Mount Brackets: Use a stud finder to locate the wall studs. Secure the floating shelf bracket to the studs with heavy-duty screws and anchors.
Step 3.Finish & Install: Paint or stain the wood to match your room. Drill matching holes into the back edge of the board, slide it onto the brackets, and lock it in place.
2. The IKEA Hack: Stylish & Custom Movie Storage
Frankly, traditional DVD racks often look outdated and bulky.IKEA Billy bookcases or KALLAX shelving units are great ready-made options. With simple modifications, you can create high-end, customised built-in home effects on a limited budget.
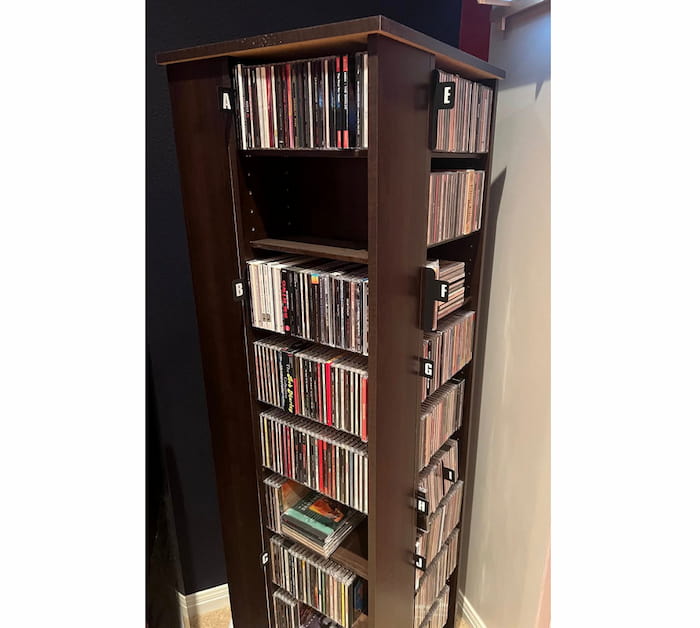
Materials Needed:
- IKEA BILLY or KALLAX unit
- Extra shelf inserts
- Wood trim moldings
- Finishing nails
- Paint
- Glass doors (optional)
How to DIY It:
Step 1.Adjust Shelf Heights: Measure your DVD cases and set the adjustable pegs to ensure there is no wasted vertical space between shelves.
Step 2.Add Custom Trim: Nail decorative wood trim or crown molding along the outer edges of the bookcase to make it look like expensive custom cabinetry.
Step 3.Paint & Mount: Paint the entire unit in a matte or satin color that matches your walls, and anchor it securely to the wall stud for safety.
3. Wooden DVD Storage Tower: Built for Small Corners
A slender, vertical DVD tower is perfect for filling awkward, narrow nooks in your living room or next to your TV stand.
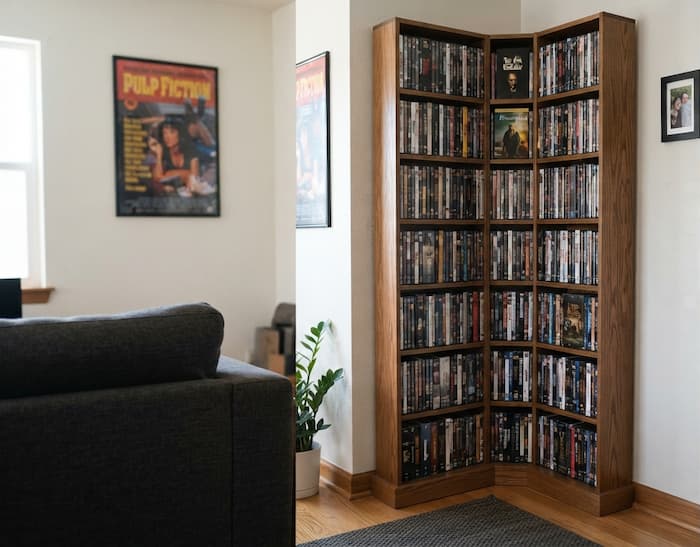
Materials Needed:
- ¾-Inch plywood or pine boards
- Wood glue
- 1.5-inch pocket hole screws
- Tape measure
- Clamps
- Cordless drill
How to DIY It:
Step 1.Build the Outer Frame: Cut two long vertical side panels (e.g., 4 feet tall) and two small top/bottom pieces (e.g., 8 inches wide). Connect them into a rectangle using wood glue and pocket hole screws.
Step 2.Insert Horizontal Shelves: Space horizontal dividers 8.5 inches apart throughout the frame. Glue and screw them from the outside or through pocket holes underneath.
Step 3.Add a Backing Panel: Tack a thin ¼-inch hardboard panel onto the back to prevent the tower from wobbling and keep DVDs from falling out behind.
4. Repurposed Wooden Storage Crates: Rustically Organised
For those who are passionate about rural, farmhouse, or industrial-style aesthetics, wooden crates offer a highly flexible modular storage system that requires almost no complex woodworking skills to use.
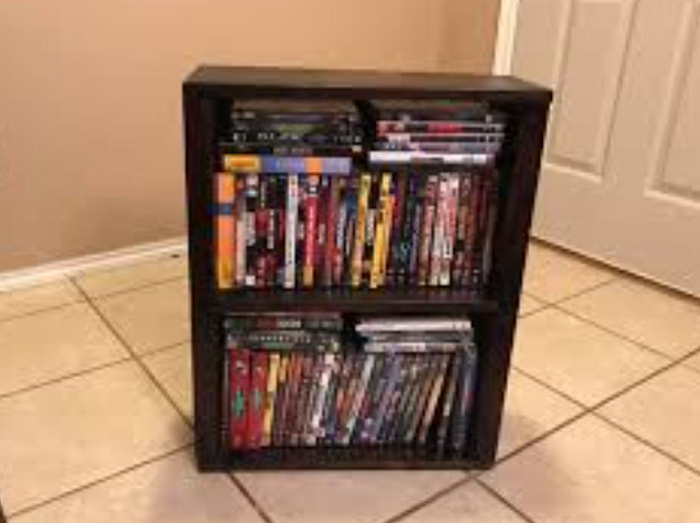
Materials Needed:
- 3–4 unfinished wooden crates (from craft stores or hardware shops)
- Sandpaper
- Wood stain or spray paint
- Metal connecting brackets
- Short screws
How to DIY It:
Step 1.Prep the Crates: Sand down all rough spots on the crates to prevent wood splinters from scratching your DVD covers.
Step 2.Stain or Paint: Apply a warm wood stain (like Dark Walnut) or chalk paint for a vintage rustic vibe. Let it dry completely.
Step 3.Assemble the Grid: Stack the crates either vertically or horizontally. Secure them to each other using flat metal brackets on the back edges so the stack stays sturdy.
5. DVD Sleeve Binders: The Ultimate Space Saver
If your collection is truly extensive and the media storage cabinet is already full, it's obviously not practical to continue storing all the bulky Amaray plastic storage boxes. You can use high-quality DVD page binders, which are the most effective way to free up living space.
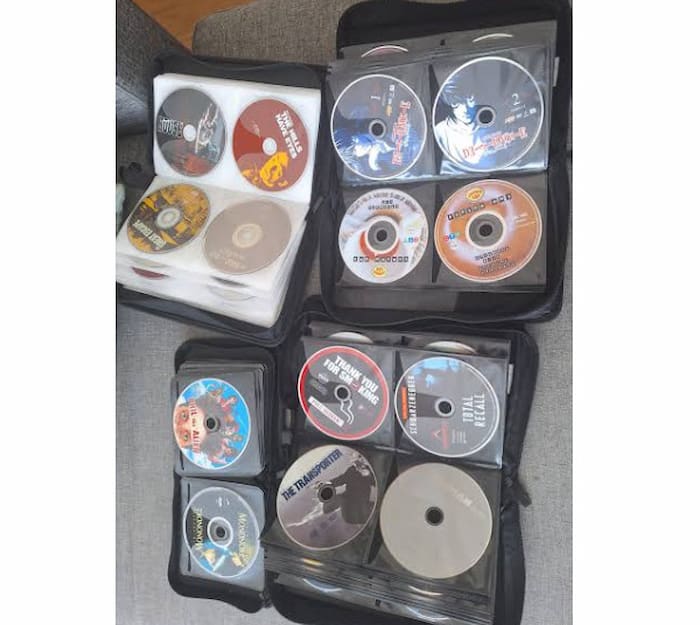
- Real-World Space Savings: Place your DVD discs into a padded nonwoven three-ring binder. Storing 100 DVDs in a single three-ring binder immediately reduces physical storage space by up to 75%, freeing up a significant amount of shelf space.
- Pro Tip: Please choose acid-free, scratch-resistant book covers to prevent long-term aging of the book covers. Label the spine by category or alphabetically for quick browsing.
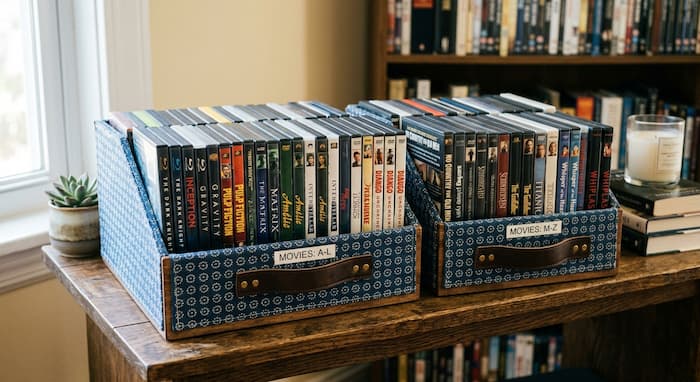
6. Custom Fabric-Lined Storage Boxes: Neat & Dust-Free
Decorative storage boxes let you hide your movie collection in plain sight on open coffee tables or living room shelves while keeping dust away.
Materials Needed:
- Sturdy cardboard or plastic shoeboxes
- Fabric of choice
- Spray adhesive
- Fabric scissors
- Cardstock (for dividers)
How to DIY It:
Step 1.Measure & Cut Fabric: Cut your fabric with an extra 2 inches of overlap on all sides of the box.
Step 2.Wrap & Glue: Spray the exterior of the box with spray adhesive and smooth the fabric over it, tucking the edges neatly over the top rim into the inside.
Step 3.Insert Custom Dividers: Cut stiff cardstock to fit the width of the box to create genre dividers (e.g., Action, Comedy, Sci-Fi) for easy movie-night flipping.
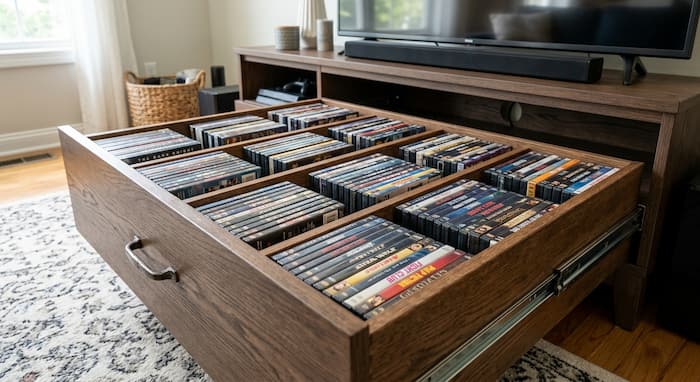
7. Deep Drawer Dividers: Hidden Media Pull-Out
Repurposing an existing TV stand drawer or dresser drawer into an organised DVD pull-out system keeps your entertainment center completely clutter-free.
Materials Needed:
- Thin ¼-inch balsa wood or acrylic strips
- Double-sided tape or notched divider inserts
- Handsaw
How to DIY It:
Step 1.Clean & Measure: Measure the interior height, width, and depth of your drawer.
Step 2.Cut Divider Rows: Cut thin wood strips to match the depth of the drawer. Space rows roughly 5.5 inches apart (so DVDs can sit spine-up).
Step 3.Secure & Label: Fix the dividers in place with heavy-duty double-sided tape or interlocking notches so your DVDs stay upright when you open and close the drawer quickly.
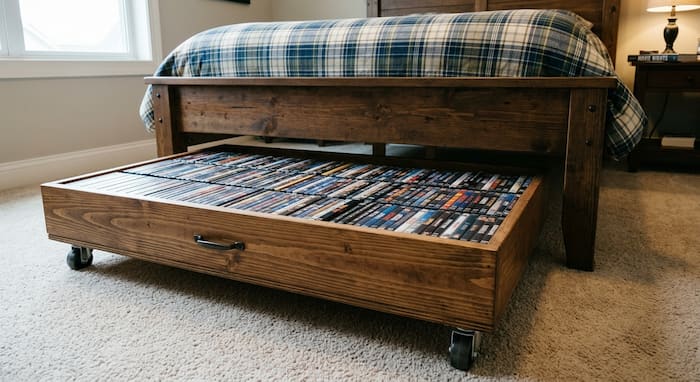
8. Under-Bed Rolling Storage: Out of Sight, Easy to Reach
For movie collectors with limited living space, the space under the bed is absolutely ideal for storing collections. Installing a movable under-bed storage box is both convenient for accessing the collections and keeps them out of sight.
Materials Needed:
- Shallow wooden crate (under 6 inches high)
- 4 low-profile 360-degree caster wheels
- Cabinet handle
- Screws
- Screwdriver
How to DIY It:
Step 1.Attach Casters: Flip the wooden crate over and screw a caster wheel into each of the four bottom corners.
Step 2.Add Pull Handle: Screw a stylish metal cabinet pull onto the front-facing panel.
Step 3.Load & Slide: Arrange your DVDs spine-up in the crate and roll it smoothly under the bed frame out of sight.
9. Go 100% Digital: Rip and Backup Your DVD Collection
Digitalizing your DVDs will enable you to store numerous DVD files in an easy and safe way. You can store the ripped DVD videos in your desired drive, such as a computer, disc, and flash drive. This digitalizing method is inspired by a ripping process, where DVDs are transcoded into a regular media format such as MP4, MOV, AVI, WMV, and more for storing and compatibility purposes. That being said, you won’t need to make a DIY DVD storage because, just like your online banking, your discs are secured internally. For this reason, we highly recommend you use this Blu-ray Master Free DVD Ripper, a remarkable converting and ripping tool of all time. The instructions are provided below to show you the simplified and lossless procedure for ripping DVDs using this powerful software.
Key Features:
• Ultrafast conversion and ripping process.
• Hundreds of various video outputs to use.
• Editing tools that will help you enhance and customize your media files.
• Support high-quality picture display, making you rip DVDs in the same or higher quality.
Free Download
For Windows
Secure Download
Free Download
for macOS
Secure Download
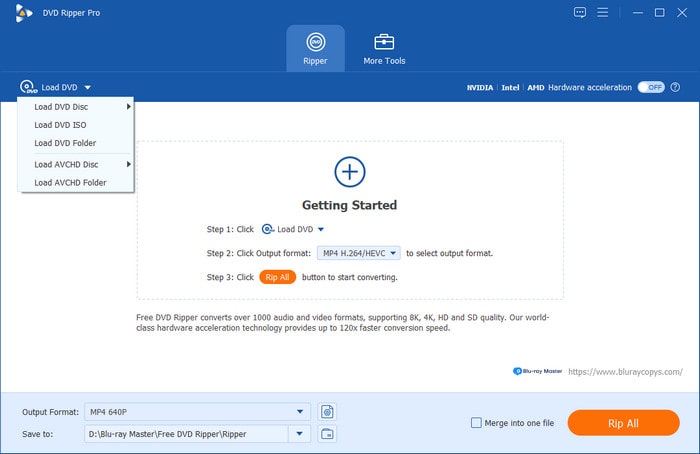
Step 1.Start by grabbing the software on your computer device and inserting the DVD into the optical drive for preparation. Then, launch the software, and bring yourself to the Load DVD > Load DVD Disc button. Click it to upload the DVD content.
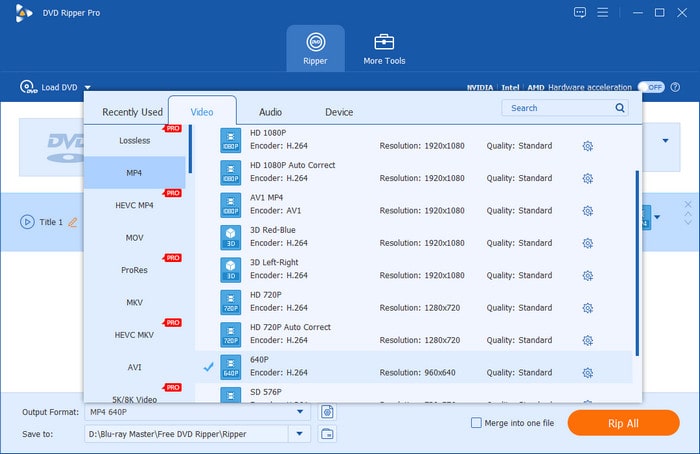
Step 2.After that, go to the Output Format and choose one preferred video profile, like MP4, MKV, MOV, Android, and others. You can also choose the gear icon to further adjust the output video parameters including encoder.
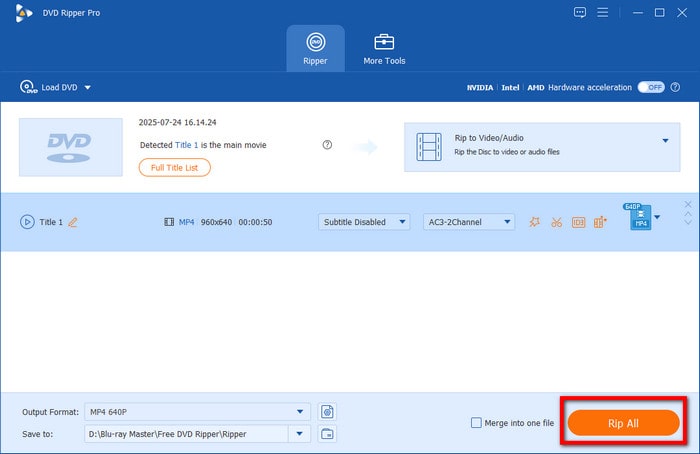
Step 3.Next is to set the file destination of your ripped DVDs when you navigate to the Save to section. Then, when all is good, hit the Rip All button to start the process.
The steps are easy, and you can follow them to back up your rich DVD collections. Moreover, you can also explore more features of this tool to make you DVD ripping better. It is compatible with Windows and Mac computers and have a try!
Tips for DVD Organisation and Maintenance
Bonusly, let's see some effective tips to help you organize
A. Indexing and Categorization
Keeping your DVDs organized helps you find movies faster and keeps your space neat. You can arrange them by name, type of movie, or when they came out. Adding colors or small labels makes it easier to spot what you’re looking for, especially if you have a big collection or share it with others.
B. The Sleeve Conversion Strategy
A great way to save space is by taking DVDs out of their big plastic cases and putting them into sleeves or binders. This can free up a lot of room, up to 70% less shelf space, and makes your collection easier to carry and store. Just keep in mind, you might lose the original cover art and the discs won’t be as protected, so it’s smart to use padded sleeves and maybe save the artwork digitally.
C. Dust and Sunlight Protection:
If your DVDs are out in the open air, it’s a good idea to keep them safe from dust and sunlight. Dust can scratch the discs or mess up your player, and too much sun can fade the covers and damage the discs. Try using dust covers, keeping shelves out of direct light, and cleaning or rotating your discs now and then to keep them in good shape.
D. Climate Control & Physical Care for Long-Term DVD Preservation
Proper physical maintenance is crucial for preventing "disc decay" and ensuring your DVD collection lasts for decades.
- Store CDs vertically (horizontal stacking may cause CDs to warp).
- The storage environment should be temperature-controlled, with an ideal temperature between 59°F and 77°F (15°C to 25°C) and a relative humidity between 30% and 50%.
- Ensure the discs are fully protected from direct sunlight and strong ultraviolet radiation, as these rays can damage the delicate reflective layer and accelerate disc aging.
- In addition, when operating a DVD, you should only touch its centre hole or outer edge to prevent skin contamination from acidic oils.
- Store the CDs in protective sleeves made of inert, nonreactive materials such as polyolefins or acid-free polypropylene, rather than polyvinyl chloride sleeves; this protects the CDs' polycarbonate substrate from long-term chemical volatilisation and oxidation.
FAQs about Storing DVDs
-
What type of DVD storage can provide me with a secure keep?
All of the storage will make your DVDs safe. However, you must ensure to place your storage in a cool, dry, and secure place to prevent damage to your DVD collections.
-
Is it necessary to clean the DVDs before I store them?
It is not really needed, but cleaning them is a good idea to do so.
-
Should I make a backup copy of my DVD before storing them for a long time?
Yes. Having a backup is a wise idea for preserving your DVDs. That said, you can create a backup copy using the ripper of Video Converter Ultimate.
-
What is the most space-saving way to store 200+ DVDs without keeping the plastic cases?
You can use non-woven DVD sleeve binders or sleeve storage boxes, which can reduce your physical footprint by up to 75–80%.
-
How can I build a cheap DIY wall shelf specifically measured for DVD cases?
Prepare 1x6 pine or MDF boards (about 5.5 inches wide, which matches DVD depth perfectly), wood screws, and floating shelf brackets. Standard DVD cases are 7.5 inches tall. Leave 8.5 to 9 inches of height between each shelf for easy access.
-
Are DVD binder sleeves safe for long-term storage, or will they scratch the discs?
Yes. Remember to use sleeves made of acid-free polypropylene or soft non-woven fabric to line the pocket and prevent scratches while protecting against polycarbonate oxidation.
Wrapping up
There you go, the 9 different DIY DVD storage ideas you can create at home. However, if you want to avoid DIY storage for your discs, then you can have digital storage. Rip your DVDs with Blu-ray Master Free DVD Ripper quickly and losslessly, then compile the digital files on your device instead.
More from Blu-ray Master
DVD Tips
Fast and free ripping software to decrypt all DVDs to digital easily on your computer.
100% Secure. No virus