Jul 04, 2025Posted by Kevin Miller to Rip DVD
Watching on an iPad, iPhone, or any other handy device is what everyone does nowadays. Suppose you love watching movies on your iPhone or iPad with iTunes but want to add your all-time favorite DVD movie to your library. If that’s the case, you will need to learn the free yet best way to add DVDs to iTunes, as depicted in this article’s content below. For this reason, grab your reading aid, and begin to scan the information provided below.

Part 1. Can I Transfer DVDs to iTunes
iTunes was primarily made as a media management and player program for movies, TV shows, and digital music. Even though Apple developed it, it comes with availability on Mac and Windows computers. It does not have the ability to directly play physical DVDs. Therefore, if you want to play DVDs in Disc, IOS, and folders on your Mac, iPhone, iPad, and desktop, you would typically need a dedicated or built-in DVD player application. However, if you are using a modern laptop or computer, you know that DVD drives are no longer equipped for them, making it necessary for you to purchase an external DVD drive just to play your discs.
On the other hand, how then will you add DVD to iTunes on Windows, Mac, or even on iPad and iPhone? The answer is you can convert your DVD to a digital video that iTunes supports. For example, you can convert DVD to MP4 and add MP4 movies to iTunes and sync to every Apple device you have. Below is more information about the iTunes-supported video formats.
| Specification | |
|---|---|
| MOV | One of the common formats developed by Apple. It is also known as QuickTime and is commonly used on Mac computers, but is also supported by Windows. |
| MP4 | This universal format, also known as MPEG-4, is also included as it is widely compatible with almost all media players. |
| M4V | Another Apple-developed format. Most of the iTunes content is in M4V. |
| AVI | AVI is a popular format for Windows, but you can also use it for adding movies to iTunes from DVDs. |
| MKV | Although iTunes doesn’t have boundless support for MKV, it is still on the list. |
| WMV | Another original format for Windows, WMV, also has its place for iTunes library support. |
Part 2. Best Free Software to Convert DVDs for iTunes
Let us now learn how to convert DVDs to digital in the best free way. Introducing this Blu-ray Master’s Free DVD Ripper, an amazing practical DVD-ripping program that enables you to watch movies on different devices, back up your DVD collections, and share the content with others easily.
This program can read data from DVD discs, ISO image files, and folders on your computer, and convert them into your desired digital formats that iTunes supports, such as MP4, MOV, AVI, MKV, WMV, and more. You can even customize the output settings to fit your project to your preferences, including video resolution, frame rate, bit rate, audio quality, and many more. Moreover, the ripper also provides you with features like full DVD regions support and audio/subtitle track selection. This software is available for both Windows and Mac computers. Have a try!
Key Features
- Rip your DVDs to all iTunes-supported formats and 200 more.
- Edit your DVDs by cropping, modifying effects, watermarks, and audio before ripping.
- Easy-to-master interface.
- Superfast ripping procedures and process itself.
Free Download
For Windows
Secure Download
Free Download
for macOS
Secure Download
Step 1.Install the Ripper
Begin by grabbing the software on your computer when you click the Download button above. Then, follow the quick installation process.
Step 2.Upload the DVD
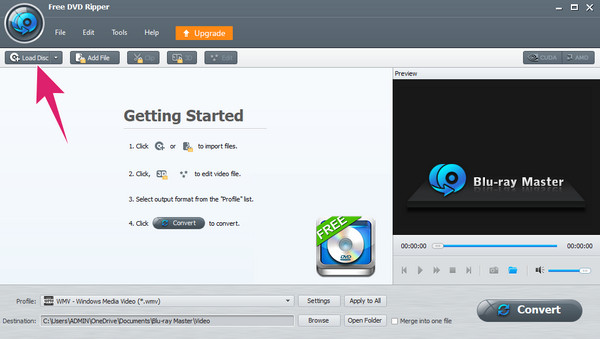
Now place your DVD disc in your computer’s DVD drive. Then, when you launch the software, click the Load Disc button and bring your DVD in.
Step 3.Set to Desired Output
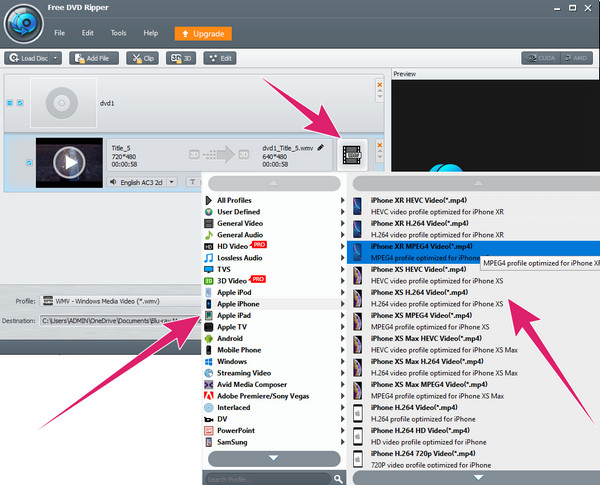
Once the DVD is loaded, click the Profile button and choose your desired format. Choose only the formats that iTunes supports. Also, you can be specific in choosing the device you are using, like iPad, iPhone, TV, and more.
Step 4.Start the Conversion
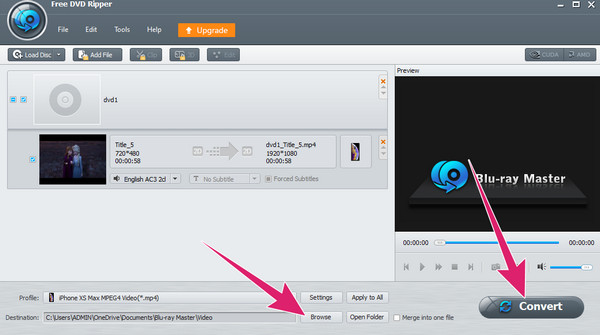
After setting the format, you have the option to set the file destination by clicking the Browse button. Then, hit the Convert button.
Part 3. How to Add DVDs to iTunes
After ripping your DVD to iTunes-supported format on a computer, you need to add it to iTunes and enjoy it on your devices such as iPad and iPhone. So, how can you import your converted DVD digital copy to iTunes? You need to update your iTunes to the latest version before that. Now, you can follow the steps below to add digital DVD collections to the iTunes library.
For Windows
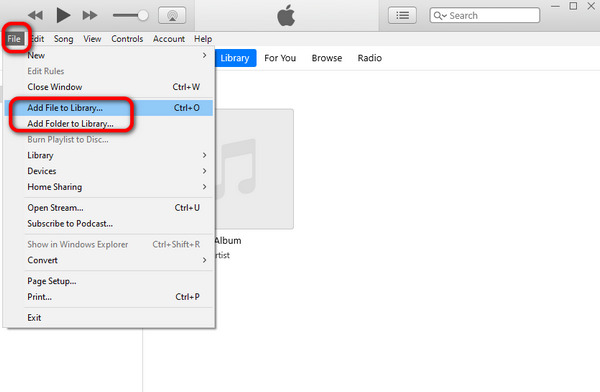
Step 1.Launch iTunes on your computer and click File to choose Add File to Library or Add Folder to Library.
Step 2.Then, you can choose your DVD file or folder from File Explorer. If you are a Mac user, you can find it from Finder.
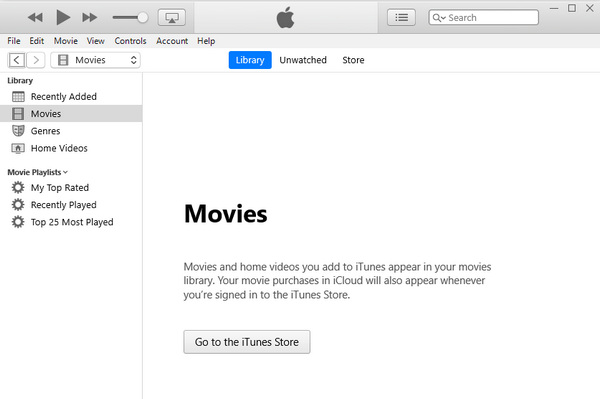
Step 3.Now, you can select Movies from the box on the left top. Here, you can find your DVD movies and click them to start watching.
For Mac
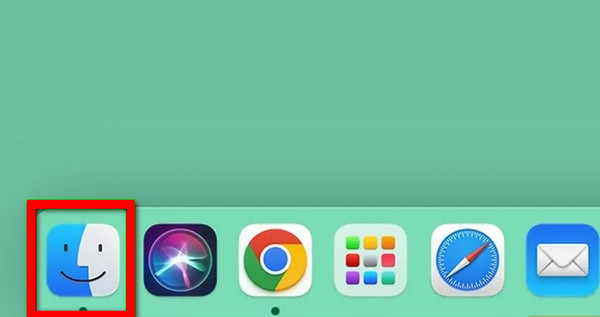
Step 1.Open Finder on your Mac and find the converted DVD files.
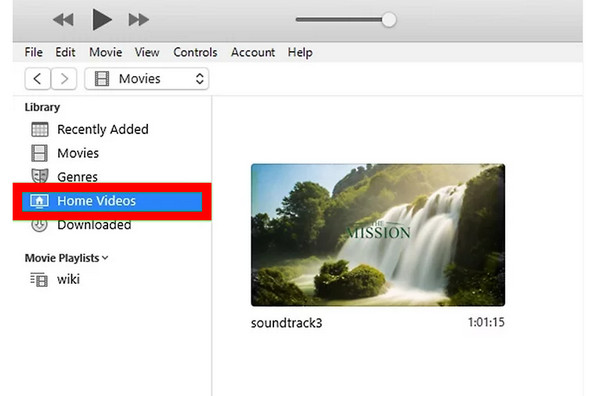
Step 2.Either drag and drop the video file onto the iTunes application icon or straight into the open iTunes window. iTunes will automatically add DVD videos to the iTunes library, and they will be saved in the Home Videos section.
The above are the detailed steps of copying a DVD to iTunes on Windows and Mac computers. Follow them to add DVDs to iTunes by yourself.
Part 4. FAQs About the iTunes and DVDs
-
Does iTunes Store have DVD movies?
Unfortunately, iTunes Store doesn’t focus on selling DVDs. Instead, it offers digital content like TV shows, music, and movies in digital formats.
-
Can I add the purchased DVD to the iTunes library?
Yes. However, you must first turn the DVD to digital format to add the content to iTunes. This is because iTunes doesn’t support content in DVD format.
-
How much are movies on iTunes?
It depends on the movie you want to purchase. Other factors to consider are the movie’s release date and popularity. The more it’s on demand and is latest, the higher its price is. But to give you an idea of the pricing, it ranges from $2-$500.
-
Can iTunes play Blu-ray?
No. iTunes doesn’t have native support for both DVDs and Blu-rays. The video formats that it only supports are MP4, M4V, MOV, MKV, AVI, and WMV. Therefore, to play your Blu-ray movies to iTunes, you must convert them to the digital formats it supports.
-
Do Apple computers have DVD players?
Apple has been phasing out its disc drives to its computers, including DVD and Blu-ray players. It is why modern Mac computers like MacBook Pro, Air, Mac Mini, and iMac do not have built-in disc drives. However, if your Mac has an older version, then it may still have a built-in optical drive. Otherwise, you will need an external drive to copy the DVD to iTunes on Mac.
Wrapping up
As you have grasped from the information above, importing DVDs to iTunes will only be possible when you convert them into digital formats. Therefore, by employing the provided instructions of the chosen ripper, you can easily and quickly perform your task without even spending a dime to do so. Moreover, you won’t need to worry about the video quality that you can obtain. Because even though the tool is free to use, it guarantees a lossless output. So, come and use the Blu-ray Master’s Free DVD Ripper now.
More from Blu-ray Master
DVD to Devices

Fast and free ripping software to decrypt all DVDs to digital easily on your computer.
100% Secure. No virus