May 21, 2025Posted by Brittany Garcia to Rip DVD
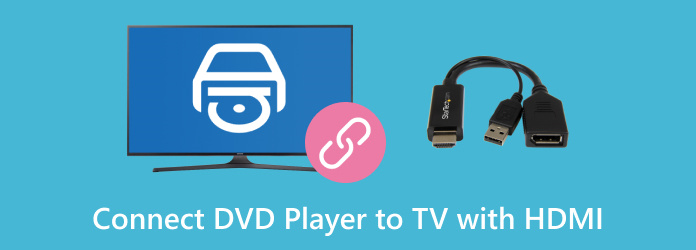
For those who own DVD collections, watching movies on DVDs remains a solid choice to enjoy high-quality content. However, it is essential to connect the DVD player to the TV using the correct method. HDMI is the most preferred connection option as it transmits video and audio through a single cable. This post will teach you how to connect DVD player to TV with HDMI. Understanding the right approach can help you avoid playback issues. This way, you can enjoy watching your collections without interruptions.
- Part 1. Preparation Before Using HDMI to Connect DVD Player and TV
- Part 2. Connecting DVD Player to TV with HDMI
- Part 3. Troubleshooting
- Part 4. Bonus: Digitize DVDs for Playing on TV
Part 1. Preparation Before Using HDMI to Connect DVD Player and TV
Before connecting a DVD player to a TV with HDMI, it is essential to prepare everything to avoid connection issues. Below are the important steps you should take before making the connection:
• Check Device Compatibility: Ensure both DVD player and TV support HDMI connectivity.
• Gather the Necessary Equipment: An HDMI cable should be of an appropriate length to reach both devices.
• Position the Devices Properly: Place the DVD player on a stable surface close to the TV to prevent overheating.
• Power Off Both Devices Before Connecting: Turn off and unplug the DVD player and TV to avoid electrical damage.
Part 2. Connecting DVD Player to TV with HDMI
Watching your DVD collection on a larger screen is a great way to enjoy high-quality movies. It uses an HDMI to transmit the DVD content through a single cable, eliminating multiple connections. This method delivers better picture quality compared to older connection types: composite or component cables. If the DVD player and TV have HDMI ports, setting up the connection only takes a few minutes.
Here’s how to connect DVD player to TV with HDMI:
Step 1.Plug one end of the HDMI into the OUT port on the DVD player. Then, plug the other end into the IN port on the TV. Plug in the power cords of the DVD player and TV, power them on, and ensure the player is in playback mode.

Step 2.Press the Input/Source button on the TV remote, and select HDMI 1 or HDMI 2. Get your disc, open the DVD tray using a remote, and place your DVD. Once that is done, close the tray and wait for the disc to load. You should see the DVD content playing on your TV screen.
That’s how to connect a DVD player to a TV with an HDMI cable! HDMI cable provides the best video and audio quality without needing multiple cables. Meanwhile, if you’re using a smart TV with built-in DVD player , there’s no need to use such wires.
Part 3. Troubleshooting
1. No Signal on TV

Sometimes, the TV screen displays a No Signal message after connecting the DVD player. It happens due to a loose HDMI cable or incorrect TV input selection. Check if the HDMI cable is securely plugged into the DVD player and TV. Use the TV remote to switch to the input source. If the problem persists, use a different HDMI to rule out any hardware defects.
2. Poor Picture Quality

Incorrect video settings and low-quality cables can result in blurry, distorted, or poor picture quality. The picture may appear unclear if the DVD player’s resolution doesn’t match the TV’s resolution. Navigate to the DVD player’s settings menu and adjust the output resolution to match your TV’s display. Consider switching to an HDMI cable if you’re using composite or component cables. HDMI cable provides a better picture quality with digital signal transmission.
3. No Audio from the DVD Player
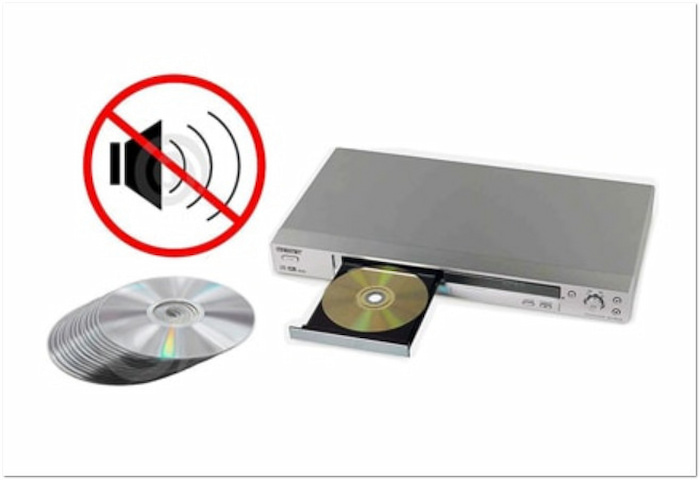
Does your DVD have video but hear no sound? The issue may come from muted volume settings or misconfigured output settings. Increase the TV and DVD player’s volume and ensure the mute is not turned off. Then, navigate to the DVD player’s Audio Settings and change the audio output format to ensure compatibility with your TV’s speakers.
Part 4. Bonus: Digitize DVDs for Playing on TV
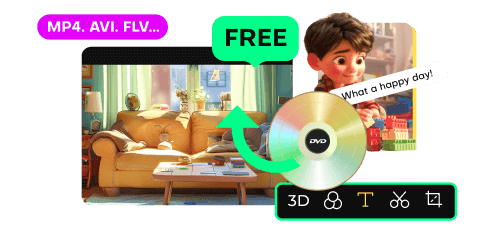
Playing a DVD involves so many processes. You have to set up and connect the DVD player to the TV with HDMI before you can start playback. However, you can instantly access the content with a single click through digitalization. But how? Through Blu-ray Master Free DVD Ripper , you can extract and convert DVD content into digital formats.
Blu-ray Master Free DVD Ripper is a desktop-based software for converting DVDs to digital formats. It can rip DVDs to over 200+ formats that are compatible with TVs. It provides customization of profile settings to enhance your DVDs’ quality for high-quality rips. You can easily set an output directory to access the ripped DVDs after the conversion.
Here’s how to digitize DVDs for playing on TVs:
Step 1.Get the Blu-ray Master Free DVD Ripper from the official site or click the free download below. Install the DVD-ripping software and wait for the installation process to finish. Once completed, insert the DVD into the disc drive and open the software.
Free Download
For Windows
Secure Download
Free Download
for macOS
Secure Download
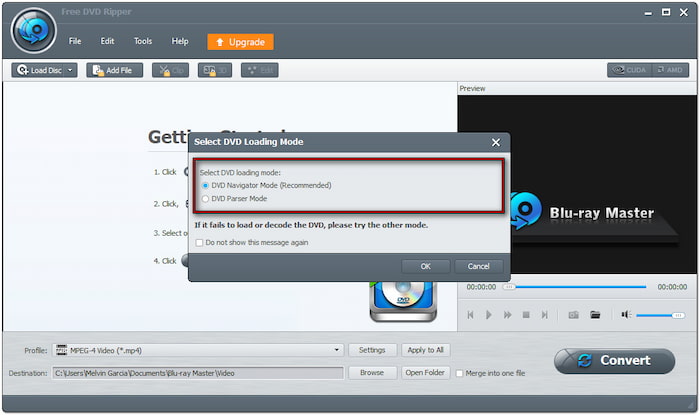
Step 2.Click load Disc to import the inserted DVD from the disc drive. Besides DVDs, you can load a VIDEO_TS folder or IFO files. Click the pulldown menu to access the Load DVD Folder and Load IFO Files buttons. In the popup window, select your loading mode.

DVD Navigator Mode: This default mode reads the entire DVD structure. It ensures proper decryption of the DVD to avoid common copy-protection issues.
DVD Parser Mode: This mode is recommended for bypassing damaged or corrupted DVDs. It can help when the software fails to detect the main movie using DVD Navigator Mode.
Step 3.Once the DVD is detected, click the Profile field and select the General Video category. Choose MPEG-4 Video (*.mp4) for compatibility with standard and smart TVs. Optionally, select the MKV Video Format (*.mkv) for high-quality outputs.
If needed, click the Settings button next to the Profile field for customizing the profile settings. You can customize settings like encoder, frame rate, resolution, bitrate, aspect ratio, channel, etc.
Step 4.Move to the Destination field and click Browse to specify the destination path. Once the output directory is set, click Convert to digitize the DVD. Blu-ray Master Free DVD Ripper will extract the content and prepare the DVD for digitalization.

Important Note: Store the ripped DVD on a USB flash drive or hard drive after the conversion. Create a folder in the root directory of the USB flash drive and name it. Copy and paste the ripped DVD into the created folder. Then, insert the USB flash drive into the TV for playback.
Blu-ray Master Free DVD Ripper is among the best free DVD rippers for digitizing DVDs. It provides a convenient solution to playback your collections without connecting a DVD player to a TV with HDMI. In addition to ripping, it has a built-in editor for customizing DVD content before conversion. It boasts essential tools like a trimmer, cropper, sound booster, etc.
Wrapping up
Knowing how to connect DVD player to TV with HDMI properly is an essential step to enjoy your movies with high-quality video and clear sound. Through the simple steps outlined in this post, you can ensure a trouble-free connection between your devices. If you want to watch movies on your TV without needing a DVD player, use Blu-ray Master Free DVD Ripper. This software lets you digitize DVDs to over 200+ formats playable on any TV. Get Blu-ray Master today and convert DVDs to digital for easier playback and long-term storage.
More from Blu-ray Master
Play DVD Movies
Fast and free ripping software to decrypt all DVDs to digital easily on your computer.
100% Secure. No virus