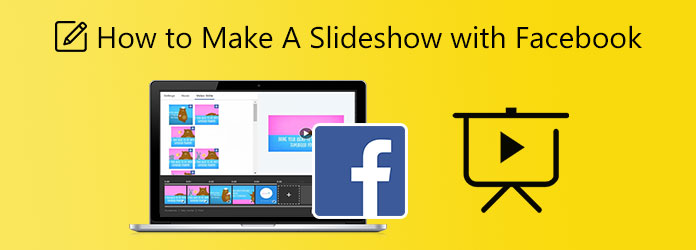
Top Easy Methods on How to Make a Slideshow with Facebook

July 21, 2022 10:00Posted by Selena Thomas to Edit Video
Slideshows make viewing photos simpler than ever. All you need to do is add snapshots of your recent travels, birthday celebration, family reunion, and adventure with friends. You can insert music, add filters, stickers, and texts to beautify your slideshow, which in turn makes it entertaining. And on Facebook, you can create a slideshow in the app itself. Yes! There is a feature in this social media app that you can use to make slideshows. If you want to know better on how to make a slideshow with Facebook, you should finish this article to understand everything. Let’s begin!
This is a very helpful reference for users who need to make a quick photo slideshow with music to be posted on their Facebook accounts. Use this guide to finish it within minutes.
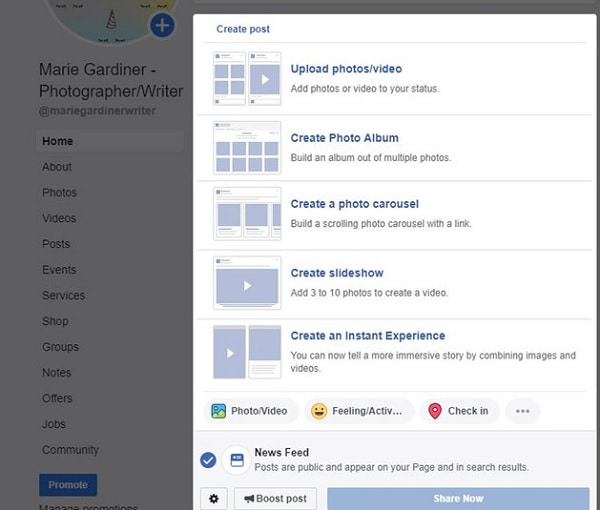
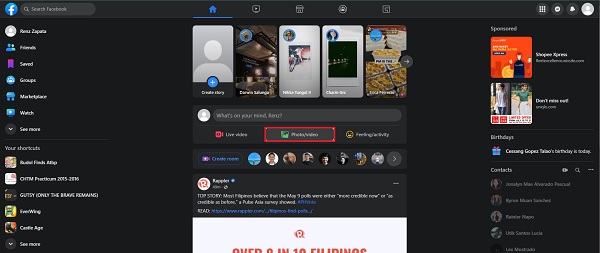
Go to the official Facebook using any web browser on your desktop computer or laptop. Log in to your Facebook account and start to write a new post. Click the Photo/Video option, then choose Create Slideshow to start.
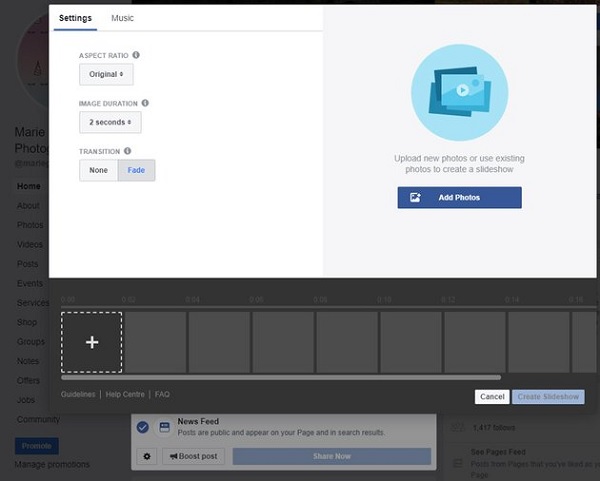
A small window will appear that gives setting options for the slideshow like the aspect ratio, duration of each photo, and transition effect. Click Add Photos to begin importing pictures from your device folders. It is advisable to upload the images in the order you need them to be because you cannot rearrange them after uploading.
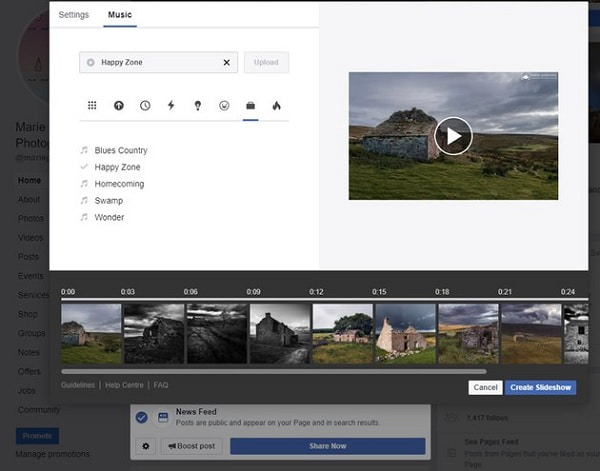
On the same window, switch to the Music tab. There will be a wide range of tracks that are free to use. You can select the icons that represent the themes of different music. You can also upload the music of your choice, but make sure that you have the right to use them.
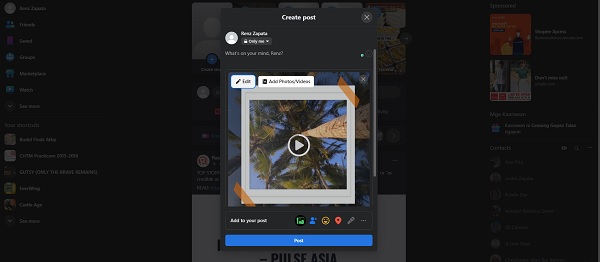
Hit Create Slideshow after finalizing the slideshow. Another small pop-up window will appear where you can add a caption or title to your slideshow. Click Publish to post your newly created photo slideshow so that others can see it.
The features and functions that Facebook offers in making a slideshow are a bit lacking. There are few transition effects, limited numbers of images you can upload, and little to no filter effects. Good thing there is a tool that can save your day, Video Converter Ultimate. This program’s main function is to convert files into other file formats and burn media files to CDs or DVDs. But it doesn’t mean that it’s not a capable slideshow maker. It has a dedicated function called MV, where you can freely create music videos, movie clips, tutorial videos, and slideshows. The videos you created using this tool are excellent for Facebook posts. You can download this software for free on any device running Windows and macOS.
Key Features:
Use this informative guide as a reference when making a slideshow for Facebook using this amazing desktop application.
Tap the Free Download button above to download the program on your PC or laptop. Run the installer file to start installing the program to your device. After installing, open the tool and use the MV feature to start creating a slideshow for Facebook.

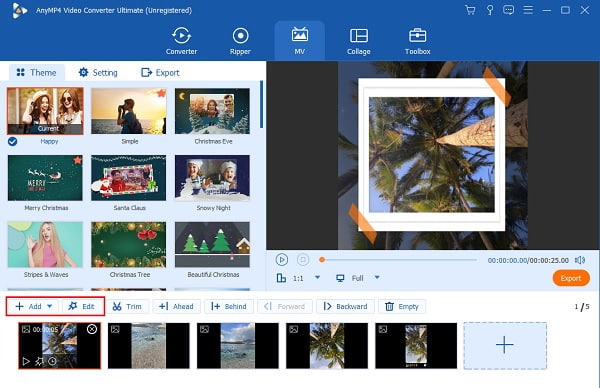
Choose a template with specific themes for your slideshow that fit the criteria for the post. Then click +Add to import images and video clips that you will use for the slideshow. Click Edit to adjust the effects of each image and apply filters as well. Tap the OK button to set the changes.
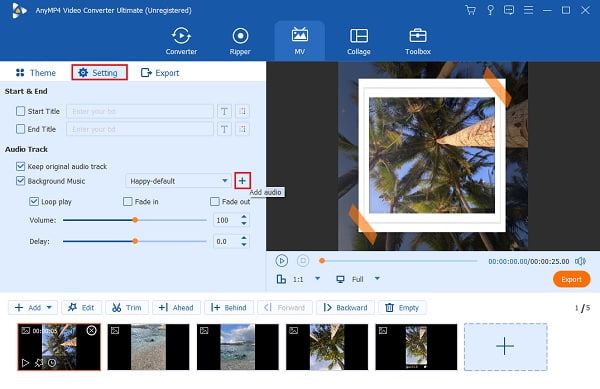
Go to Setting to alter the slideshow’s background music with the choice of your music. Click the Plus icon and choose which song you will use. Select and import the audio track to the program.
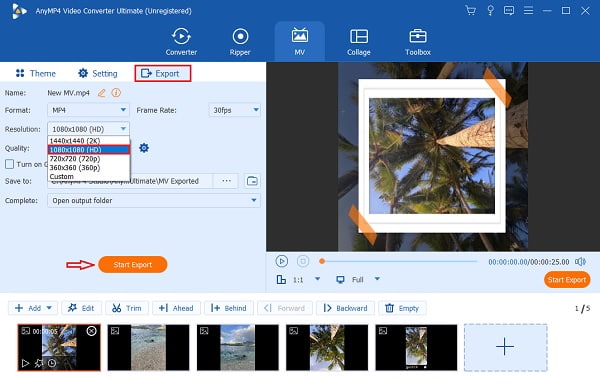
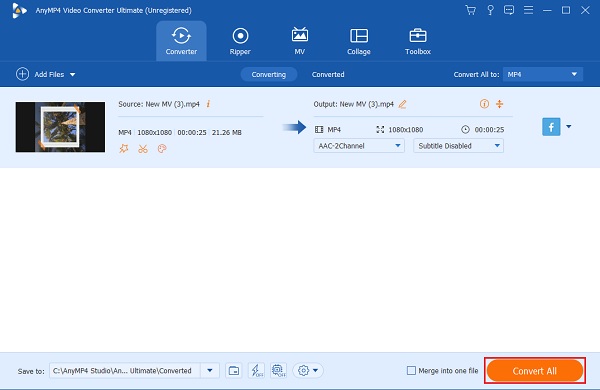
Move to Export to save the slideshow on your computer or laptop. Tap the drop-down list beside Resolution, then select 1080p, which is the maximum video quality Facebook allows. Click Start Export to start saving the slideshow.
Head to the Converter feature to change the format of the slideshow to a format suitable for Facebook. Add the slideshow to the program, then click the Format icon to see the list of formats. Select Facebook and select the highest quality possible for the best viewing experience.
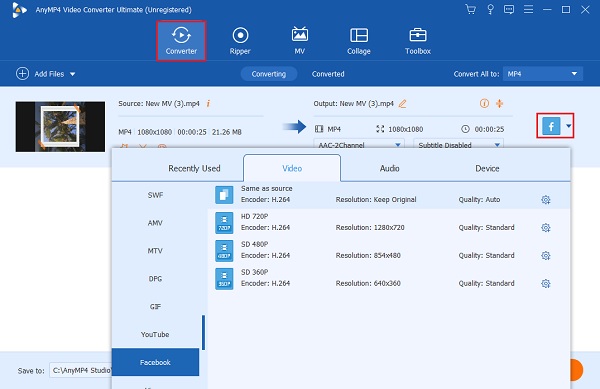
Click Convert All to start converting the format of the slideshow. Wait for a few moments until the process finishes. The slideshow is then stored automatically on your device, ready to be posted on your Facebook account. You also can use this software to make videos for Facebook.
After creating a slideshow for Facebook by following the steps above, you can proceed to post it on your social media account. And to do that, you must follow this simple guide.
Go to the Facebook page on your web browser and log in to your account. Select Profile in the navigation bar, which is placed at the top of the screen.

Then click Photos in the navigation menu on the left part of your screen. Click the Upload Video button on the top-right corner. Click Browse and the slideshow you will post on your account.
Afterward, fill out the File Upload form, where you can write the title and the description of the slideshow you are posting. Click Save Info at the bottom part of the form to upload the slideshow. Done!
Is the slideshow feature still available on Facebook?
Unfortunately, the slideshow feature on Facebook is no longer available in the latest version. You can still make slideshows using Video Converter Ultimate instead.
What are the minimum and the maximum number of images you can upload for the slideshow using Facebook?
The minimum number of images you can use is three, and the maximum is ten per slideshow.
What is the maximum duration of a slideshow you make with Facebook?
The maximum duration of the slideshow you created on Facebook is 50 seconds.
And that is the proper way to make a slideshow on Facebook. It’s just easy, right? Although the outcome of the slideshow is basic, it is still good for a quick and simple post on social media. But if you like your slideshow to be jaw-dropping, consider using Video Converter Ultimate. This fantastic program has better features, more templates, filters, effects, better video quality, and allows you to create longer slideshows easily. You will never go wrong with this offline program. Test it now!
More Reading
iPhoto Slideshow: Best Guide for Making Slideshows on Mac
This post contains details on how to use iPhoto for Slideshow making. All the necessary steps and information on making slideshows on your Mac are included.
How to Make Wonderful Slideshows Using Adobe After Effects
Skillfully create slideshows in After Effects by reading this post. I assure you that after reading, you will be capable of creating slideshows with no effort.
Complete Tutorial on How to Make a Slideshow on TikTok
Learn how to make a slideshow on TikTok with the help of this article. This will help you become an expert in creating a beautiful slideshow for TikTok.
Guide on How to Make Splendid Slideshows in Final Cut Pro
Quickly learn how to make a spectacular slideshow in Final Cut Pro by just reading this post. This post is worth spending your time reading about Final Cut Pro.