Sep 08, 2025Posted by Kevin Miller to Create DVD
If you take a lot of photos and videos on a travel or other interesting activities, you can create a photo or video slideshow to manage your memory. Moreover, you can make a DVD slideshow of pictures on Mac to keep large amounts of photos into a DVD disc. Thus, you can play a DVD slideshow on any device with a portable DVD player. To start from a mess of pictures, you can do as the following paragraphs show to burn a slideshow to disc on Mac completely.
- Part 1. Preparation Before Burning Slideshow to DVD on Mac
- Part 2. How to Burn a Slideshow to DVD on Mac with iDVD
- Part 3. How to Burn a Slideshow to DVD on Mac with Blu-ray Master DVD Creator
- Part 4. Tips for DVD Burning on Mac
- Part 5. FAQs
Part 1. Preparation Before Burning Slideshow to DVD on Mac
Before burning a slideshow to DVD on your Mac, there are two essential steps: first, make a slideshow, and second, choose the best DVD burner for Mac. Here's how to get started:
How to Make a Slideshow
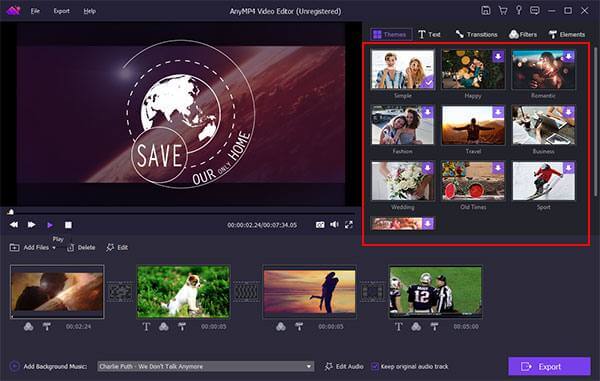
If you haven't make any DVD slideshow before, Video Editor can be your friendly choice. You can create a slideshow with pictures, videos and music with simple steps. There are various pre-made slideshow themes, including wedding, party, graduation and more. You can personalize the slideshow theme with hundreds of transitions, filters and elements. It is super easy to put pictures and music on a DVD as slideshow.
The built-in video and photo editor allows users to edit media files without quality loss. You can share the slideshow with friends and family directly. Or you can save the slideshow to the DVD compatible format for further DVD slideshow creation. You can create DVD slideshow on Windows 10 and earlier versions in one stop.
- Create unforgettable slideshows with photos, videos and music in all formats.
- Make your DVD slideshow standout with lively themes, texts, custom text, background music, elements, transitions and filters.
- Edit videos and photos with the built-in editor, including cropping, merging, rotating, enhancing, etc.
- Share slideshows on TV, YouTube, tablets, mobile devices or burn into DVD discs.
Step 1.Run Video Editor. Click the + icon on the main interface to import your photos and videos.

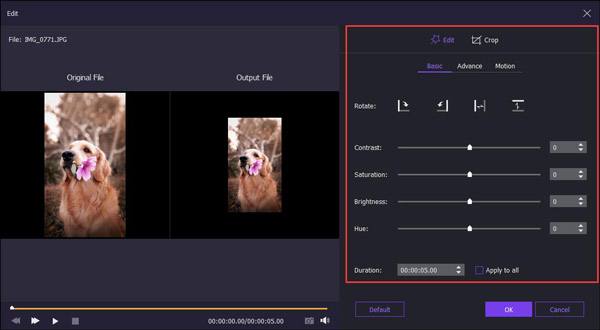
Step 2.Click Edit above the slideshow workspace.
If you create a DVD photo slideshow, you can rotate, flip, crop, adjust contrast/saturation/brightness/hue, add motion and set the duration for each photo.
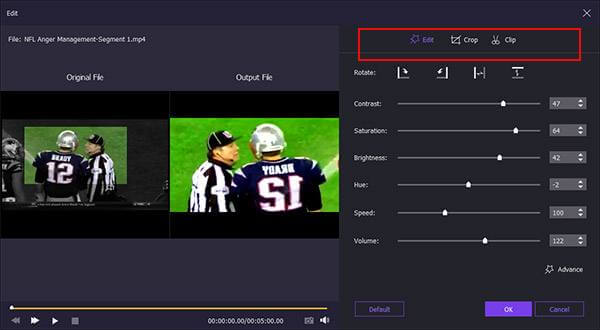
When you tend to make a slideshow video, you can get the above features completely. Moreover, you can also clip video, speed up/slow down the video and get more video effects.
Step 3.To make a slideshow with music, you can click Add Background Music near the bottom. Mark before Loop Playback or Keep original audio track based on your needs.
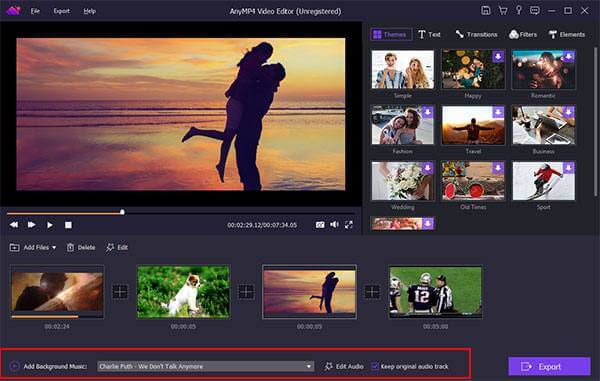
Step 4.In the top right pane of the window, you can select the ready-made theme and add personalized objects. After downloading the certain template package, you can edit slideshow with customizable effects freely.
Step 5.After finishing the DVD slideshow making process, you can click Export to save the slideshow file in any format. Click Convert to export the DVD slideshow photo or video.
Choose Your DVD Burning Software
While older versions of macOS may support iDVD, many users prefer third-party tools like Blu-ray Master DVD Creator for more flexibility and modern compatibility. When selecting your software, consider the following:
- macOS Compatibility: Ensure the software supports your current macOS version.
- Format Support: Look for support for MP4, MOV, M4V, and other common formats.
- Menu Features: Check if you can add navigation menus, background music, etc.
- Ease of Use: A user-friendly interface is better for beginners.
- Burning Stability: Please ensure the burning process is reliable with verification options.
Part 2. How to Burn a Slideshow to DVD on Mac with iDVD
iDVD is an early free DVD authoring software for Mac that was widely used to burn slideshows, home movies, or educational content to playable DVDs. It supports importing videos, pictures, and music, and offers basic menu templates for simple DVD projects.
But it has many limitations, which you should note:
- Bad system compatibility: iDVD has been discontinued and only supports versions between macOS 10.6-10.11. Newer Macs cannot be installed and used directly.
- Limited format support: MOV or MP4 format is better, but other formats may not import smoothly.
- Basic features: No Blu-ray support, no HD video output, and limited menu customization.
- Ease of Use: A user-friendly interface is better for beginners.
- Stability issues: Some users report that it crashes easily when importing large files or long videos.
Here are its usage steps:
Step 1.Export your slideshow as a video file from the Photos app or another application first. Then, launch iDVD.
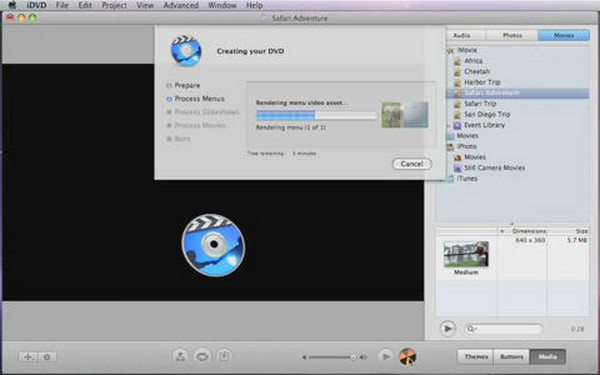
Step 2.Click the Create a New Project button, then drag the exported video file of your slideshow directly into the iDVD project window. Then, in the pop-up interface, you can give a name to the output disc and choose a suitable aspect ratio.
Step 3.After that, choose or make a DVD menu for your content. Also, it supports modifying menu text, background music, or adding chapter buttons.
Step 4.Finally, click the Burn button to wait for the burning to be complete.
Note: Don’t forget to insert a blank DVD dis bofre starting the burning.
Overall, iDVD offers a relatively simple way to burn slideshows to DVD for older Mac users or scenarios that don't require a lot of menu design. Although it has outdated features and limited compatibility, it is still stable enough to perform basic DVD authoring tasks under the right system environment.
Part 3. How to Burn a Slideshow to DVD on Mac with Blu-ray Master DVD Creator
- Burn slideshow to DVD-5, DVD-9, DVD-R, DVD+R, DVD-RW, DVD+RW and DVD-RAM in free format and aspect ratio.
- Make a DVD slideshow with several DVD title menus, including holiday, travel, family, wedding, etc.
- Customize the DVD title menu with new background image or other editing tools.
- Merge video segments, add watermark, select audio track/subtitle and more.
- Superfast slideshow to DVD burning speed.
Free Download
For Windows
Secure Download
Free Download
for macOS
Secure Download
Step 1.Launch DVD Creator for Mac. Insert a blank DVD into the built-in or external optical drive. Choose DVD Disc to make a slideshow to DVD on Mac.
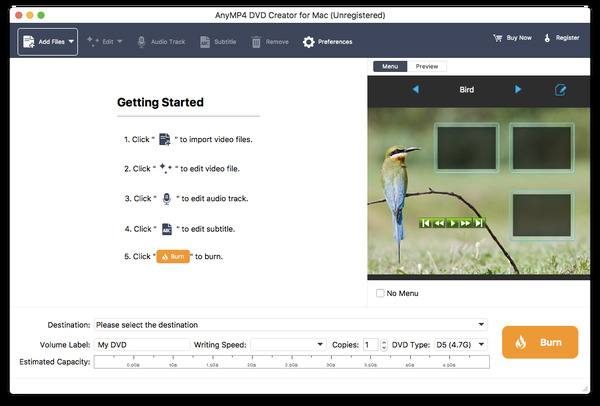
Step 2.Click Add Files to import your slideshow file. You can click Edit on the top toolbar to trim, crop, add watermark and adjust video effects if necessary. Furthermore, you can click Audio Track and Subtitle to burn slideshow to DVD on Mac with your favorite audio track and subtitle.
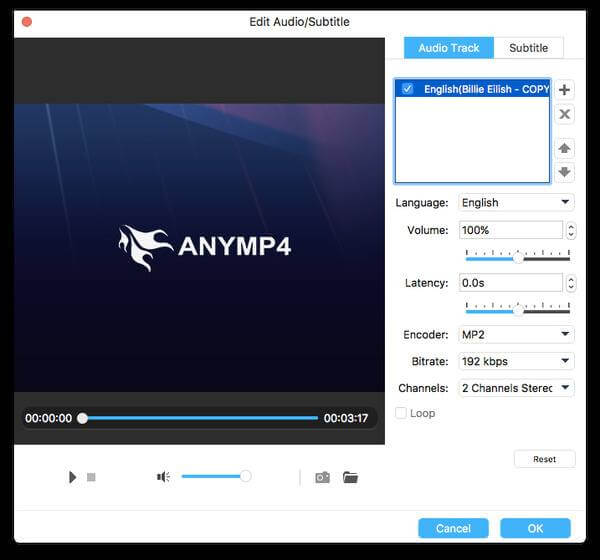
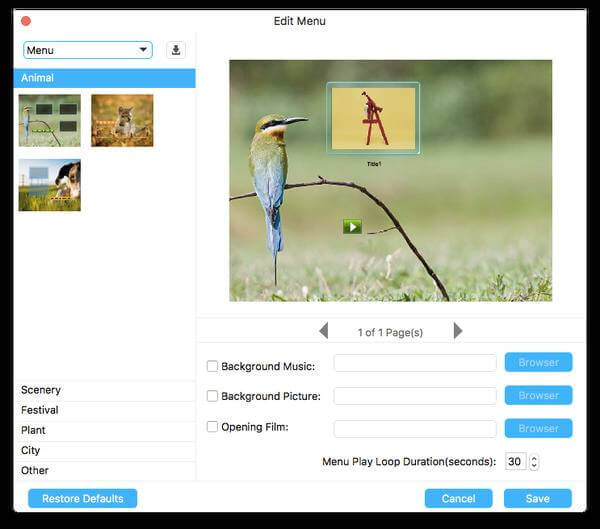
Step 3.Click the Edit icon on the top right corner of the preview window. In the Edit Menu window, you can apply DVD title menu, add background music/picture, set menu play loop duration and make more changes to create a DVD slideshow on Mac.
Step 4.Now you can specify Destination, Volume Label, Writing Speed, Copies and near the bottom. At last, click Burn to burn slideshow to DVD disc on Mac.
That's all to make a DVD slideshow on Mac with photos, videos and music. You can use any media file you like to burn a DVD for the collection or backup. Since your slideshow DVD is ready for watching, you can share with friends and family any time you want.
Part 4. Tips for DVD Burning on Mac
Before finalizing your DVD project, here are some essential tips to ensure your slideshow looks professional, plays smoothly on TV, and maintains high-quality visuals and audio.
- When creating DVD slideshows, choosing the right video and picture resolution is crucial. It is recommended to export the video to 1280×720 or 1920×1080 to maintain clarity while avoiding excessive file size.
- For background music, MP3, AAC, or WAV format is recommended for stable sound quality and good compatibility. A bitrate of 128-192 kbps is best for most playback needs. And don’t use VBR (Variable Bit Rate) format, which can avoid audio and video desynchronization during playback.
- To maintain video quality, it is recommended that you export your slideshow to MP4 (H.264) format and minimize multiple transcoding operations. Each re-encoding may lead to picture quality degradation, so you'd better choose software that supports high-quality encoding.
- To ensure that the DVD will play smoothly on your TV, be sure to select the DVD-Video format for burning. Also, select the correct format (NTSC or PAL) for your target region and test it once on a physical DVD player to make sure that the menus and video work properly.
Part 5. FAQs
-
Why would I want to burn a slideshow to a DVD?
Burning a slideshow to DVD is a great way to preserve memories, share presentations offline, or create physical keepsakes for events like weddings, graduations, or memorials. DVDs are easy to distribute and can be played on most home DVD players without needing internet access.
-
Can I still burn a DVD on my Mac?
Yes, but it depends on your macOS version. Older Macs may still support iDVD, while newer systems require third-party tools. You’ll also need an external DVD drive if your Mac doesn’t have a built-in drive.
-
What is the best format for my slideshow before burning?
MP4 (H.264) is the most recommended format. It offers wide compatibility, good compression, and high video quality. Make sure your slideshow is exported as a video file before importing it into DVD burning software.
Conclusion
Throughout the article, we have explored two effective methods to burn slideshows to DVDs on Mac. As we analyzed above, Blu-ray Master picked DVD Creator performs very well, which could easily convert slideshows to high-quality DVDs. Download and try it now!
More from Blu-ray Master
Videos to DVD